Adding borders to a quilt top is a simple sequence: press the quilt top, measure it through the center, cut border strips to the measured length, pin carefully, sew with an accurate seam allowance, and press flat. The main beginner mistake is cutting borders based only on the outside edge of the quilt. Those edges may be stretched or slightly uneven, which can create wavy borders.
Think of borders as a frame that must fit the quilt top, not as long strips you stretch onto it. Measure first, cut to size, and let the pins help you ease any tiny differences evenly. This method keeps the quilt square, flat, and ready for the next stages.
What Quilt Borders Do and Why Measuring Matters
Quilt borders frame the pieced center, add size, and can help stabilize edges with many seams. A well-added border makes the quilt top look finished and balanced. A poorly added border can ripple, flare, or pull the quilt out of square.
The key idea is control. Fabric edges stretch, especially if they are handled a lot or include bias edges. If you sew on an unmeasured strip and trim it afterward, the border may stretch as you sew. Measuring the quilt top first, then cutting the border to that length, keeps the border acting like a stable frame.
Tools and Materials You’ll Need
Gather your supplies before cutting so the process stays smooth:
- Completed quilt top
- Border fabric, pressed
- Rotary cutter, ruler, and cutting mat
- Measuring tape or long quilting ruler
- Straight pins or clips
- Sewing machine
- Thread
- Iron and pressing surface
- Seam ripper, just in case
Use the same seam allowance used in the quilt top, usually 1/4 inch. If your machine has a 1/4-inch foot, this is a good time to use it.
Plan the Border Width and Fabric Amount
Before cutting, decide how wide you want the finished border to be. Add 1/2 inch to that number for seam allowances. For example, a 3-inch finished border is cut 3 1/2 inches wide.
Narrow borders can give a clean frame, while wider borders add size and show off fabric. Beginners often do well with borders between 2 and 5 inches finished, depending on the quilt size.
| Finished border width | Cut strip width | Good use |
|---|---|---|
| —: | —: | — |
| 1 inch | 1 1/2 inches | Small inner border |
| 2 inches | 2 1/2 inches | Simple frame |
| 3 inches | 3 1/2 inches | Common beginner choice |
| 5 inches | 5 1/2 inches | Larger quilt or bold fabric |
Check that you have enough fabric length for two side borders and two top/bottom borders. If the quilt is wider than the fabric, you will join strips.
Step 1: Press and Check the Quilt Top
Press the quilt top before measuring. Work gently, lifting and setting the iron down instead of pushing it back and forth. Sliding the iron can stretch seams and edges.
Check for loose threads, open seams, or bulky seam allowances along the outside edge. Repair anything that might catch while sewing the border. Lay the quilt top on a flat surface and smooth it with your hands. Do not pull it into shape. You want to measure the quilt as it naturally lies.
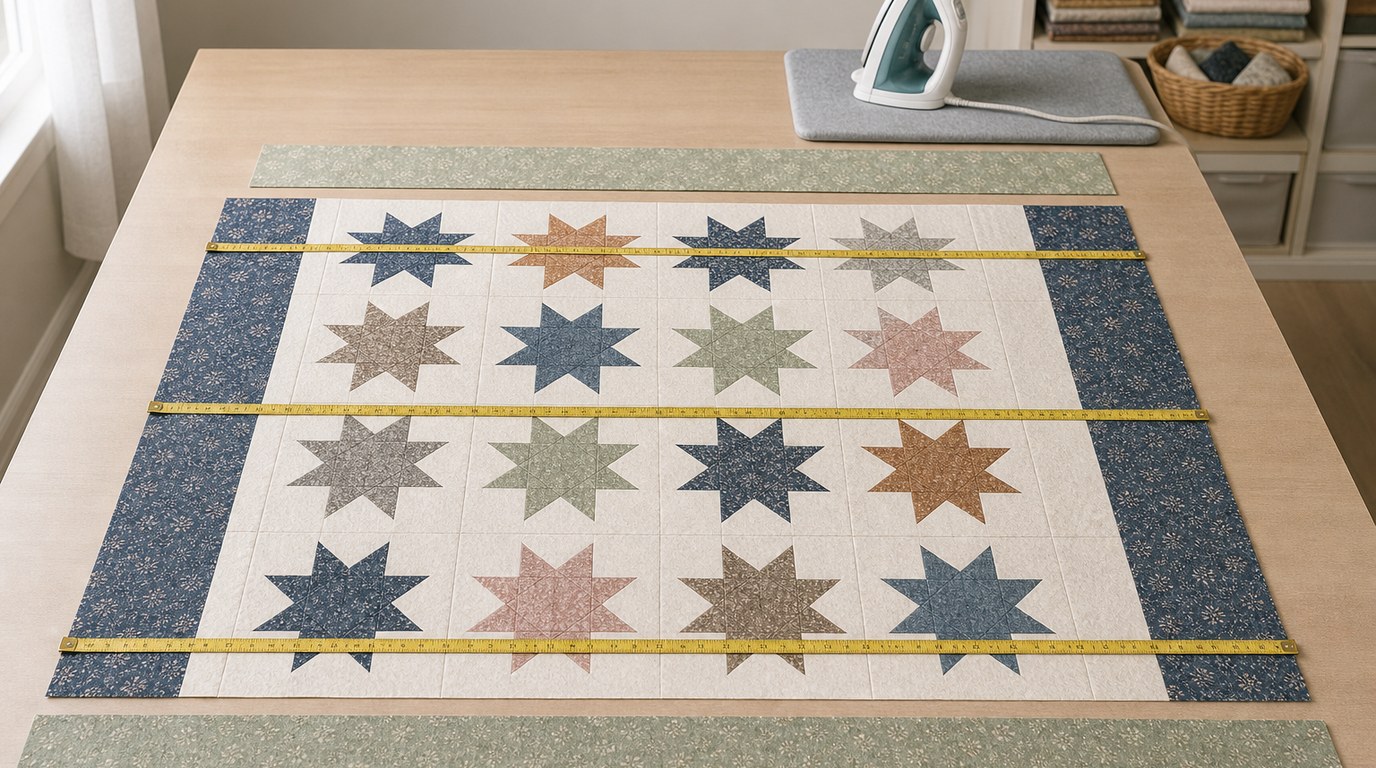
Step 2: Measure the Quilt Top Correctly
Measure for the side borders first. Instead of measuring only the left or right outer edge, measure the quilt top vertically in three places: near the left side, through the center, and near the right side. Write down all three numbers.
If the measurements are slightly different, use the average or the center measurement. For example, if the quilt measures 48 inches, 48 1/4 inches, and 48 inches, cut the side borders 48 inches or very close to the average. Do not cut one border longer just because one edge stretched.
This method helps the border bring the quilt top back to a stable shape rather than copying an uneven edge.
Step 3: Cut Border Strips to the Right Size
Cut border strips to the chosen width first. Then cut two side borders to the measured length from Step 2. Keep your ruler straight, and use a sharp rotary blade so the strips do not shift.
If one strip is not long enough, join two strips before cutting the final border length. Place the strip ends right sides together, sew a straight or diagonal seam, press the seam, and then trim the joined strip to the needed length. A diagonal seam spreads bulk and is common for borders, but a straight seam is acceptable for beginners if the fabric design allows it.
Step 4: Pin the Side Borders Before Sewing
Fold one side border in half and mark the center with a pin or crease. Fold the quilt side in half and mark its center too. With right sides together, pin the border to the quilt at both ends and at the center.
Then add more pins between those points. If the quilt top and border differ slightly, do not force all the extra into one place. Distribute it gently between pins. The border should fit the quilt top without stretching. Repeat for the other side border.
Step 5: Sew and Press the Side Borders
Sew each side border using a consistent 1/4-inch seam allowance, or the same seam allowance used in your quilt top. Sew slowly enough to keep the layers aligned. If the lower layer seems to feed faster, stop with the needle down, lift the presser foot, smooth the fabric, and continue.
After sewing, press the seam to set it, then press the border away from the quilt center. Use gentle pressure rather than dragging the iron. Check that the border lies flat before moving to the top and bottom borders.
Step 6: Add the Top and Bottom Borders
Once the side borders are attached and pressed, the quilt top is wider than it was before. Now measure horizontally across the quilt, including the newly added side borders.
Measure in three places: near the top, through the center, and near the bottom. Use the center measurement or average, just as you did for the side borders. Cut the top and bottom borders to that length.
Mark centers, pin the ends and center first, then pin between. Sew with the same seam allowance and press the borders away from the quilt center.
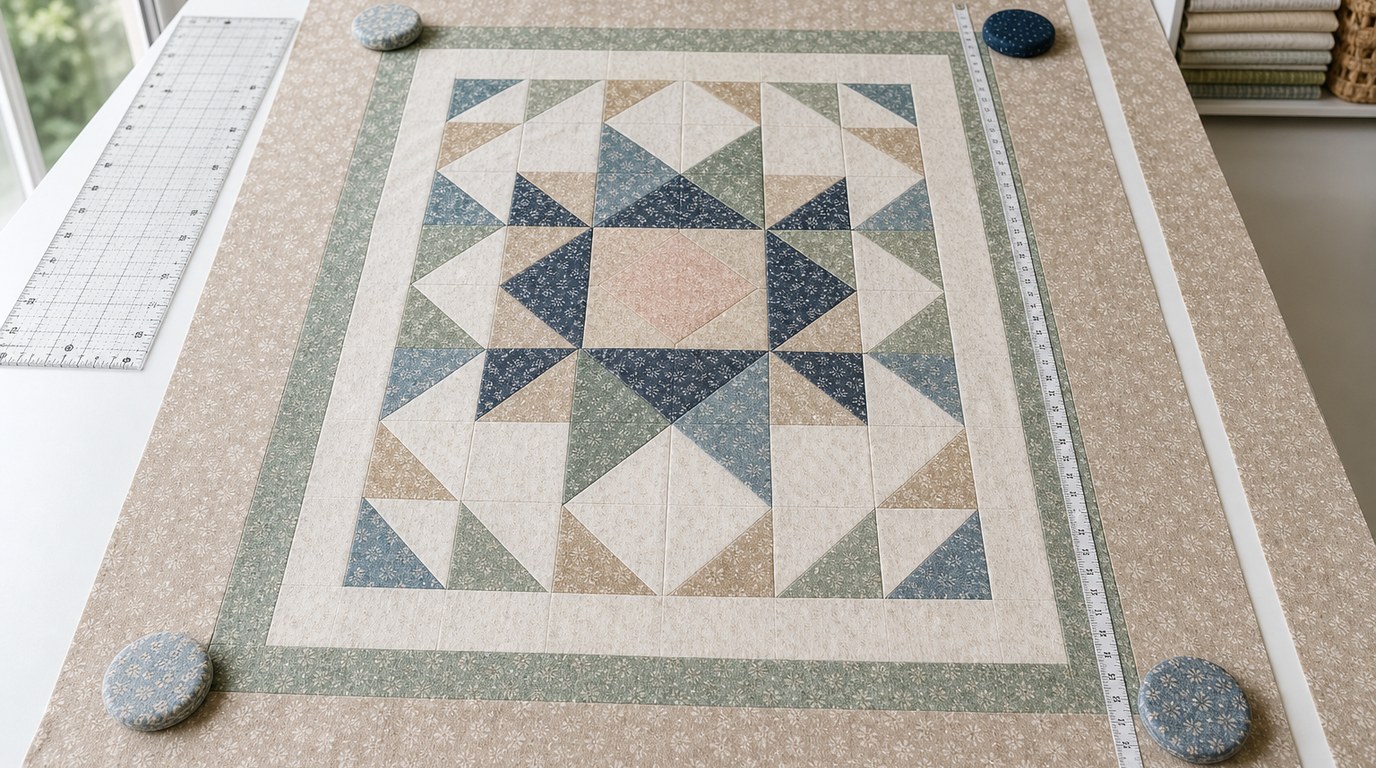
How to Check Whether Your Borders Are Flat
Lay the quilt top on a clean floor, table, or design wall. The borders should lie flat without waves, puckers, or tight pulling at the corners. The quilt should look relaxed, not stretched.
Check that opposite sides look similar in length and that the corners are close to square. A small imperfection is normal, especially for a beginner. Large ripples are easier to fix now than after quilting.
Common Beginner Border Problems and Fixes
If a border is wavy, it was probably too long or stretched during sewing. Remove it, remeasure through the quilt center, trim if needed, pin carefully, and sew again without pulling.
If the quilt center puckers, the border may be too short. Remeasure and cut a new strip if necessary. Do not stretch the quilt top hard to fit a short border.
If corners look uneven, check whether the side borders were pressed flat before measuring for the top and bottom borders. Also confirm that your seam allowance stayed consistent.
If the border fabric bows or twists, the strip may have been cut off grain or handled too much. Press it flat and recut if needed.
Simple Border Variations to Try Next
Once you understand the basic method, try a narrow inner border before adding a wider outer border. This creates a framed look and can separate busy quilt blocks from a bold border fabric.
You can also use a contrasting fabric for the border, a tone-on-tone fabric for a quiet finish, or pieced border strips made from leftover blocks. Use the same measuring, cutting, pinning, sewing, and pressing method for each border layer.
FAQ
What Should a Beginner Know First About Beginning Quilting Adding Borders to a Quilt Top?
The most important thing is to measure the quilt top before cutting borders. Do not sew on a long strip and trim it afterward. Measure through the center, cut the border to that size, pin well, sew evenly, and press gently.
What Matters Most When Evaluating Beginning Quilting Adding Borders to a Quilt Top?
Flatness matters most. A good border should frame the quilt without waves, puckers, or stretched edges. Accurate measuring, careful pinning, and consistent seam allowance are more important than choosing a fancy border design.
What Mistakes Should Readers Avoid with Beginning Quilting Adding Borders to a Quilt Top?
Avoid pulling the border as you sew, skipping pins, measuring only the outer edge, or pressing aggressively with a sliding motion. These habits can stretch fabric and create ripples. Also avoid adding top and bottom borders before the side borders are sewn and pressed.
What Is the Next Logical Step After Learning About Beginning Quilting Adding Borders to a Quilt Top?
After borders are attached and the quilt top lies flat, the next broad stage is preparing the quilt sandwich with backing and batting. Before that, inspect the borders, clip loose threads, and press the entire quilt top so it is ready for finishing.