A foldable grocery bag is a useful beginner sewing project because it uses straight seams, simple hems, sturdy handles, and one clever closure. Colorful plastic snaps make the finished bag easy to keep in a purse, car, backpack, or kitchen drawer without it unfolding. The main trick is placement: sew the bag first, fold the real finished bag into its compact shape, and then mark where the snap should go. This gives you a closure that fits the actual folded bundle instead of a guessed measurement. In this tutorial, you’ll sew a lightweight reusable grocery bag, add a reinforced snap tab, and install plastic snaps with snap pliers.
What You’ll Make
You’ll make an unlined reusable grocery tote that folds into a small rectangle or bundle. One half of a plastic snap goes on a reinforced tab near the top of the bag. The matching half goes on the bag body after the bag is folded and marked.
When the bag is open, the tab stays out of the way. When the bag is folded, the tab wraps around the bundle and snaps shut.
Supplies and Tools
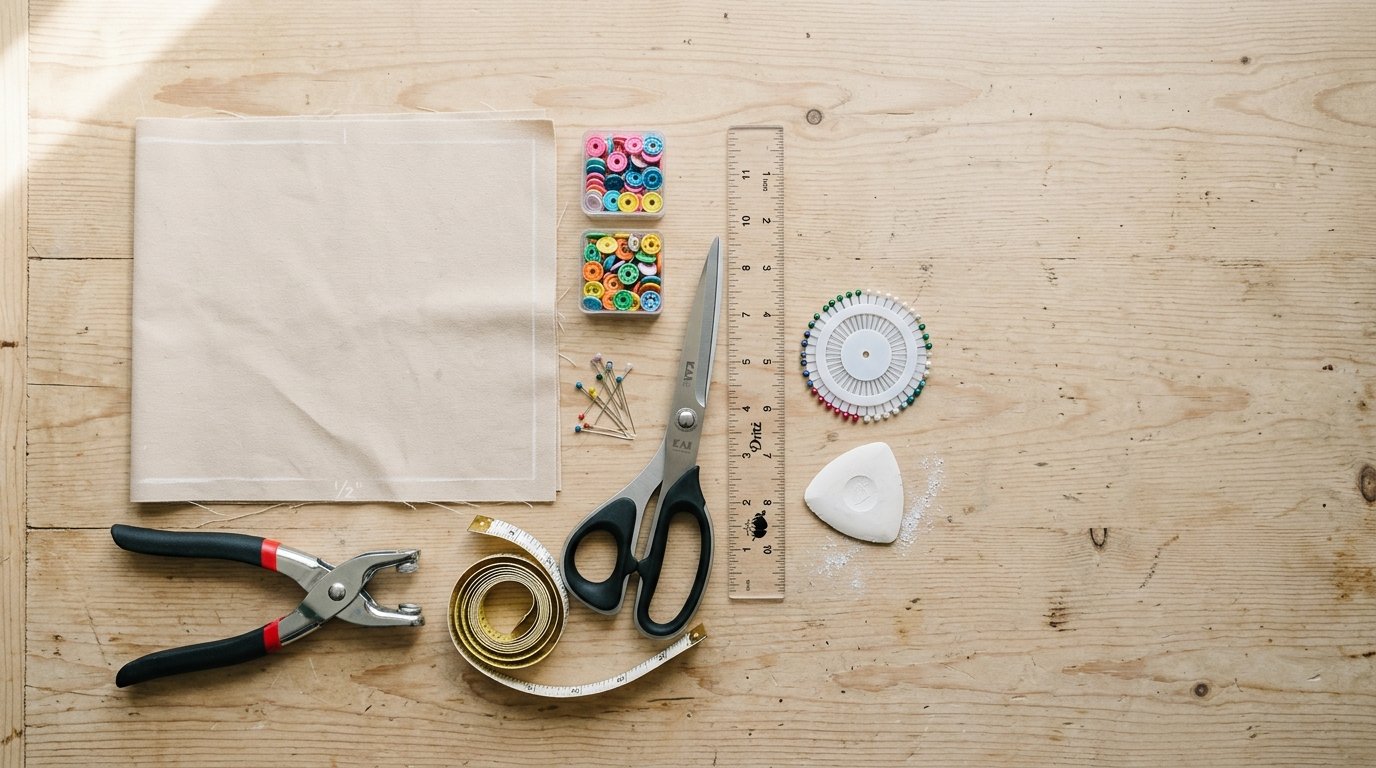
You will need:
- 1 yard of light-to-medium fabric, or two 18-by-20-inch rectangles
- Two handle strips, 4 by 22 inches each
- One snap tab piece, 3 by 6 inches
- Lightweight fusible interfacing for the tab
- One plastic snap set: two caps, one socket, and one stud
- Plastic snap pliers or a snap press
- Sewing machine and thread
- Scissors or rotary cutter
- Ruler or measuring tape
- Pins or clips
- Fabric marker or chalk
- Iron and pressing surface
- Awl or seam ripper tip for making snap holes
Use a 1/2-inch seam allowance unless noted.
Choose the Best Fabric and Snaps
Choose fabric that is strong enough for groceries but still folds easily. Quilting cotton is beginner-friendly because it presses well and is easy to sew. Ripstop nylon is lightweight and durable, but it can be slippery. Avoid heavy canvas for this version because it creates a bulky folded bundle.
Plastic snaps work best through stable fabric. Interfacing the snap tab is important, and the bag body should not be extremely thin at the snap point. Size 20 plastic snaps are common for bags and come in bright colors. Choose a contrasting snap if you want the closure to be a playful design detail.
Cut the Bag Pieces
Cut these pieces:
- Bag body: two rectangles, 18 inches wide by 20 inches tall.
- Handles: two strips, 4 inches wide by 22 inches long.
- Snap tab: one rectangle, 3 inches wide by 6 inches long.
- Interfacing: one rectangle, about 2 1/2 by 5 1/2 inches.
If your fabric has a directional print, make sure both body pieces face the same way. You can enlarge the body pieces for a bigger bag, but remember that a larger bag will fold into a thicker bundle.
Sew the Handles
Press each handle strip in half lengthwise with wrong sides together, then open it. Fold both long raw edges toward the center crease and press. Fold along the original crease again so the raw edges are enclosed.
Topstitch close to both long edges of each handle. This keeps the handles flat, neat, and stronger for repeated use. For extra strength, add one more line of stitching down the center of each handle.
Make the Snap Tab
Fuse the interfacing to the wrong side of the snap tab fabric. Fold the tab in half lengthwise with right sides together, so it measures about 1 1/2 by 6 inches. Sew along one long edge and one short end using a 1/4-inch seam allowance.
Trim the corners, turn the tab right side out, and press. Tuck the open short end inward by about 1/4 inch and press again. Topstitch around the finished edges.
Do not install the snap yet. You need the finished bag folded before you can place the matching snap half accurately.
Sew the Bag Body
Place the two bag body pieces right sides together. Sew down both sides and across the bottom using a 1/2-inch seam allowance. Backstitch at the beginning and end.
Finish the raw edges with a zigzag stitch, overlock stitch, or serger so the bag lasts through repeated use. If your fabric frays easily, this step matters.
To box the bottom corners:
- Flatten one bottom corner so the side seam lines up with the bottom seam.
- Measure 2 inches across the corner point.
- Sew across that line.
- Trim the excess corner to 1/2 inch.
- Repeat on the other corner.
Turn the bag right side out and press the seams.
Attach the Handles and Snap Tab
Turn the top raw edge of the bag to the wrong side by 1/2 inch and press. Turn it down again by 1 inch and press, but do not sew yet.
Mark handle placement on the front and back, about 4 inches in from each side seam. Slide each handle end under the folded hem by about 1 inch, making sure the handles are not twisted.
Place the snap tab at the center of the back top edge, with its unfinished end tucked under the hem. The finished tab should point upward for now. Sew around the lower edge of the top hem, catching the handles and tab. Add a rectangle or “X” of stitching over each handle end for strength.
How to Fold the Bag Before Marking Snaps
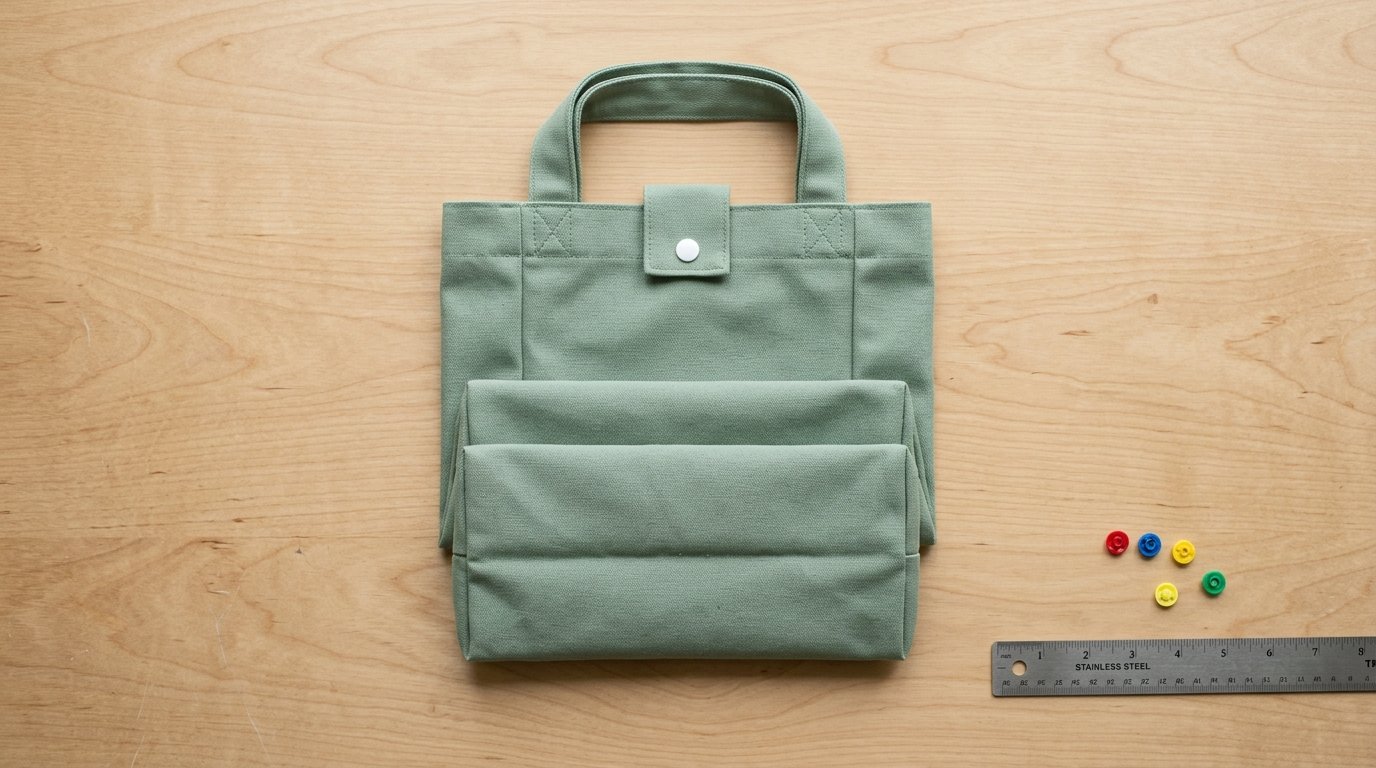
Do not guess the snap location on the bag body. Lay the finished bag flat with the snap tab at the top back. Fold the sides toward the center so the bag becomes narrow and tidy. Fold the handles down. Then fold the bottom of the bag upward in sections until it forms a compact rectangle.
Bring the snap tab around the folded bundle. Mark the spot where the tab naturally meets the bag body. This mark is the location for the second snap half.
Install the Colorful Plastic Snaps
Plastic snaps have four parts: two smooth caps, one socket, and one stud. The socket and stud are the inner pieces that click together.
Install the snap half on the tab first:
- Mark the snap position near the finished end of the tab, about 1/2 inch from the edge.
- Make a small hole with an awl or seam ripper tip. Do not cut a large hole.
- Push a cap post through from the outside of the tab.
- Place the socket or stud on the post.
- Press firmly with snap pliers until the post flattens.
Now install the matching snap half on the marked spot on the bag body. Unfold the bag enough to use the pliers safely, but keep the mark visible. Push the second cap through from the outside, add the matching snap part, and press.
Before pressing, check that the socket and stud face each other. Plastic snaps are difficult to remove cleanly once set.
Test the Fold and Adjust the Closure
Fold the bag again the same way you did before marking. Wrap the tab around the bundle and close the snap. The folded bag should feel secure, not strained.
If the tab barely reaches, fold the bag a little tighter and smooth the bundle with your hands. If the closure is always too tight, the snap may be too far from the tab. It is often easier to add a second snap location than to remove the first one.
Open and close the snap several times to check that it holds.
Troubleshooting Plastic Snaps
If the snap will not close, make sure you paired a socket with a stud, not two matching inner pieces. Also check that the raised parts face each other.
If the snap falls out, the post may not have been pressed flat enough, or the fabric may be too thin. Add a small fabric patch on the inside and install a new snap nearby.
If the snap cracks, you may have pressed at an angle or continued squeezing after the post was already flattened. Practice on scraps before setting snaps on your finished bag.
If the tab twists, it may be too narrow or slightly off center. It can still work, but mark more carefully on the next bag.
Beginner Tips for a Neater Foldable Grocery Bag
Press as you sew. Crisp handle folds, flat seams, and a clean top hem make the bag easier to fold.
Use clips instead of pins for slippery fabrics like ripstop nylon. For quilting cotton, pins are fine.
Match thread to the fabric for a subtle finish, or match it to the snap for a fun accent. Bright yellow, pink, turquoise, or lime snaps look intentional when repeated in the topstitching.
Simple Variations
Use a contrast snap tab made from a coordinating fabric scrap to highlight the closure. Make the tab 1 inch longer if you prefer a looser folded bundle.
You can also place the tab slightly lower on the back if your bag folds into a wider shape. For fraying fabric, sew French seams instead of standard finished seams. Keep add-ons lightweight so the bag still folds easily.
FAQ
What Should a Beginner Know First About How to Use Fun Colorful Plastic Snaps a Foldable Grocery Bag Tutorial?
Sew the bag first, fold it into its final compact shape, and then mark the snap placement. This prevents a closure that is too tight, too loose, or in the wrong position.
What Matters Most When Evaluating How to Use Fun Colorful Plastic Snaps a Foldable Grocery Bag Tutorial?
The best result comes from a good fabric weight, a reinforced snap tab, and accurate folding before marking. A colorful snap is decorative, but it still needs stable fabric and correct placement.
What Mistakes Should Readers Avoid with How to Use Fun Colorful Plastic Snaps a Foldable Grocery Bag Tutorial?
Avoid installing snaps before folding the finished bag, cutting oversized holes for snap posts, and setting snaps through weak fabric. Also check that the socket and stud face each other before pressing.
What Is the Next Logical Step After Learning About How to Use Fun Colorful Plastic Snaps a Foldable Grocery Bag Tutorial?
Make a second bag with a different fabric or snap color. Once you understand the folding method, you can adjust the size, change the tab length, or sew several reusable bags for shopping, gifts, or storage.