Making quilt binding means cutting fabric strips, joining them into one long strip, pressing that strip in half, and preparing it to wrap around the raw edges of a finished quilt. For most beginner quilts, you’ll make straight-grain, double-fold binding from cotton quilting fabric.
The basic process is simple: measure the quilt perimeter, add extra length for corners and joining, calculate how many strips to cut, sew those strips together with diagonal seams, trim and press the seams, then press the whole length wrong sides together. Once prepared, the binding is ready to attach to your quilt. Good binding starts with accurate cutting, neat seams, and enough extra length to finish comfortably.
What Quilt Binding Is and Why It Matters
Quilt binding is the fabric edge that finishes a quilt. It covers the raw edges of the quilt top, batting, and backing, then creates a clean frame around the outside.
Think of binding as both protection and presentation. It protects the quilt layers from fraying and wear, especially along edges that get handled often. It also affects the final look of the quilt because the binding color, print, and width create a visible border.
Most quilts use double-fold binding, which starts as a long strip folded in half lengthwise. The folded edge gives extra durability and makes the binding easier to sew evenly around the quilt.
Supplies and Fabric You’ll Need
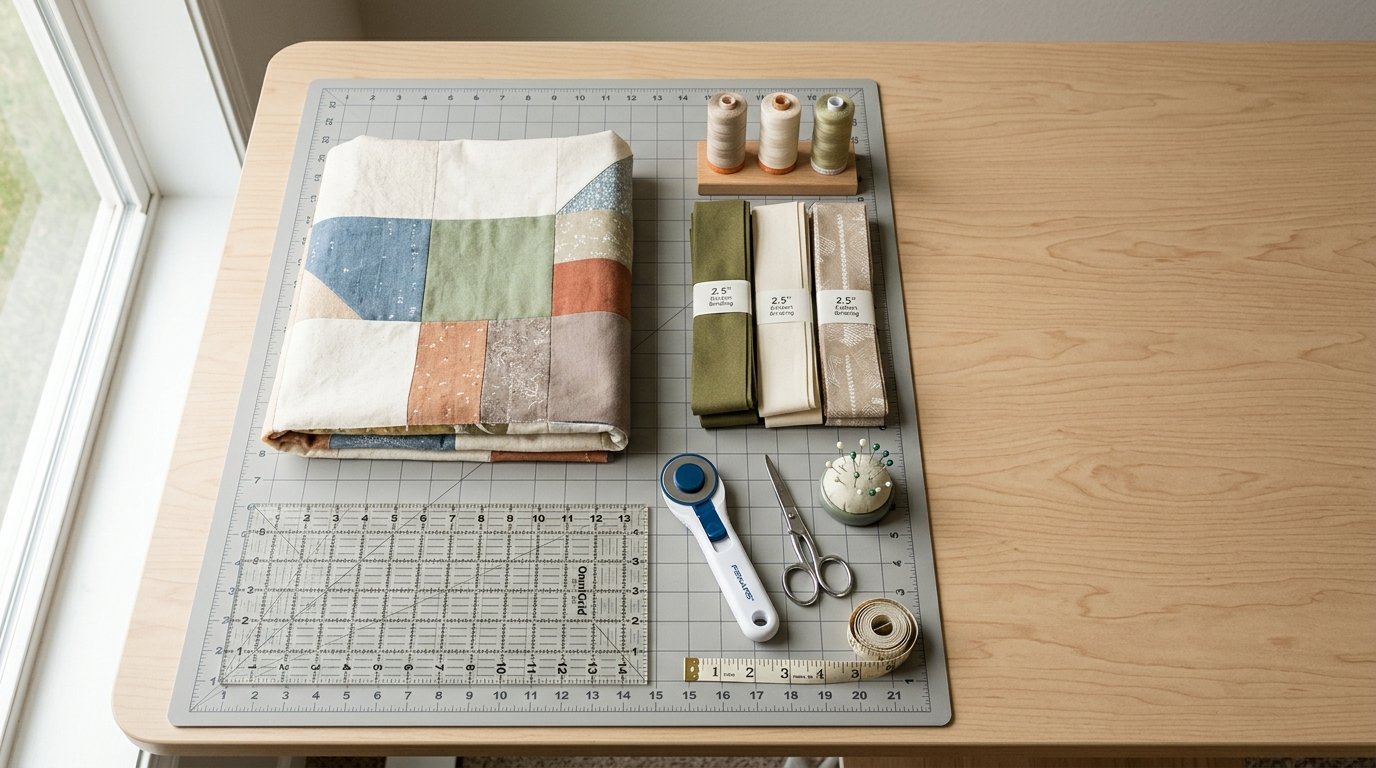
Before making quilt binding, gather everything so you can cut and sew without stopping.
You’ll need:
- Quilting cotton fabric
- Rotary cutter
- Cutting mat
- Quilting ruler
- Sewing machine
- Thread
- Iron and ironing board
- Pins or clips
- Fabric scissors or thread snips
- Measuring tape
Choose a quilting cotton that suits your quilt. Binding can match the border for a quiet finish, contrast for a framed look, or use a stripe or small print for interest.
If you are new to binding, avoid slippery fabrics or bulky fabric. Regular quilting cotton is stable, presses well, and is forgiving while you learn.
Choose the Right Binding Width
Binding width affects how the finished quilt edge looks and feels. The most common beginner choice is to cut strips 2½ inches wide. This makes double-fold binding that is easy to handle and works well for many quilts.
Narrower strips create a slimmer edge but require more accuracy. Wider strips give more room to work, especially on thick quilts, but can look bulky if the quilt is thin.
| Cut Strip Width | Best For | Beginner Note |
|---|---|---|
| 2¼ inches | Thin quilts, wall hangings, crisp narrow edges | Neat look, but less room for error |
| 2½ inches | Most quilts, beginner projects, everyday throws | Safest all-purpose choice |
| 2¾ inches | Thicker quilts or high-loft batting | Easier to wrap around bulky edges |
| 3 inches | Very thick projects or decorative wide binding | Can look oversized on standard quilts |
For your first few quilts, use 2½-inch strips unless your pattern says otherwise.
Calculate How Much Binding to Make
To calculate binding length, measure around the outside of the quilt and add extra for corners, joining, and the final overlap.
Use this formula:
Quilt length + quilt length + quilt width + quilt width + 10 to 12 inches = total binding length needed
The extra 10 to 12 inches gives you enough room to miter the corners and join the binding ends neatly.
Next, figure out how many fabric strips to cut. Most quilting cotton is about 40 to 42 inches wide after removing selvages. A safe estimate is 40 usable inches per strip.
Use this formula:
Total binding length needed ÷ 40 = number of strips
Round up to the next whole number.
Example: If your quilt is 60 inches by 72 inches:
- 60 + 60 + 72 + 72 = 264 inches
- 264 + 12 = 276 inches needed
- 276 ÷ 40 = 6.9
Round up, so you need 7 binding strips.
If you are using directional fabric, stripes, or matching prints, consider cutting one extra strip for flexibility.
Cut the Binding Strips Accurately
Accurate cutting helps the binding sew on smoothly and look even from front to back. Press your fabric first so wrinkles do not distort the strips.
To cut straight-grain binding:
- Square up the fabric edge. Fold the fabric with selvages together and align it neatly on the cutting mat. Use your ruler to trim one edge straight.
- Set your strip width. Place the ruler at your chosen width, usually 2½ inches for beginner binding.
- Cut with steady pressure. Keep the ruler still and cut away from your body with the rotary cutter.
- Repeat until you have enough strips. Check the width occasionally so small shifts do not multiply across several strips.
- Remove selvages. Trim off the tightly woven selvage ends before joining strips.
Keep the strips flat and avoid stretching them. Straight-grain binding has a little give, but pulling can distort the edges and make pressing harder later.
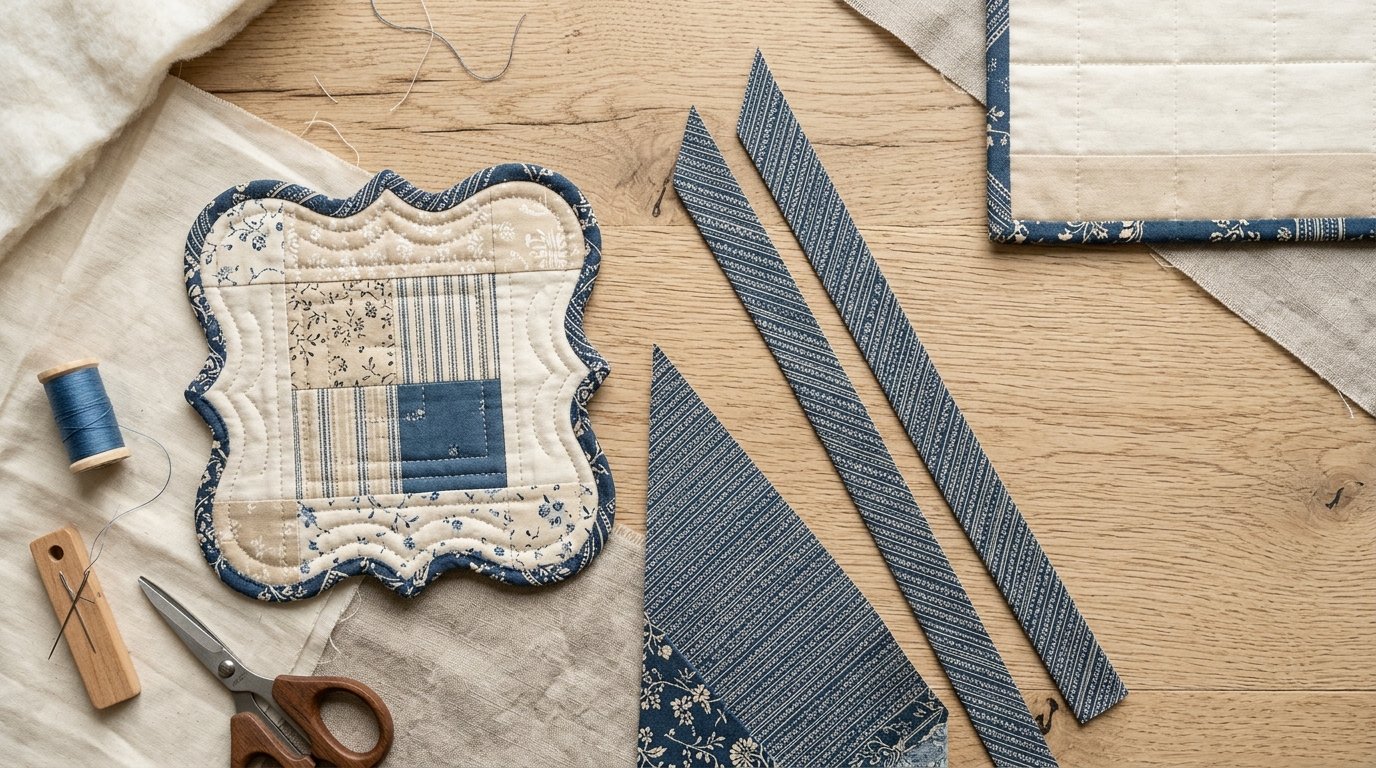
Join the Strips Into One Long Binding
Joining binding strips with diagonal seams reduces bulk. If you sew the strips together with straight seams across the short ends, all the seam allowance stacks in one place. Diagonal seams spread that bulk over a wider area, making the finished binding smoother.
To join strips:
- Place two strips right sides together. Put one strip horizontally and one vertically, forming an “L” shape. The ends should overlap like a square.
- Mark a diagonal line. Draw a line from the upper left corner to the lower right corner of the overlapped square, or use your machine guide if you are comfortable sewing without marking.
- Sew on the line. Stitch from corner to corner.
- Check before trimming. Open the strips to make sure they form one straight continuous strip, not a V shape or twisted angle.
- Trim the seam allowance. Cut about ¼ inch away from the seam.
- Press the seam open. This spreads the bulk and keeps the binding flatter.
Repeat until all strips are joined into one long piece.
When using printed fabric, pay attention to right and wrong sides. It is easy to flip one strip accidentally, especially with solids or batiks where both sides look similar. If your fabric has a directional print, make sure the design runs the way you want before sewing all the seams.
After joining, run your hand along the strip and check every seam. Fix twisted or mis-sewn joins now, before pressing the binding in half.
Press the Binding Into Double-fold Binding
Once the strips are joined, press the binding into double-fold binding. This does not mean folding both raw edges into the center like packaged bias tape. In quilting, double-fold binding usually means the long strip is folded in half lengthwise, wrong sides together.
To press it:
- Set the strip wrong sides together. Align the long raw edges.
- Press a few inches at a time. Move along the strip gradually instead of trying to fold the whole length at once.
- Keep the edges even. If the raw edges drift apart, adjust before pressing.
- Avoid stretching. Let the iron do the work. Do not pull the strip through your hands.
- Wind or fold the finished binding. Keep it tidy so it does not twist before you attach it.
Pressing well makes the next step much easier. The folded edge should be crisp, and the raw edges should stay aligned. If a seam allowance creates a lump, press it again with steam or finger-press it open first.
Check Your Binding Before Attaching It
Before sewing binding to the quilt, take a minute to inspect it. This small check can prevent frustration later.
Make sure:
- The binding is long enough for the quilt perimeter plus extra overlap.
- All strip joins are sewn securely.
- Seam allowances are trimmed to about ¼ inch.
- Seams are pressed open or very flat.
- The binding is folded evenly along the full length.
- There are no twists, accidental wrong-side joins, or narrow spots.
Also check that your binding fabric looks right with the quilt top. Once it is sewn on, replacing it takes much longer than fixing a problem now.
Common Mistakes When Making Quilt Binding
A few binding problems are common for beginners, and most are easy to avoid.
Cutting too little binding is one of the biggest issues. Always add at least 10 to 12 extra inches to the quilt perimeter. More is better than barely enough.
Skipping diagonal seams can create bulky spots along the quilt edge. Straight joins are faster, but diagonal joins usually look and feel better.
Forgetting to trim selvages can leave stiff, uneven areas in the binding. Selvages do not behave like the rest of the fabric, so cut them off before joining.
Stretching the strips while pressing can cause wavy binding. Press gently and keep the strip relaxed.
Using the wrong width can also cause trouble. If the binding is too narrow, it may not wrap around the quilt edge comfortably. If it is too wide, it may look loose or bulky.
When to Use Bias Binding Instead
Most rectangular quilts with straight edges use straight-grain binding. Bias binding is cut on the diagonal grain of the fabric, which gives it more stretch.
Use bias binding when your quilt has curved edges, scalloped borders, or rounded corners. The extra flexibility helps the binding shape smoothly around curves without puckering.
Bias binding is also useful for some decorative effects, especially with stripes. However, it takes more fabric and more careful handling, so straight-grain binding is usually best for beginner quilts with regular edges.
FAQ
What Should a Beginner Know First About Making Quilt Binding?
Start with straight-grain, double-fold binding cut from quilting cotton. For most beginner quilts, 2½-inch strips are a reliable choice. Measure the quilt perimeter, add 10 to 12 extra inches, then cut enough strips to make one continuous length.
What Matters Most When Evaluating Making Quilt Binding?
Accuracy matters most. Cut consistent strip widths, join strips with neat diagonal seams, and press the binding evenly in half. Also make sure you have enough total length. Small inaccuracies can show up later when the binding is attached to the quilt.
What Mistakes Should Readers Avoid with Making Quilt Binding?
Avoid cutting too little binding, leaving selvages attached, stretching strips while pressing, and sewing strips together with bulky straight seams. Also check for twisted joins before pressing the full length. These quick checks save time and prevent uneven quilt edges.
What Is the Next Logical Step After Learning About Making Quilt Binding?
After making the binding, the next step is attaching it to the quilt. You’ll sew the raw edges of the binding to the quilt edge, miter the corners, join the ends, then fold the binding over and stitch it down by machine or hand.