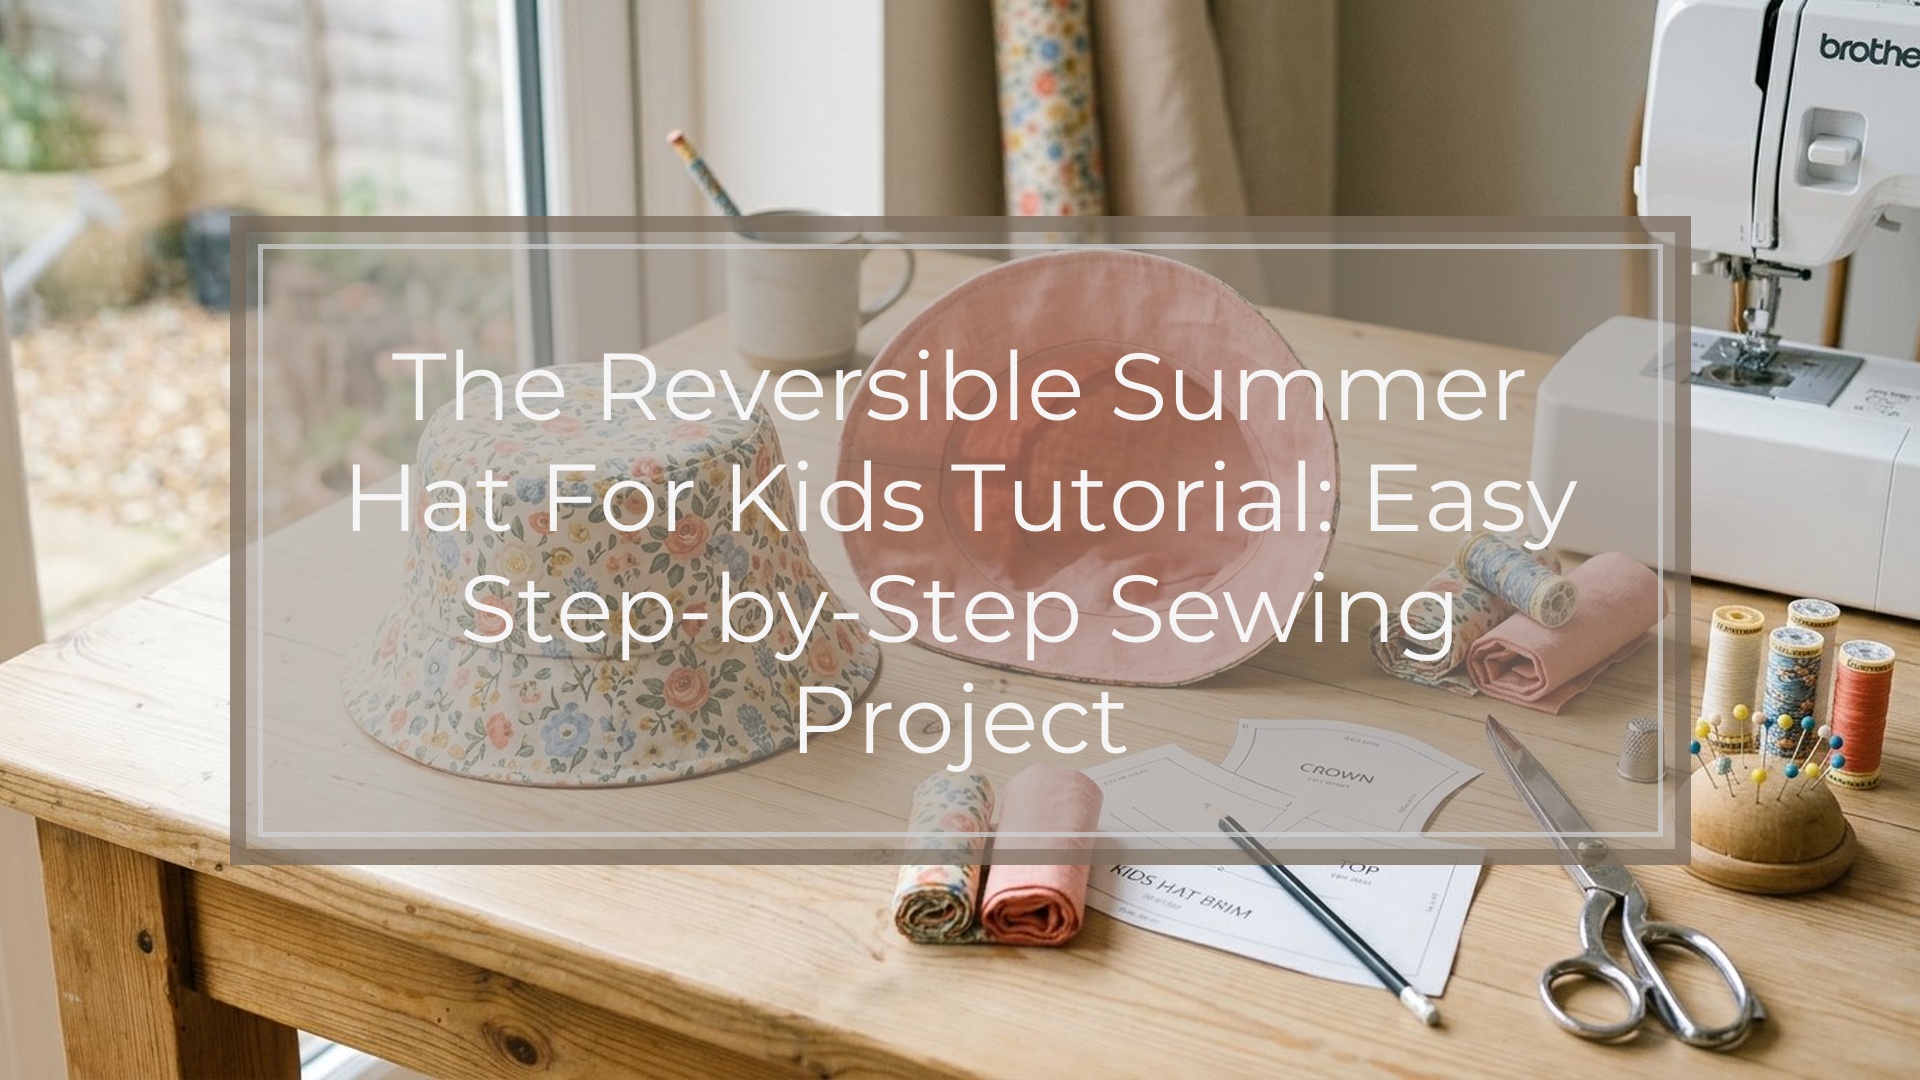
A reversible summer hat is a beginner-friendly sewing project that teaches useful skills without being overwhelming. You will sew two simple hat shells, one from each fabric, then join them so either side can be worn out. The finished hat is lightweight, washable, and practical for daily summer wear.
The basic build is simple: choose two woven fabrics, cut the crown, side band, and brim pieces, sew one full hat, repeat for the second fabric, then stitch both hats together around the outer brim edge. After turning and topstitching, the raw edges are enclosed inside the hat. If you can sew a steady seam allowance, clip curves carefully, and press often, this project is very manageable for beginners.
What You’ll Need Before You Start
Choose light to medium-weight woven fabrics that wash well and feel comfortable in warm weather. Quilting cotton, poplin, chambray, lawn, and light linen-cotton blends are all good options. Avoid bulky, slippery, or stretchy fabrics, since they make curved seams harder to control and can distort the finished shape.
Prewash and press both fabrics before cutting. This matters for kidswear because the hat will likely be washed often. It also helps to choose fabrics with similar weight and drape so one side does not pull against the other.
Use this table to gather supplies and plan your cuts:
| Item | What to use | Notes |
|---|---|---|
| Fabric A | 1/2 yard | Lightweight woven |
| Fabric B | 1/2 yard | Similar weight to fabric A |
| Thread | All-purpose polyester | Neutral works well for reversible topstitching |
| Needle | 80/12 or 90/14 universal | Use a fresh needle |
| Tools | Pins or clips, scissors or rotary cutter, ruler, iron | Pressing is essential |
| Optional brim support | Lightweight fusible interfacing | For a firmer brim |
| Pattern pieces | Crown, side band, brim | Cut one set from each fabric |
| Fabric prep | Prewash, dry, press | Prevents shrinkage later |
Hat Pattern Pieces and How to Size the Project
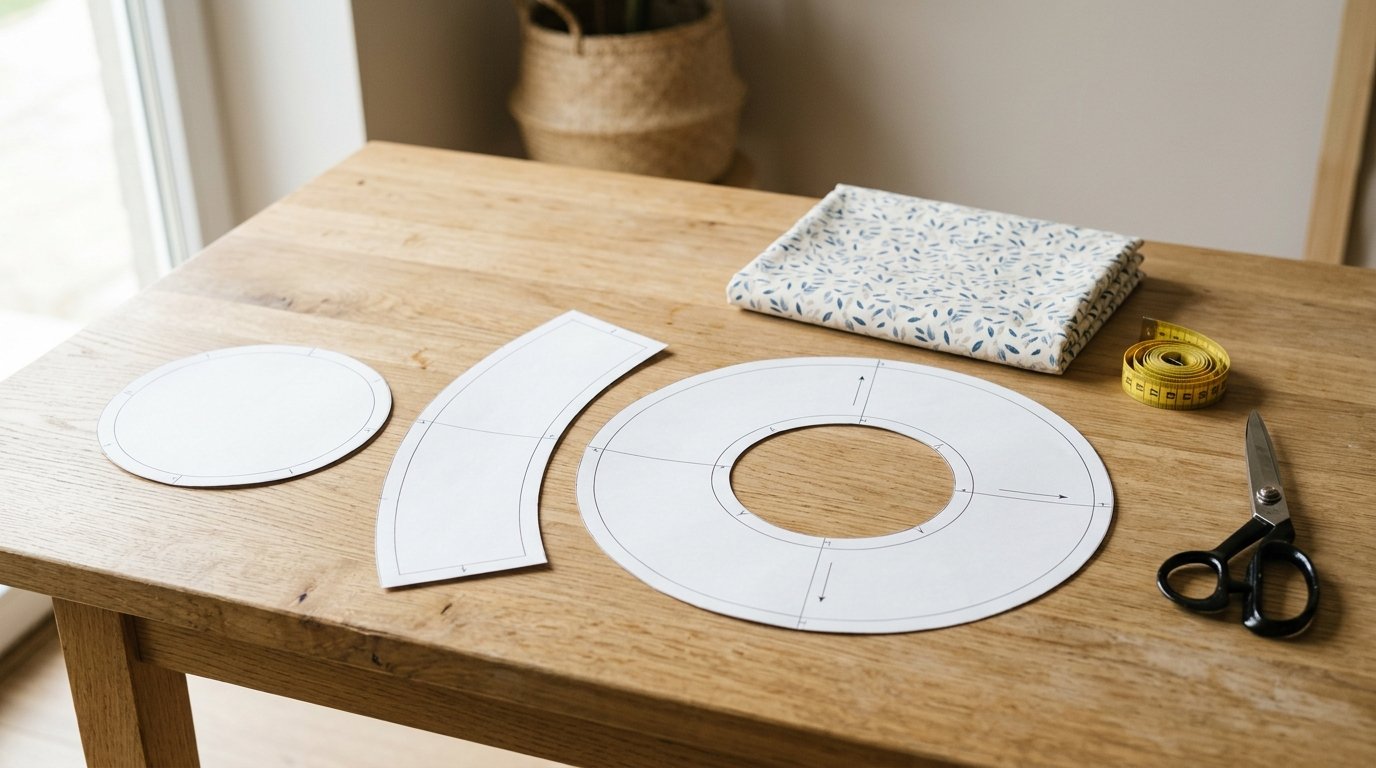
Most reversible kids hats use three basic pieces: a crown, a side band, and a brim. The crown covers the top of the head, the side band creates the depth of the hat, and the brim adds shade around the lower edge. Thinking of the hat in these three layers makes the assembly easier to follow.
To choose a size, measure around the child’s head across the forehead and around the fullest part at the back. Compare that number to your pattern’s finished size if you have one. For a woven summer hat, about 1/2 inch of ease is usually enough for comfort without making the hat loose.
If the child falls between sizes, size up. That usually gives a better fit for warm-weather hats, especially for toddlers who may wear the hat through a full season.
For simple size adjustments, change matching pieces evenly. Do not alter only the crown or only the brim. Small changes spread across the side band and brim circumference work best and keep the seam lines matching. As a rule, every connecting edge still needs to stay the same length as its partner piece.
How to Cut the Fabric Accurately
Lay the fabric flat and on grain before placing pattern pieces. Keep the grain direction consistent, especially on the side band and brim, so the finished hat does not twist. If your pattern uses fold lines, align them carefully before cutting.
Cut one complete set from fabric A and one from fabric B. Transfer notches, quarter marks, and center markings. These small references save time later because curved hat seams are much easier to match when you sew by marks instead of guessing.
If the brim has mirrored halves, keep each pair together. For stripes or directional prints, double-check the print direction before cutting so both reversible sides look correct when worn.
Step-by-step: Sew the First Side of the Hat
Start with one fabric only so you can learn the order without handling both layers at once.
- Sew the crown pieces together if your crown has multiple sections. Match notches and stitch the curved seams. Press the seams open or to one side.
- Sew the side band seam to make a ring. Press that seam open.
- Attach the side band to the crown. Match quarter marks or divide both pieces into quarters yourself. Pin or clip the marked points first, then stitch the full circle with an even seam allowance. Press the seam toward the band.
- Join the brim pieces if needed and press those seams.
- Attach the brim to the lower hat edge. Match seams and quarter points first, then stitch around the curve slowly.
- Press the full hat shell well. Check that the crown sits smoothly and the brim falls evenly all around.
At this stage you should have one complete hat shell. If anything looks uneven, fix it now before the reversible layers are joined.
Repeat for the Second Side and Assemble the Reversible Hat
Sew the second fabric set the same way: crown, side band, then brim. Try to keep your seam allowance consistent so both hat shells end up the same size.
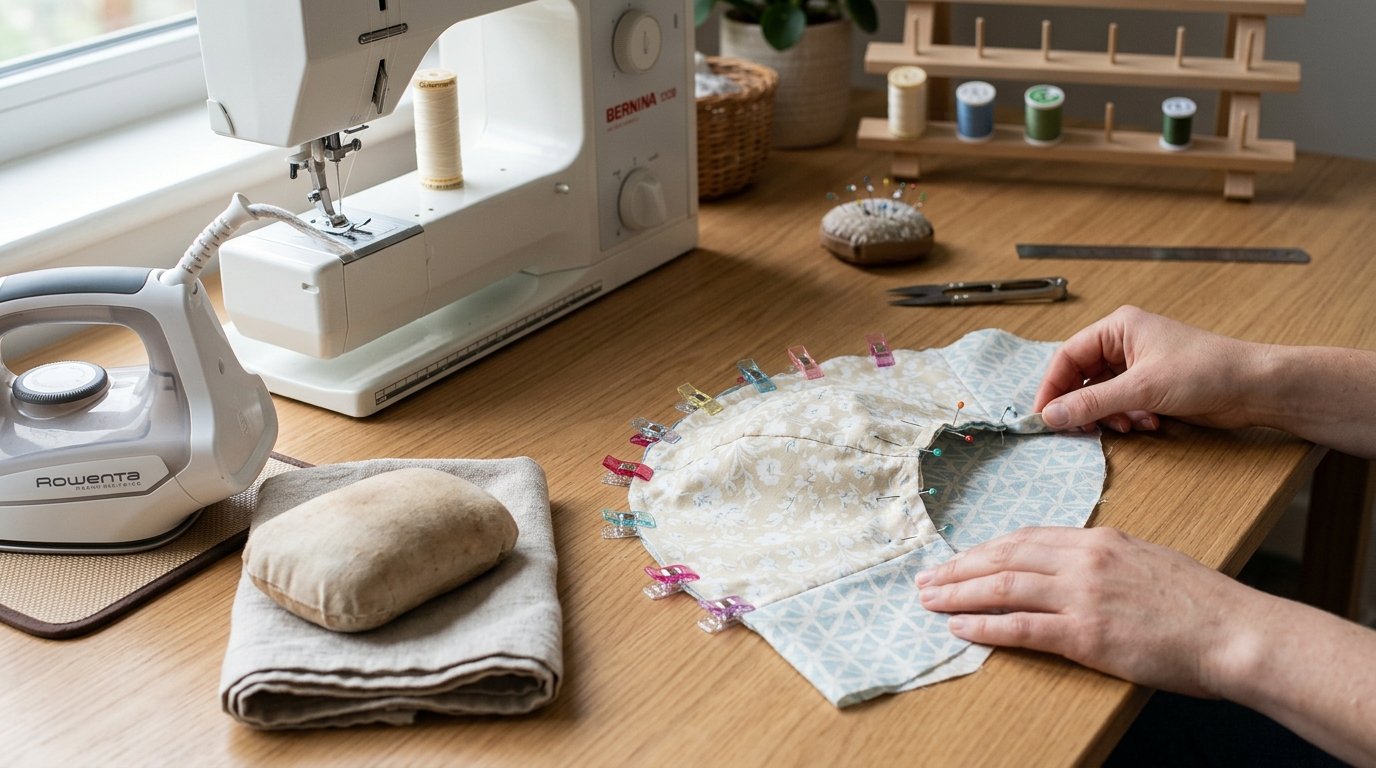
When both shells are finished, place them right sides together with one hat nested inside the other. Match side seams, brim seams, and quarter points around the outer brim edge. Pin or clip the circle carefully.
Stitch around the outer brim edge, leaving a 3- to 4-inch turning gap in a less noticeable area. Trim bulky seam allowances if needed, then clip the curved edge lightly without cutting into the stitching. This helps the brim turn smoothly.
Turn the hat right side out through the gap. Gently push out the edge with a blunt point turner or chopstick, then roll the seam between your fingers so the stitched edge sits fully at the outside. Press all the way around.
Fold the raw edges of the turning gap inward and press them in line with the sewn edge. Close the gap either by catching it in the topstitching or by hand sewing it with a ladder stitch.
Finish with topstitching around the brim edge, usually 1/8 to 1/4 inch from the edge. One row is enough for most hats, but a second row farther in can help the brim lie flatter and hold its shape better. Turn the hat both ways when finished to make sure each side looks clean and intentional.
Beginner Tips for a Neater, More Wearable Result
Press after each major seam instead of waiting until the end. This is one of the easiest ways to improve the shape of the crown and brim.
Use plenty of pins or clips on curved seams. Matching quarter points first keeps the pieces from shifting and prevents lopsided seams.
Sew slowly around curves. If needed, stop with the needle down, lift the presser foot, and pivot slightly. Small adjustments create a smoother line than pulling the fabric through.
If your brim feels too floppy, fuse lightweight interfacing to one brim layer before sewing. If the fabric is already fairly crisp, skip it to keep the hat soft and breathable.
Common Mistakes and Quick Fixes
If the crown puckers, the curve may have shifted while sewing. Unpick the uneven part, repin using quarter marks, and resew slowly.
If the brim does not match the hat body, check your seam allowance first. Small mismatches can often be eased in, but larger ones usually mean one piece was cut inaccurately or off grain.
If the hat looks twisted after turning, the shells may not have been matched at the seams before the final brim stitching. Always align seams and quarter points, not just the raw edge.
Care and Storage for a Kids Summer Hat
Wash the hat using the gentlest care method required by either fabric. For most cotton hats, a cool or warm gentle wash works well. Reshape the brim while damp and air dry flat or over a rounded form.
Store the hat flat or lightly stuffed so the crown keeps its shape. Avoid crushing it under heavy items, especially if you added interfacing to the brim.
FAQ
What Fabric Is Best for a Reversible Summer Hat for Kids?
Lightweight woven cotton is the easiest choice. Quilting cotton, poplin, lawn, and chambray are all breathable, washable, and easy to sew. Try to pair two fabrics with similar weight so the hat hangs evenly on both sides.
Do I Need Interfacing for the Brim?
No. A soft brim works fine without it. Add lightweight fusible interfacing only if you want more structure or a little extra sun-shading support.
How Do I Make the Hat Bigger or Smaller?
Measure the child’s head, then adjust matching pieces evenly rather than changing just one section. Small changes to the circumference of the side band and brim are usually the safest way to resize.
Can I Sew This Reversible Kids Hat Without a Serger?
Yes. A regular sewing machine is enough. The raw edges are enclosed between the two hat layers, so a serger is optional, not required.
Why Is My Brim Wavy After Sewing?
Wavy brims usually come from stretching the edge while sewing or from uneven topstitching. Press the brim well, reshape it with steam, and resew slowly if needed. Lightweight interfacing can also help very soft fabric behave better.