A crazy quilted Christmas stocking is made by sewing small fabric scraps onto a foundation in irregular shapes, then decorating the seam lines with embroidery or machine stitches. The result looks rich and detailed, but the method is forgiving because pieces do not need to match perfectly.
For this tutorial, you will make one lined stocking with a crazy quilted front, a plain or coordinated back, optional batting, and a hanging loop. You can sew the patchwork by machine and add decorative stitches by hand or machine. Beginners can keep the stitches simple; experienced sewists can add beads, trims, and layered embroidery.
Introduction: What Makes This Stocking “Crazy Quilted”
Crazy quilting is patchwork without a strict block grid. Instead of rows of squares or triangles, you build the surface with angled scraps, overlapping each new piece over the last. The “crazy” look comes from varied shapes, fabrics, and decorative seams.
For a Christmas stocking, this technique works beautifully because small pieces of velvet, cotton, satin, linen, or holiday prints can all live together. The project is beginner-friendly if you work slowly, press often, and keep embellishments away from bulky seam allowances.
Materials and Tools
Choose fabrics that feel festive but are still easy to sew. Cotton is the simplest base; velvet, brocade, silk, or satin add shine in small amounts. If you are new to slippery fabrics, use them as smaller patches and stabilize them well.
| Item | Suggested Amount | Notes |
|---|---|---|
| — | —: | — |
| Stocking front foundation fabric | 1 piece larger than template | Muslin or cotton works well |
| Fabric scraps | Assorted | Cotton, linen, velvet, satin, holiday prints |
| Stocking back fabric | 1 piece | Coordinating cotton or quilted fabric |
| Lining fabric | 2 pieces | Lightweight cotton is easiest |
| Batting or fusible fleece | 1–2 pieces | Adds body; optional but helpful |
| Embroidery floss or decorative thread | Several colors | Metallic thread can be used sparingly |
| Ribbon or fabric strip | 6–8 inches | For hanging loop |
| Basic tools | — | Sewing machine, needle, scissors, pins, iron |
Use a 1/4-inch seam allowance for patchwork and a 3/8- to 1/2-inch seam allowance for stocking assembly.
Choose or Make a Stocking Template
Use a stocking you already like, a printed pattern, or draw your own. A simple shape is best: wide enough at the top for gifts, gently curved through the heel, and rounded at the toe.
Trace the shape onto paper and add your preferred seam allowance if it is not already included. Mark the top opening clearly. Before cutting fabric, check that the stocking is not too narrow at the ankle; crazy quilt layers and lining need room to turn smoothly.
If you want a cuff, decide now whether it will fold over the top or sit as a separate band.
Cut the Foundation, Backing, Lining, and Batting
Cut the foundation for the crazy quilt front slightly larger than the final stocking template. An extra 1 inch around all sides gives you room to trim after stitching. This foundation will be hidden, so plain muslin, cotton, or lightweight canvas is fine.
Cut one stocking back from your chosen back fabric, using the template. Cut two lining pieces, mirrored so they face each other. If using batting or fusible fleece, cut one piece for the front and one for the back, or only one for the front if you want less bulk.
Do not cut the crazy quilt front to final size yet. Build the patchwork first, then trim it cleanly.
Build the Crazy Quilt Front Panel
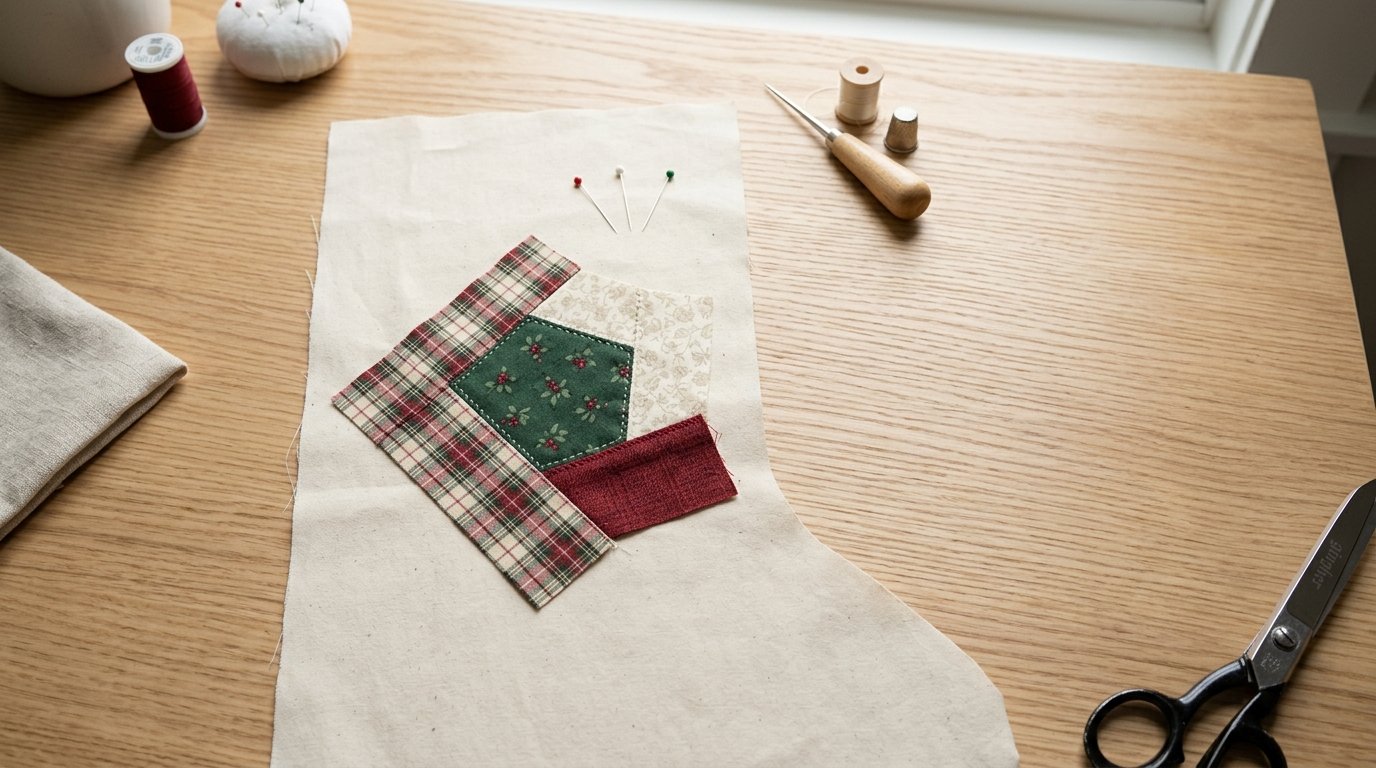
Place your foundation fabric right side up, even though it will be covered. Start near the center with one fabric scrap, right side up. This first piece can be a five-sided shape, a small rectangle, or any uneven scrap with clean edges.
Lay a second scrap right side down on top of the first, aligning one edge. Sew through both scraps and the foundation with a 1/4-inch seam. Flip the second piece open, press it flat, and trim any excess underneath if it creates bulk.
Continue adding scraps one at a time. Each new piece should cover a raw edge from the previous section and extend beyond the area you want to fill. Sew, flip, press, and repeat. Rotate the panel as you work so the seams angle in different directions.
Use larger, stable cotton pieces around the heel, toe, and top edge where the stocking will be handled most. Save tiny scraps for the center where they will not interfere with the final seam.
When the foundation is fully covered, press the entire panel from the back. Place your stocking template on top and check the layout. If an important patch falls too close to the seam allowance, shift the template slightly if possible. Then trim the crazy quilt panel to the final stocking front shape.
Add Decorative Stitches Along the Seams
Decorative stitches are what turn the patchwork into a crazy quilted Christmas stocking with decorative stitches rather than ordinary scrap patchwork. Work along the seam lines where two fabrics meet. You do not need to embellish every seam; leave some quiet spaces so the eye can rest.
For hand stitching, try blanket stitch, feather stitch, herringbone, chain stitch, stem stitch, or simple running stitches. A beginner-friendly combination is blanket stitch on long straight seams, lazy daisy flowers at intersections, and small French knots as accents. Use embroidery floss in two or three colors from your fabrics, such as red, ivory, and gold.
For machine stitching, test decorative stitches on a scrap sandwich first. Use stabilizer if stitches pucker. Good machine options include scallops, vines, stars, honeycomb stitches, or a narrow zigzag in metallic thread. Slow down around thick seams and avoid dense stitching near the stocking’s outer edge.
If you want to add lace, ribbon, rickrack, or beads, attach them now. Keep beads and heavy trims at least 1/2 inch away from the outer seam line so the stocking can be sewn and turned without broken needles or lumps. For a balanced look, repeat each color or stitch style at least twice across the front.
Prepare the Back, Lining, and Hanging Loop
If using batting, baste or quilt the stocking back to batting before assembly. A few straight lines or outline quilting is enough. You can also fuse fleece to the wrong side if your product allows it.
Make the hanging loop from ribbon or a fabric strip. For fabric, cut a strip about 2 inches by 7 inches, fold it lengthwise, press, tuck the raw edges inside, and stitch along the long edge. Fold the finished strip in half.
Place the loop on the upper inside edge of the stocking back, raw ends aligned with the top edge and loop pointing downward for now.
Sew the Stocking Outer and Lining
Place the crazy quilted front and stocking back right sides together. Pin carefully, especially at the heel and toe curves. Sew around the sides and bottom, leaving the top open. Backstitch at the beginning and end. Clip curves and trim bulky seam allowances, but do not cut into the stitching.
Sew the two lining pieces right sides together in the same way, leaving the top open and also leaving a 3- to 4-inch turning gap along one straight side or near the bottom. This gap will let you turn the stocking later.
Turn the outer stocking right side out and gently shape the toe and heel. Leave the lining wrong side out. Slip the outer stocking inside the lining so right sides are together. Match the top edges and side seams. Make sure the hanging loop is tucked between the layers, not sticking upward outside the seam.
Finish the Top Edge
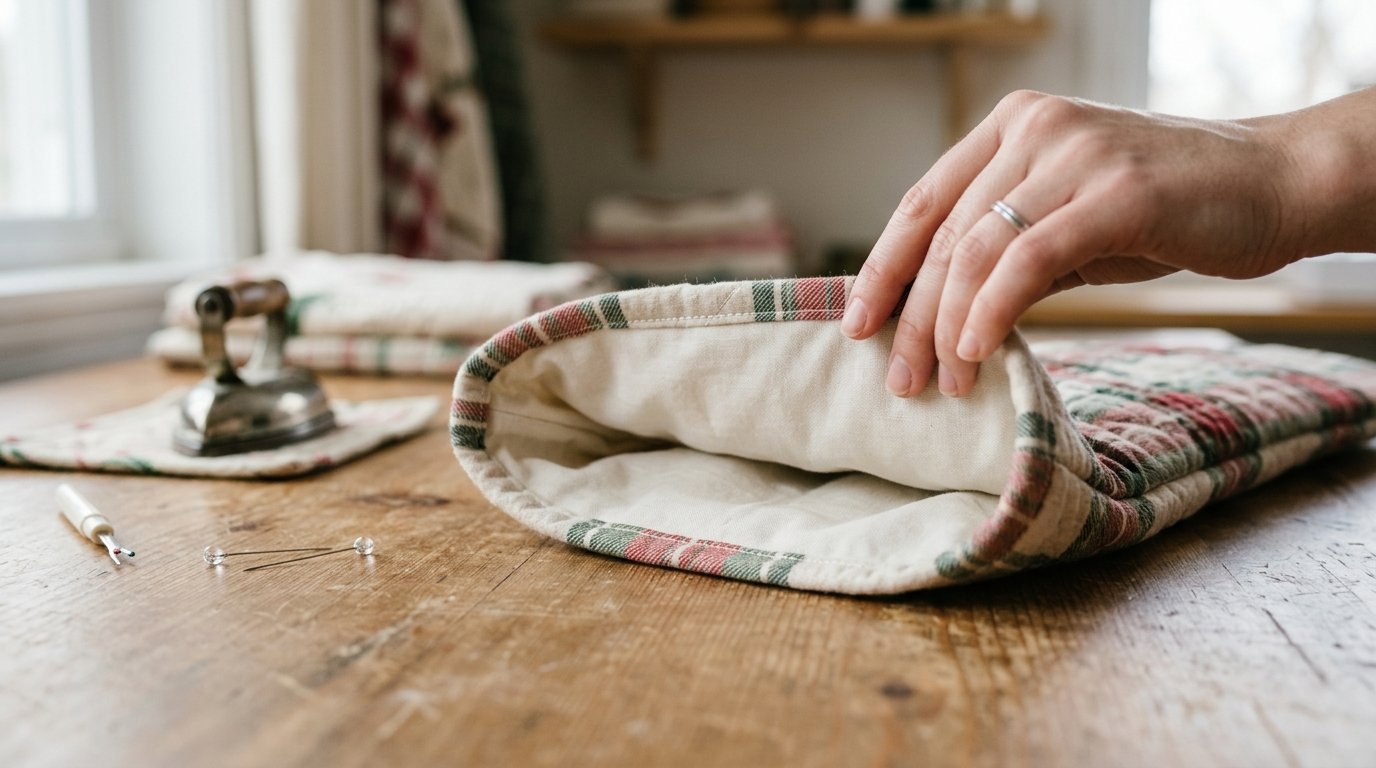
Sew around the top edge of the stocking, joining the outer stocking to the lining. Use a consistent seam allowance and go slowly over bulky areas. Pull the stocking right side out through the gap in the lining. Push the lining down inside the stocking and smooth the top edge with your fingers.
Press the top carefully, using a pressing cloth if you included velvet, metallic fabric, or trims. Close the lining gap by hand with a ladder stitch or by machine close to the edge.
For a no-cuff stocking, topstitch around the upper edge to keep the lining in place. For a cuff, add a separate folded band before attaching the lining, or fold the finished top outward if your stocking is tall enough and the lining looks attractive.
Troubleshooting and Beginner Tips
If the panel puckers, press after every added patch and reduce stitch density in decorative areas. If fabrics stretch, add lightweight interfacing to delicate scraps before sewing them onto the foundation.
If the stocking feels bulky, trim seam allowances unevenly so layers do not stack on top of each other. Keep velvet, ribbon, and beads away from the final seam line.
If your decorative stitches look uneven, repeat the same “imperfect” rhythm across several seams. Crazy quilting is forgiving; consistency matters more than precision. Test thread colors on scraps before stitching the stocking front.
Personalization Ideas
Add a name with hand embroidery, machine lettering, or a small fabric label near the cuff. Use a color palette that suits the recipient: red and green for classic Christmas, cream and gold for elegant décor, or bright scraps for a playful child’s stocking.
You can also add charms, lace from family linens, tiny buttons, or a dated tag. Keep sentimental pieces securely stitched and placed where they will not rub against the mantel hook.
Care and Storage
Because decorative stitches and trims can snag, spot clean the stocking when possible. If it must be washed, use cool water, gentle handling, and air drying, but only if all fabrics and trims are washable.
Store the stocking flat or lightly stuffed with tissue so the toe keeps its shape. Wrap beaded or metallic areas in acid-free tissue or plain cotton to prevent rubbing and tarnish.
Conclusion
A crazy quilted Christmas stocking is a practical sewing project with plenty of room for creativity. The foundation method makes the patchwork manageable, while decorative stitches let you add personality one seam at a time.
Start with stable fabrics, keep the construction simple, and embellish only as much as you enjoy. Each stocking will come out slightly different, which is exactly the charm of crazy quilting.
FAQ
What Should a Beginner Know First About Crazy Quilted Christmas Stocking with Decorative Stitches?
Start with cotton scraps, a muslin foundation, and simple embroidery stitches. The foundation supports the irregular patchwork, so your fabric shapes do not need to be perfect. Build the front first, decorate the seams, then assemble the stocking like a basic lined sewing project.
What Matters Most When Evaluating Crazy Quilted Christmas Stocking with Decorative Stitches?
Look for secure seams, a smooth lining, balanced embellishment, and a sturdy hanging loop. Decorative stitches should enhance the patchwork without making the stocking too stiff or bulky. The best result is attractive, functional, and strong enough to use year after year.
What Mistakes Should Readers Avoid with Crazy Quilted Christmas Stocking with Decorative Stitches?
Avoid placing beads, thick trims, or dense embroidery inside the seam allowance. Do not skip pressing between patches, because small wrinkles become harder to fix later. Also avoid using too many slippery fabrics at once if you are new to crazy quilting.
What Is the Next Logical Step After Learning About Crazy Quilted Christmas Stocking with Decorative Stitches?
Make a second stocking using a different palette or stitch plan. Repeating the project helps you improve fabric placement, seam embellishment, and curved assembly. You can also adapt the same crazy quilt panel method for ornaments, gift bags, or small holiday pillows.