Fabric twine is a simple cord made by twisting narrow fabric strips together. It is a useful way to turn sewing scraps, quilting leftovers, old cotton shirts, and other lightweight fabric pieces into something decorative and practical.
To make fabric twine, cut fabric into long strips, knot two strips together, twist each strip in one direction, then wrap the twisted strips around each other in the opposite direction. Keep steady tension as you work, and add new strips when the old ones get short. The finished twine can be used for gift wrapping, tags, garlands, baskets, ornaments, drawstrings, and small textile embellishments.
The basic method is easy to learn, but even tension and suitable fabric make the biggest difference.
What Is Fabric Twine?
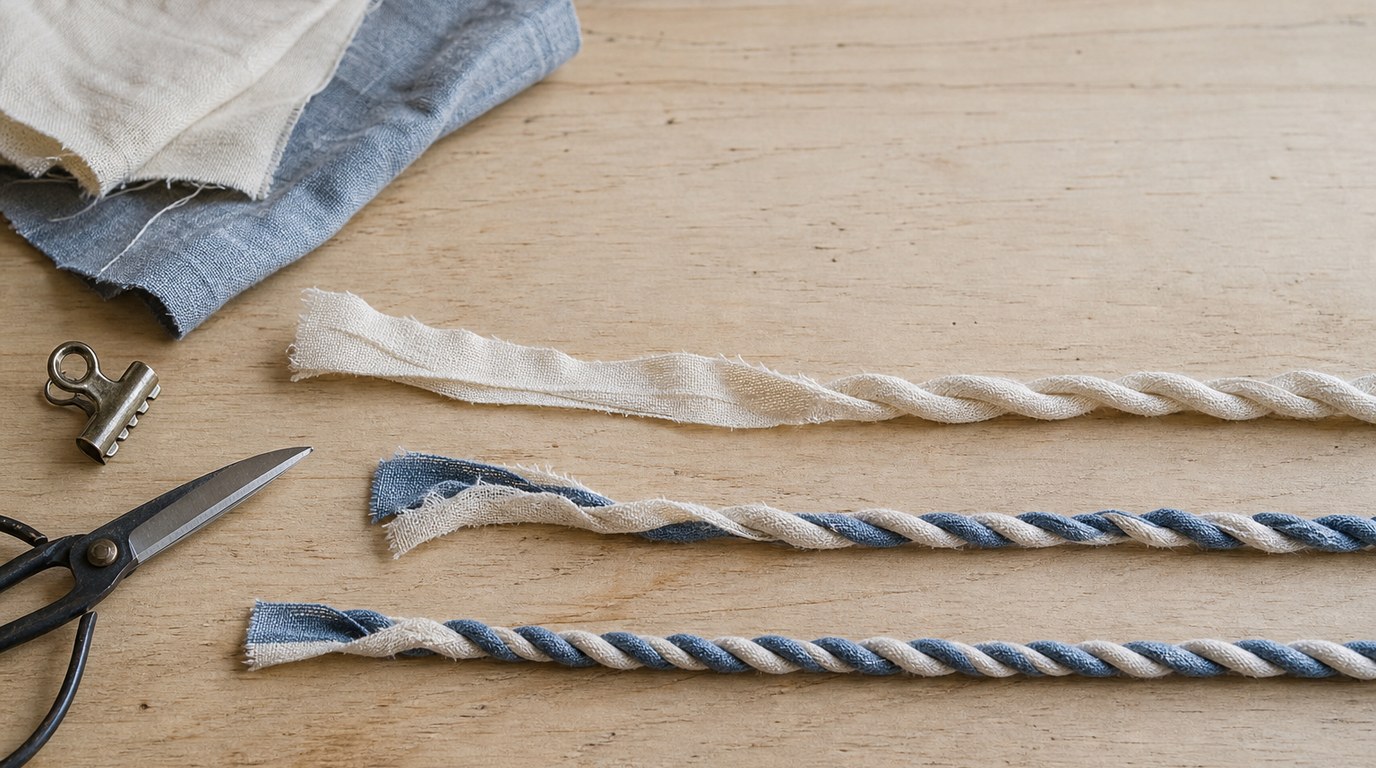
Fabric twine is a handmade cord created from two or more fabric strips. Each strip is twisted tightly, then the strips are twisted around each other to lock them in place. This opposite-direction twisting is what keeps the cord from immediately unraveling.
Think of it as a small rope made from cloth instead of fiber. The finished twine can be thin and neat or chunky and rustic, depending on the fabric width, fabric weight, and how tightly you twist. Frayed edges are normal and often part of the charm.
Supplies You’ll Need
You only need a few basic supplies:
- Fabric scraps
- Sharp fabric scissors or a rotary cutter
- Cutting mat and ruler, if using a rotary cutter
- Clip, safety pin, or tape to hold the starting end
- Optional: needle and thread, fabric glue, or a small knot for finishing
Cotton quilting fabric is a good beginner choice because it tears or cuts cleanly and twists easily. Lightweight denim, linen, shirting, and worn cotton clothing can also work. Avoid very slippery or stretchy fabric for your first attempt.
Choose and Cut Your Fabric Strips
For beginner-friendly fabric twine, cut strips about 1/2 inch to 1 inch wide. Narrow strips make thinner twine, while wider strips make a thicker, more textured cord. Length does not need to be perfect because you can join more strips as you work.
If your fabric frays heavily, that is usually fine. Loose threads can add texture, but trim any very long strands that get in the way. Try to keep strip widths fairly consistent so the twine does not become lumpy.
| Fabric type | Best strip width | Result |
|---|---|---|
| — | —: | — |
| Quilting cotton | 1/2 to 3/4 inch | Smooth, easy twine |
| Linen or shirting | 1/2 to 1 inch | Soft, rustic twine |
| Lightweight denim | 1/2 inch | Firm, sturdy twine |
| Knit fabric | 1/2 inch | Stretchy, casual cord |
Cut several strips before you start so you can keep twisting without stopping often.
How to Make Fabric Twine Step by Step
- Choose two fabric strips. Start with strips of similar width and weight. They do not need to match in color; mixed scraps often make the prettiest twine.
- Tie the strips together. Knot one end of both strips together, leaving a small tail. Secure the knot under a clip, tape it to the table, or pin it to a cushion. Holding the starting point steady makes the twisting much easier.
- Twist each strip to the right. Take the strip on the right and twist it away from you, or clockwise, a few times. Then do the same with the strip on the left. Each individual strip should become tighter.
- Wrap the strips to the left. Cross the right strip over the left strip, moving in the opposite direction from the individual twist. This opposite motion locks the two twisted strips together.
- Repeat the rhythm. Twist the individual strip to the right, then wrap it to the left over the other strip. Continue: twist, cross, twist, cross. Keep your hands close to the working point so the tension stays even.
- Check the firmness. If the twine looks loose, twist each strip a little more before crossing. If it coils tightly back on itself, your tension may be too strong.
- Keep going until you reach the strip ends. Stop when you have about 2 inches left so you have enough fabric to add the next strips securely.
Do not worry if your first few inches look uneven. Most beginners improve quickly once the twist-and-cross rhythm starts to feel natural.
How to Add More Fabric Strips
To make continuous fabric twine, add new strips before the current ones run out. Work with one side at a time so the cord stays stable.
When one strip has about 2 inches left, lay a new strip alongside it, overlapping the old strip by 1 to 2 inches. Treat the old and new strip as one piece for the next several twists. Continue twisting and wrapping as usual. The overlap will become trapped inside the twine.
Repeat on the other side when needed. Stagger joins when possible, rather than adding both new strips in the same spot. This keeps the twine smoother and prevents a bulky lump.
For extra security, especially on twine that will be handled often, add a tiny dab of fabric glue at the overlap.
Finishing the Ends
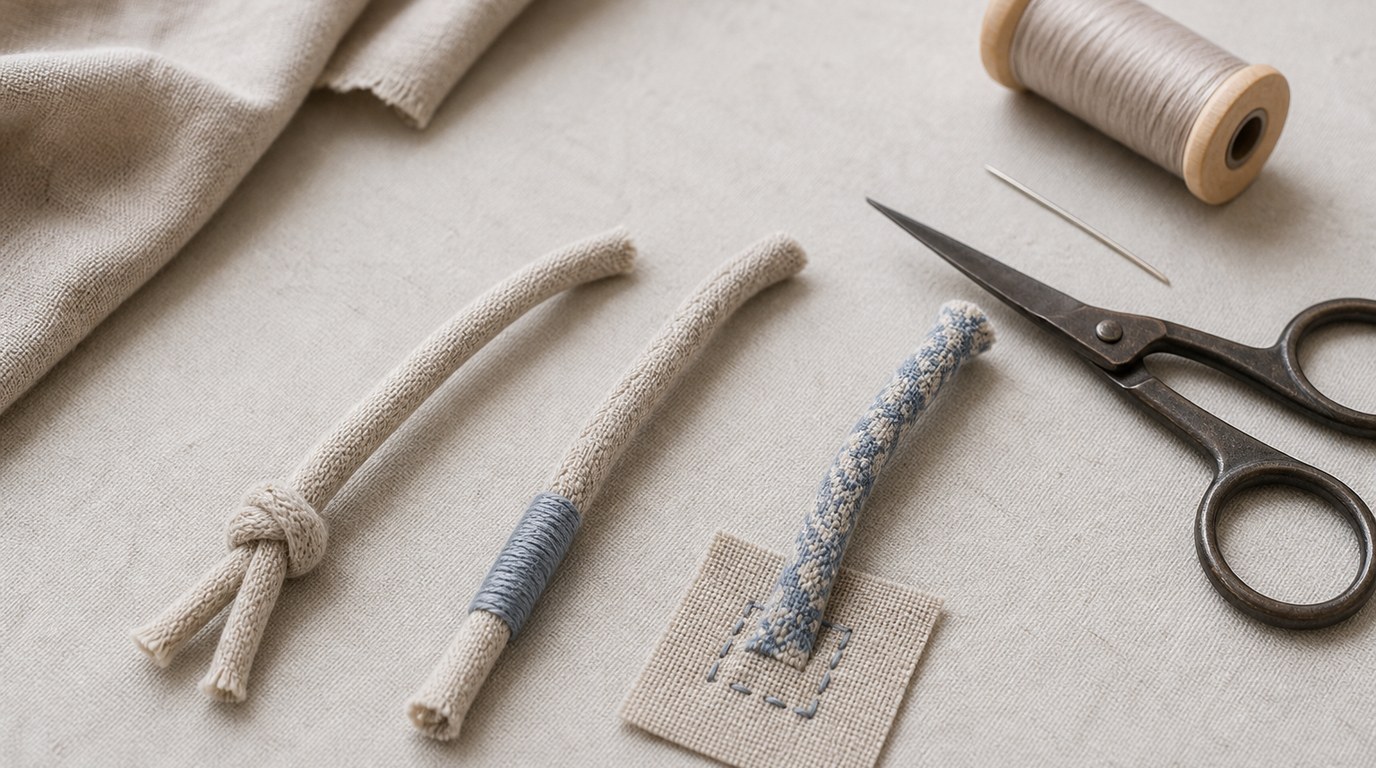
The best finish depends on how you plan to use the twine. For simple gift wrap or tags, tie an overhand knot at the end and trim the tails. For a neater finish, wrap the end with thread and stitch through it a few times.
If the twine will be sewn onto a project, leave a short tail and stitch it down by hand or machine. For decorative pieces, a small amount of fabric glue can help hold the final twist in place.
Troubleshooting Fabric Twine
If your fabric twine unravels, make sure you are twisting each strip in one direction and wrapping the strips together in the opposite direction. Using the same direction for both actions will not lock the cord properly.
If the twine is bumpy, check your strip width and joins. Large overlaps, thick fabric, or uneven cutting can create lumps. Trim bulky seams from recycled clothing before cutting strips.
If your hands get tired, make shorter lengths at a time. Fabric twine does not need to be made in one sitting. Clip the working end to keep it from unraveling, then return to it later.
Ways to Use Fabric Twine
Fabric twine works well anywhere you want a soft, handmade cord. Use it to tie fabric bundles, wrap gifts, hang ornaments, make garlands, finish handmade tags, or add texture to journal covers and textile art.
You can also coil and stitch it into small bowls, trivets, or mats. Thicker twine can become handles for small fabric baskets, while thinner twine makes charming ties for drawstring bags or needlework packaging.
FAQ
What Should a Beginner Know First About Make Fabric Twine?
A beginner should know that fabric twine is built from two actions: twist each fabric strip, then wrap the strips around each other in the opposite direction. That opposite twist is the key. Start with cotton fabric strips because they are easier to control than slippery or stretchy fabric.
What Matters Most When Evaluating Make Fabric Twine?
The most important things are fabric choice, strip width, and tension. Good fabric twine feels firm enough to hold together but not so tight that it kinks constantly. Consistent strips make smoother twine, while mixed widths create a more rustic, textured look.
What Mistakes Should Readers Avoid with Make Fabric Twine?
Avoid cutting strips too wide, twisting too loosely, or adding both new strips in the exact same place. These habits can make the twine bulky or weak. Also avoid starting with difficult fabrics like satin, thick upholstery scraps, or very stretchy knits.
What Is the Next Logical Step After Learning About Make Fabric Twine?
After learning the basic method, try making a longer length from coordinated scraps. Then use it in a small project, such as gift ties, a stitched coaster, a hanging loop, or a fabric garland. A real project helps you learn how firm your twine needs to be.