Edgejoining quilt binding is a machine-finishing method that uses an edgejoining foot, also called a stitch-in-the-ditch foot, to sew close to the seam where the binding meets the quilt top. Instead of hand-stitching the folded binding to the back, you guide the foot along the front binding seam and let the needle catch the folded binding on the underside.
The goal is a neat front with stitching hidden in, or very close to, the ditch. On the back, the stitching lands just inside the folded binding edge. This technique is useful when you want a durable, quick, machine-finished binding that still looks controlled and tidy.
What Edgejoining Means in Quilt Binding
In quilt binding, edgejoining means sewing along the “edge” where two areas meet: the quilt top and the attached binding. The guide on an edgejoining foot rides in that seam line, helping you keep the stitching straight.
Think of the binding as two jobs. First, it is sewn to the front or back of the quilt with a normal seam. Then the loose folded edge is wrapped around to the other side and secured. Edgejoining is one way to do that second job by machine.
The important mental model is this: you are watching the front seam, but you are actually trying to catch the folded binding edge on the back.
When Edgejoining Is a Good Binding Method
Edgejoining is a good choice for everyday quilts, baby quilts, throws, charity quilts, table runners, and projects that will be washed often. It is faster than hand binding and usually stronger because the finishing stitches are made by machine.
It works best when your binding is evenly made, your seam allowance is consistent, and the folded edge on the back extends slightly past the first stitching line. If you want an invisible heirloom finish, hand-stitching may still be better. If you want speed with a clean look, edgejoining is a practical middle ground.
Tools and Materials You’ll Need
You do not need many special supplies, but the right foot and setup make the method easier.
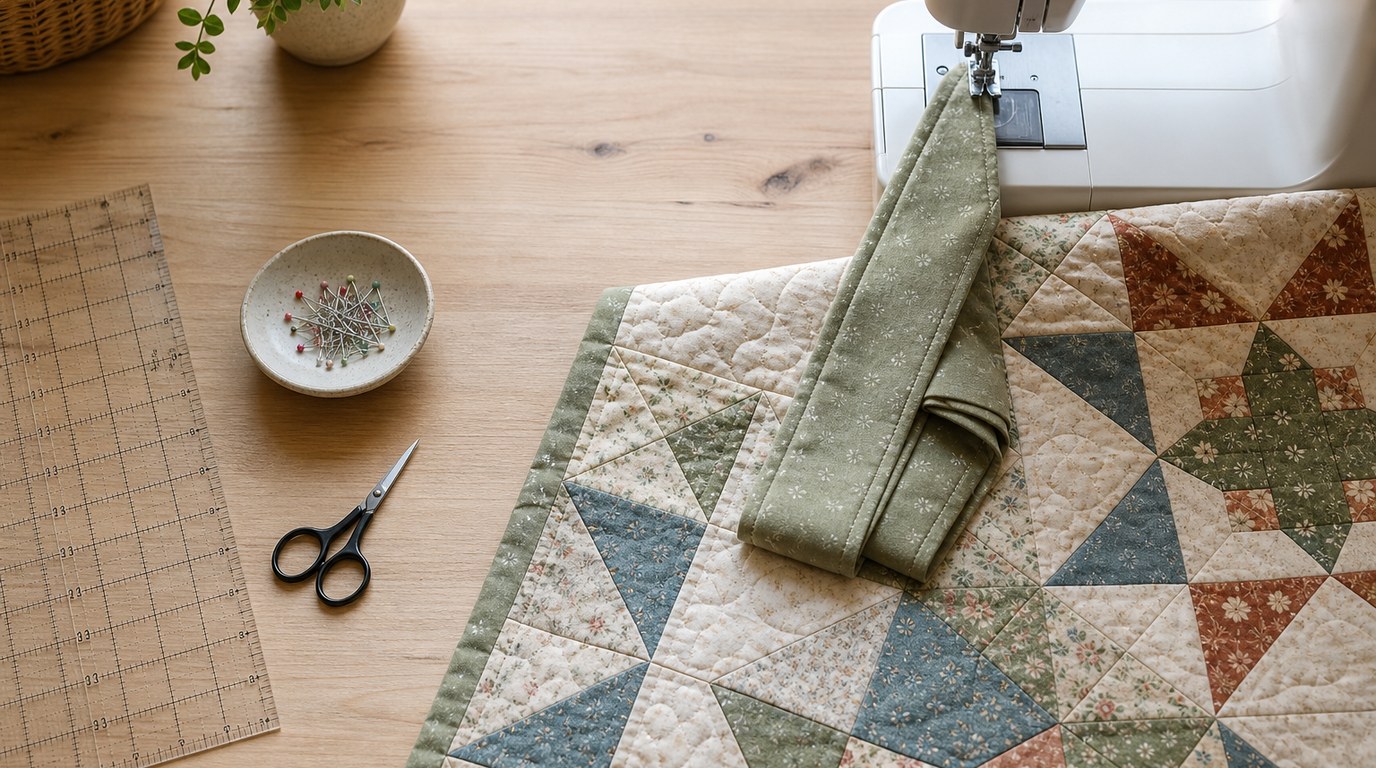
Use an edgejoining foot or stitch-in-the-ditch foot with a center guide. You will also need prepared double-fold quilt binding, a quilt sandwich that is already quilted and squared, thread that blends with the quilt top, and a suitable sewing machine needle.
Clips are more useful than pins because they hold the folded binding without distorting the quilt edge. A walking foot is not usually used for the edgejoining pass, but even feeding still matters, so avoid pulling the quilt through the machine.
Edgejoining Quilt Binding: Setup Choices
Before sewing, test your settings on a quilted scrap with binding attached. Small changes in needle position can decide whether the underside is caught cleanly.
| Setup choice | Good starting point | Why it matters |
|---|---|---|
| — | —: | — |
| Foot | Edgejoining or stitch-in-the-ditch foot | The center guide follows the binding seam |
| Needle | 80/12 or 90/14 universal, quilting, or topstitch | Choose based on quilt thickness and thread |
| Thread | Blending cotton or polyester | Matching thread hides small wobbles |
| Stitch length | 2.5–3.0 mm | Slightly longer stitches look smoother |
| Needle position | Slightly toward the binding side | Helps catch the folded edge underneath |
| Speed | Slow to medium | Gives you time to manage corners and bulk |
The most important setting is needle position. The guide stays in the ditch, but the needle may need to move one or two clicks toward the binding.
Prepare the Binding Before You Sew
Attach the binding to the front of the quilt using your preferred seam allowance, often 1/4 inch. Join the binding ends neatly, then press the binding away from the quilt top. This press creates a sharp fold and makes wrapping easier.
Wrap the binding to the back so the folded edge covers the original stitching line by a small but reliable amount. If it barely reaches the line, the edgejoining stitches may miss it.
Clip the binding in place all the way around, especially near corners. Check the back before you sew. The back fold should look even, not stretched tight in some areas and loose in others.
Step-by-step: How to Edgejoin Quilt Binding
- Attach the binding first. Sew the raw edge of the folded binding to the front of the quilt. Use a consistent seam allowance and miter the corners as usual.
- Press the binding outward. Press from the front so the binding moves away from the quilt center. This reduces bulk at the seam and helps the binding roll cleanly to the back.
- Wrap and clip the back. Fold the binding over the quilt edge to the back. The folded edge should extend just beyond the seam line from the first pass. Clip every few inches, using more clips near corners.
- Install the edgejoining foot. Place the quilt right side up under the machine. The front of the quilt faces you because the foot will follow the seam between the quilt and binding.
- Position the guide in the ditch. Lower the presser foot so the guide sits directly in the seam where the binding meets the quilt top.
- Adjust the needle position. Move the needle slightly toward the binding side. On many machines, this is one or two needle-position clicks. Test before sewing the actual quilt.
- Start on a straight side. Begin several inches away from a corner. Backstitch lightly or shorten the first few stitches if needed.
- Sew slowly and guide gently. Keep the foot’s guide in the ditch. Do not steer by watching the needle only; let the guide do its job.
- Handle corners carefully. As you approach a mitered corner, slow down. Stop with the needle down, raise the presser foot, pivot, and make sure the corner fold on the back is still flat.
- Check the underside early. After sewing 8 to 12 inches, stop and inspect the back. If the stitches are missing the folded edge, adjust needle position or reclip before continuing.
- Finish and inspect. When you return to the starting point, overlap a few stitches. Look around the back for skipped sections and resew any missed areas neatly.
Tips for Neater Edgejoining
Use thread that blends with the quilt top rather than the binding if your goal is to hide the front stitching. If your ditch stitching wanders slightly, matching the quilt top will be more forgiving.
Do not stretch the binding while clipping or sewing. Stretching can cause ripples, especially along bias edges or softer fabrics.
Keep the quilt supported on the table so its weight does not pull against the needle. For bulky quilts, roll or fold the excess loosely. At corners, finger-press the miter firmly before clipping so the underside fold stays where the needle can catch it.
Common Problems and How to Fix Them
If the stitches miss the binding on the back, the folded edge is probably not extending far enough past the original seam. Repress, reclip, or move the needle slightly farther toward the binding.
If the front stitching is visible outside the ditch, slow down and keep the guide seated in the seam. A contrasting thread will make this more obvious, so use blending thread while learning.
If corners look bulky or loose, trim excess batting carefully before binding and clip the miter on both sides of the corner. If the quilt edge ripples, check that you are guiding rather than pulling.
Edgejoining Vs. Stitching on the Binding Edge

Edgejoining follows the seam beside the binding, usually from the quilt front. The front stitches are meant to disappear into the ditch, while the back stitches secure the folded binding.
Stitching on the binding edge is different. In that method, you sew visibly on top of the binding, close to its inner folded edge. It is easier to control from the front, but the stitching becomes part of the design. Choose edgejoining for a subtler finish and edge stitching for a more visible machine-bound look.
FAQ
What Should a Beginner Know First About Edgejoining Bind Quilt?
A beginner should know that edgejoining quilt binding is sewn from the front, but it must catch the folded binding on the back. The front guide follows the ditch, while the needle position determines whether the back edge is secured.
What Matters Most When Evaluating Edgejoining Bind Quilt?
The most important factors are binding width, back overlap, needle position, and steady guiding. If the folded binding on the back does not cover the first stitching line enough, even perfect sewing from the front may miss it.
What Mistakes Should Readers Avoid with Edgejoining Bind Quilt?
Avoid rushing, pulling the quilt, using high-contrast thread too early, and assuming the back is caught without checking. Sew a short section first, inspect the underside, and adjust before completing the full quilt.
What Is the Next Logical Step After Learning About Edgejoining Bind Quilt?
Practice on a small quilt sandwich or table runner before using the technique on a large quilt. Try different needle positions and stitch lengths, then inspect both sides to learn what gives your machine the cleanest finish.