Quick Answer
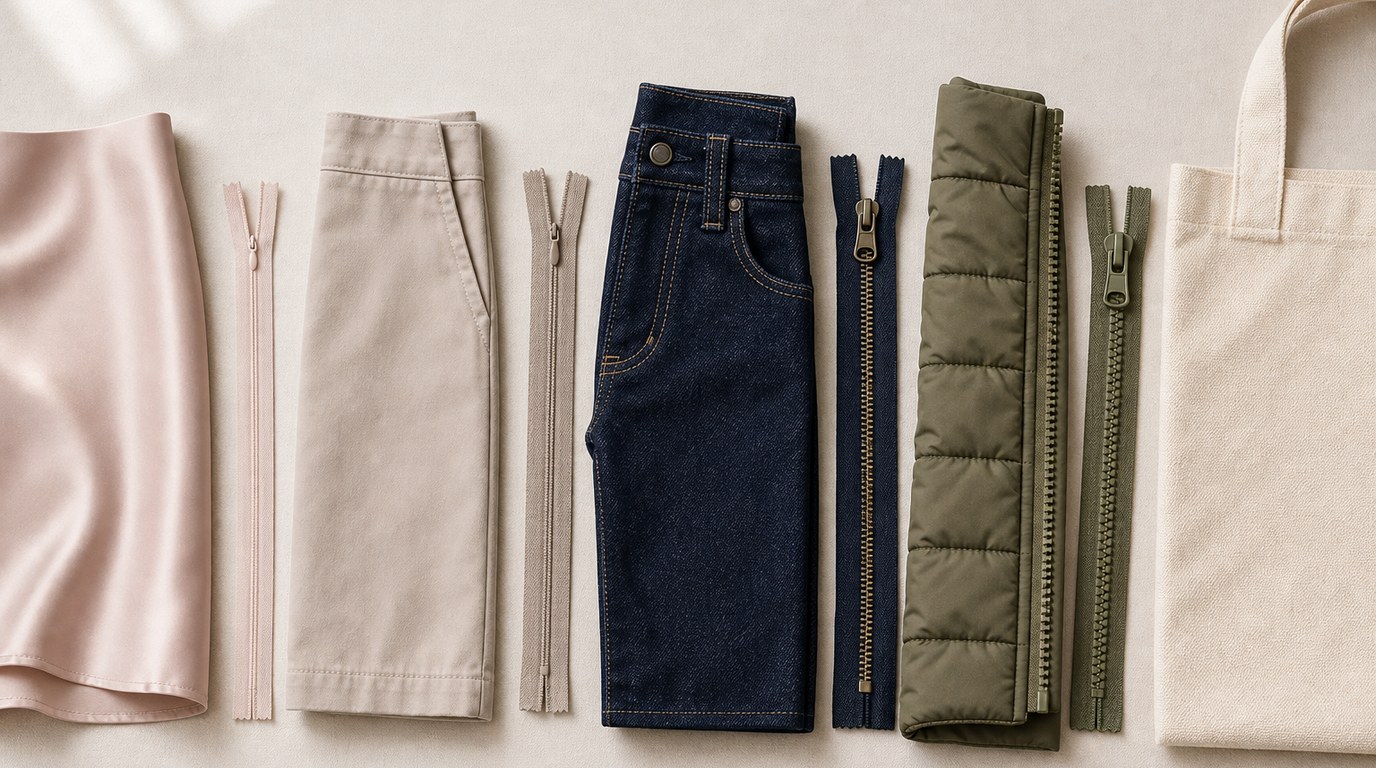
The main thing to know about zippers is that the “right” zipper is chosen by project use, not just by length. A zipper for a dress, a jeans fly, a winter jacket, a cushion cover, and a tote bag may all open and close fabric, but they need different strength, flexibility, appearance, and opening style.
A zipper has a tape, teeth or coil, slider, pull, stops, and sometimes a separating box and pin. The tape is the fabric strip you sew into your project. The teeth or coil are the interlocking parts. The slider joins or separates them. The stops keep the slider from sliding off. A separating zipper, used in jackets, fully opens at the bottom; a closed-end zipper, used in skirts, pillows, and bags, stays joined at one end.
The most common zipper types for sewing are coil, molded plastic, metal, invisible, and separating zippers. Coil zippers are flexible and useful for garments, bags, cushions, and curved seams. Metal zippers are sturdy and decorative, often used in jeans, jackets, and bags. Molded plastic zippers are lightweight but strong, common in jackets and outdoor items. Invisible zippers hide in a seam and are popular for dresses, skirts, and formal garments.
When choosing a zipper, ask five questions: Does the project need to open completely? Should the zipper show or disappear? How much stress will it take? What fabric weight are you sewing? What length and color will look intentional? For installation, use the correct zipper foot, stabilize stretchy or loose fabric, baste when accuracy matters, and avoid sewing too close to the teeth.
A good zipper choice should feel natural for the item. It should open smoothly, support the fabric, match the style, and be easy enough to sew neatly with your current skill level.
How to Think About This Topic
A practical way to understand everything about zippers is to think of a zipper as both a closure and a design decision. It has to function reliably, but it also affects how the finished project looks, feels, and wears over time. Beginners often focus only on the printed length on the package. Intermediate sewists learn that zipper type, tooth size, tape quality, slider style, and installation method matter just as much.
Start with zipper anatomy. The zipper tape is usually woven polyester or cotton-blend fabric, and it is the part stitched into the seam allowance. The teeth may be metal, molded plastic, or nylon coil. Coil teeth are actually a spiral sewn onto the tape, which is why coil zippers bend well. The slider is the moving piece that locks or unlocks the teeth. The pull is the tab you hold. Top and bottom stops keep the slider in place. On a separating zipper, the box and pin at the bottom allow the two sides to come apart completely.
Next, think about whether the zipper is closed-end or separating. A closed-end zipper is joined at one end. Use it for skirts, dresses, trousers, cushions, pouches, and many bags. A separating zipper opens all the way apart. Use it for jackets, hoodies, coats, and some removable covers. This single choice prevents many project problems. A non-separating zipper in a jacket front will not work correctly, even if it is the right length and color.
Then consider visibility. Some zippers are meant to be hidden; others are meant to be seen. Invisible zippers are sewn so the teeth roll behind the seam, leaving only a small pull visible. They are ideal for garments where the closure should not interrupt the design. Centered and lapped zippers show more stitching but are common, durable, and easier to repair. Exposed zippers are intentionally visible and can be decorative on bags, jackets, and modern garments.
Size is another part of the mental model. Zipper size usually refers to the approximate width of the closed teeth in millimeters. A #3 zipper is lighter and narrower, common for skirts, dresses, pouches, and lightweight garments. A #5 zipper is more substantial and works for jackets, bags, cushions, and medium-heavy projects. Larger sizes such as #8 or #10 are used for heavy coats, luggage, gear, and statement designs. Bigger is not always better. A heavy zipper can distort lightweight fabric, while a delicate zipper can fail in a high-stress bag.
Length matters, but it is usually the easiest part to adjust. Many closed-end zippers can be shortened from the top by sewing new stops and trimming the excess. Some can be shortened from the bottom, depending on type and project. Separating zippers are less forgiving because the box and pin must stay at the bottom. For jackets and coats, buy the finished length you need or adjust the garment design to suit an available separating zipper.
Here is a quick comparison for choosing common zipper types:
| Zipper type | Best for | Main advantage | Watch out for |
|---|---|---|---|
| Coil | Dresses, pouches, cushions, bags, curved seams | Flexible and versatile | Can look less structured on rugged items |
| Invisible | Dresses, skirts, formalwear | Disappears into a seam | Needs careful pressing and an invisible zipper foot |
| Metal | Jeans, jackets, bags | Strong and decorative | Can be heavy or scratchy on delicate fabric |
| Molded plastic | Jackets, outerwear, kids’ items | Lightweight strength | Teeth are bulkier and harder to shorten neatly |
| Separating | Jackets, hoodies, coats | Opens completely | Must be chosen in the correct finished length |
| Two-way separating | Long coats, activewear, bags | Opens from top or bottom | Requires careful orientation before sewing |
Finally, connect the zipper to the fabric. Lightweight cotton, rayon, silk, and dress fabrics usually need lighter zippers. Denim, canvas, upholstery fabric, and coating need stronger zippers. Stretch fabric may need stabilization so the zipper area does not ripple. Slippery fabric may need basting or temporary tape. Thick fabric may need grading, trimming, or a wider seam allowance so the zipper lies flat.
Thinking this way helps you choose and sew zippers with fewer surprises. Instead of asking, “What zipper do I have?” ask, “What does this project need the zipper to do?”
Practical Guidance
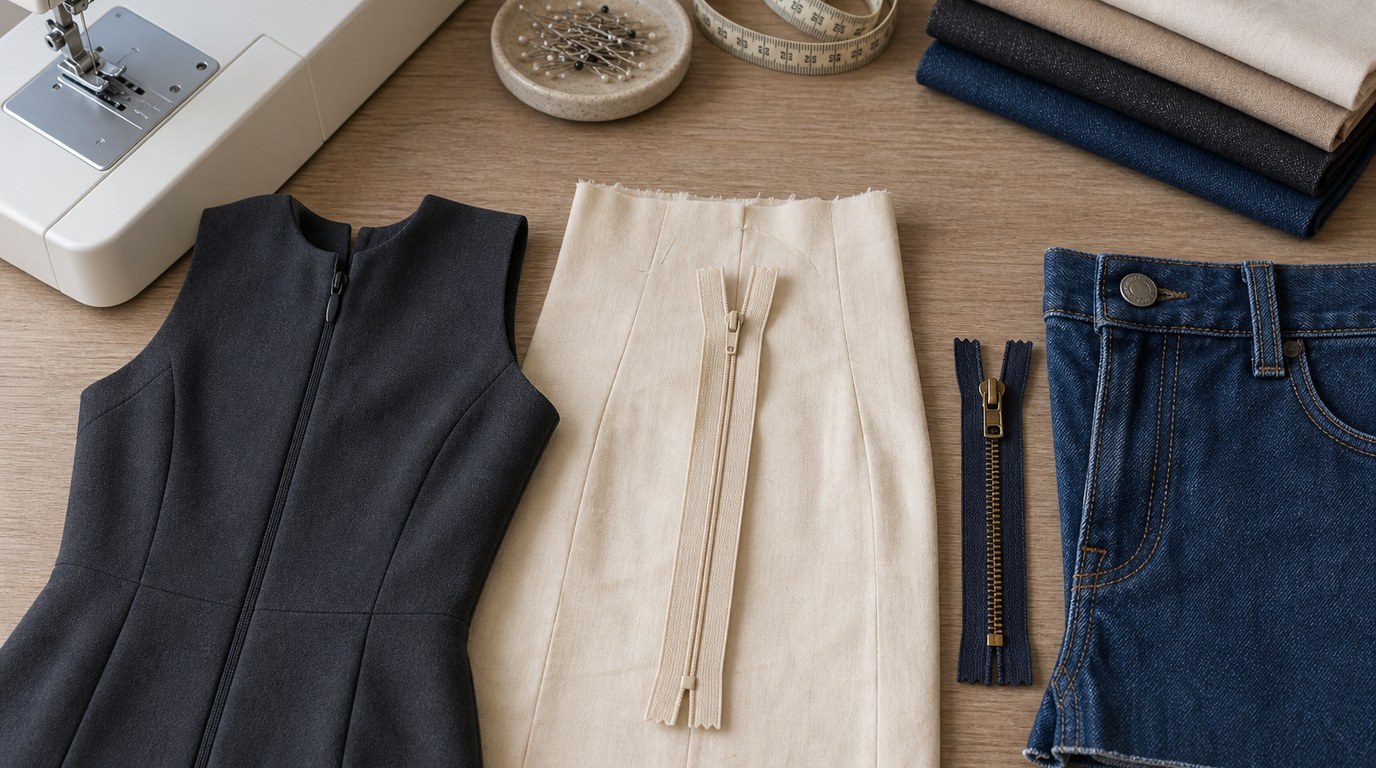
To choose a zipper, begin with the project category. For a dress, skirt, or fitted garment, use an invisible zipper when you want the cleanest finish, or a regular coil zipper for a centered or lapped application. For jeans, choose a short metal jeans zipper or sturdy coil zipper designed for fly fronts. For a jacket, coat, or hoodie, choose a separating zipper. For a cushion, pouch, or tote, coil zippers are usually practical because they are flexible, easy to sew, and available by the yard. For a heavy bag, consider a #5 or larger coil, molded plastic, or metal zipper.
Match zipper weight to fabric weight. A lightweight blouse or lined dress does not need a chunky zipper. A canvas duffel should not rely on a tiny dress zipper. If you are unsure between two sizes, lay the zipper on the fabric and imagine the finished use. Does it bend naturally? Does it overpower the fabric? Does the pull feel easy to grip? A zipper should support the project without becoming the project unless you want an exposed decorative feature.
Color can either blend or contrast. For hidden and invisible zippers, match the fabric as closely as possible, especially the tape and pull. For exposed zippers, choose a deliberate contrast: brass teeth on denim, black tape on canvas, or a bright zipper on a pouch. If the exact color is unavailable, choose slightly darker rather than lighter for most garments, because darker usually recedes into a seam.
Before sewing, prepare the zipper area. Press the seam allowance accurately. Interface or stabilize the zipper opening if the fabric is stretchy, loosely woven, delicate, or likely to ripple. On knits, a narrow strip of fusible knit interfacing or stay tape can make the zipper easier to control. On slippery fabric, hand basting or washable glue stick can prevent shifting. On bulky fabric, reduce seam bulk before topstitching.
Use the right presser foot. A standard zipper foot lets the needle stitch close to the teeth while the foot rides beside them. An invisible zipper foot has grooves that roll the zipper coil open so you can stitch very close to it. A regular zipper foot can work for invisible zippers in a pinch, but the results are often less hidden. For bag zippers or bulky projects, a narrow zipper foot may give better control.
Installation method depends on the finish you want. A centered zipper has equal fabric flaps on both sides and is beginner-friendly. A lapped zipper hides one side under a flap and is traditional for skirts and some dresses. An invisible zipper is sewn before the seam below it is closed and needs accurate alignment at the top edges. A fly zipper has its own sequence with a fly shield and topstitching. A separating zipper is usually sewn into front edges, often between a garment layer and facing or lining.
Several small habits improve results. Open the zipper when sewing near the pull, stop with the needle down, lift the presser foot, move the pull past the foot, then continue. Do not stitch so close to the teeth that the slider catches the thread. Backstitch securely at stress points, especially the bottom of a zipper opening and the top edges of bags. Press carefully, using a press cloth if the teeth are plastic or the fabric is sensitive to heat.
If a zipper waves or ripples, the fabric may have stretched during sewing. Stabilize the seam, reduce presser foot pressure if your machine allows it, and avoid pulling the fabric. If the zipper sticks, check for thread caught in the teeth, stitching too close to the coil, or a bent tooth. If the slider comes off a closed-end zipper, you may need to replace the stop or the whole zipper. If the pull tab breaks but the slider works, you can often replace the pull with a zipper charm, ring, or replacement tab.
Zipper care is simple. Keep teeth free of lint and loose thread. Close zippers before washing garments or bags so the teeth do not snag other fabric. Use gentle heat when pressing near plastic teeth or invisible coils. For outdoor or heavy-use items, occasional cleaning around the teeth helps the slider move smoothly. Do not force a stuck zipper; find the obstruction first.
Use this checklist before buying or sewing:
- Does the project need a closed-end, separating, or two-way zipper?
- Should the zipper be hidden, subtle, or decorative?
- Is the zipper weight suitable for the fabric?
- Is the length correct, or can it be shortened safely?
- Do you need a regular, invisible, or narrow zipper foot?
- Should the fabric be interfaced before installation?
- Will the zipper open smoothly after seam allowances and lining are added?
For beginners, the easiest practice projects are zip pouches, cushion covers, and simple skirts with centered zippers. These teach alignment, topstitching, and sewing near the teeth without the pressure of a complex garment. Once those feel comfortable, invisible zippers, fly fronts, lined bags, and separating jacket zippers become much easier to understand.
FAQ
What Should a Beginner Know First About Everything About Zippers?
A beginner should know that zipper choice depends on the project. First decide whether the zipper must open completely, whether it should show or hide, and how strong it must be. Then choose the type, size, length, and color that match the fabric and use.
What Matters Most When Evaluating Everything About Zippers?
The most important factors are zipper type, weight, length, and installation method. A beautiful zipper can still be wrong if it is too heavy for the fabric, too weak for the item, or unable to open the way the project requires.
What Mistakes Should Readers Avoid with Everything About Zippers?
Avoid choosing by color and length alone. Also avoid sewing too close to the teeth, skipping stabilization on stretchy fabric, using a non-separating zipper for a jacket, or forcing a stuck slider. Most zipper problems come from mismatch, shifting fabric, or rushed installation.
What Is the Next Logical Step After Learning About Everything About Zippers?
The next step is to sew a low-risk sample. Try a centered zipper on scrap fabric, then a zip pouch, then an invisible zipper. Practicing on samples helps you understand spacing, pressing, topstitching, and slider movement before sewing into a finished project.