A felt kite headband is a cheerful beginner sewing project for kids, classrooms, spring events, dress-up days, or handmade party accessories. You’ll make a small stuffed felt kite, decorate the front, add a ribbon or felt tail with tiny bows, then attach it to a child-sized headband so it sits comfortably on top or slightly to one side. This project uses simple shapes, easy hand stitches, and forgiving felt that does not fray. Plan on about 45 to 75 minutes, depending on how much decorating you add. Younger children can help choose colors, cut simple pieces with supervision, or practice large stitches, while an adult can handle sharp scissors, needles, and final attachment.
What You’ll Make
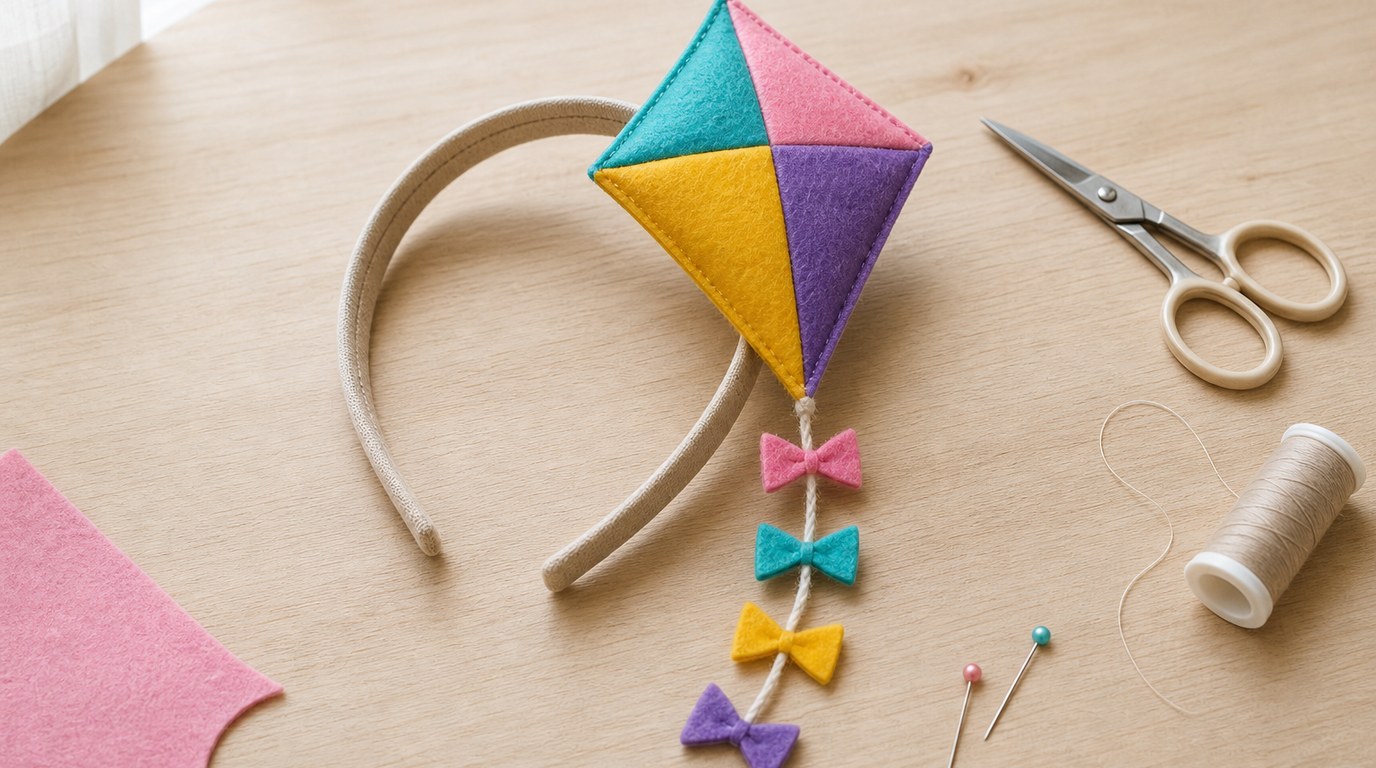
The finished headband has a soft diamond-shaped kite as the main decoration, with a short tail trailing down from the bottom point. The kite can be flat or lightly stuffed for a puffier look. Felt is ideal because it holds its shape, comes in bright colors, and hides small stitching mistakes better than woven fabric. A simple plastic, fabric-covered, or elastic headband becomes the base. The goal is a lightweight decoration that looks playful without feeling heavy or scratchy during wear.
Skill Level, Time, and Kid-friendly Setup
This is a beginner-friendly hand-sewing project. Kids who are new to sewing can practice threading a needle, tying knots, and making a running stitch or whipstitch. An adult should supervise all cutting and needle use, especially with younger children.
Set up a clear table with good lighting, a small bowl for pins and needles, and a scrap felt piece for practice stitches. If working with a group, pre-cut the headband attachment strips and kite backs to save time. For very young crafters, use fabric glue for decorations and reserve sewing for the adult-led assembly.
Supplies and Tools
Choose medium-stiff craft felt for the kite so it stands up neatly. Softer felt works too, but it may need a little stuffing or a hidden support strip behind it.
| Supply or Tool | Amount | Notes and Substitutions |
|---|---|---|
| — | —: | — |
| Felt for kite | 2 pieces, about 5 x 5 inches | Use one color for front and back or two contrasting colors |
| Felt scraps | Small pieces | For stripes, dots, bows, or patches |
| Child-sized headband | 1 | Plastic, fabric-covered, or elastic |
| Embroidery floss or sewing thread | 1–2 colors | Floss gives bolder stitches; thread is subtler |
| Hand sewing needle | 1 | Use a blunt tapestry needle only if holes are pre-punched |
| Ribbon, yarn, or felt strip | 8–12 inches | For the kite tail |
| Polyester stuffing | Small pinch | Optional, for a puffy kite |
| Fabric glue | Optional | Useful for child-made decorations |
| Scissors | 1 pair | Sharp fabric scissors cut felt cleanly |
| Paper, pencil, ruler | 1 each | For making the kite template |
| Clips or pins | A few | Clips are safer for kids than pins |
Cut the Felt Kite Pieces
Start by making a paper template. Draw a diamond shape about 4 inches tall and 3 inches wide. To keep it even, draw a vertical line first, then mark the widest point slightly above the center. Connect the top, side points, and bottom with straight lines.
Cut out the paper kite and place it on felt. Trace around it twice, once for the front and once for the back. Cut slowly with long, smooth scissor strokes so the edges stay neat. If a child is cutting, make the kite slightly larger; bigger felt shapes are easier to handle. Keep the paper template nearby in case you want to make matching kites for siblings or a classroom set.
Decorate the Front of the Kite
Decorate the front kite piece before sewing the two layers together. This keeps the work flat and easier for small hands. Add felt stripes, a center cross, polka dots, stars, initials, or a tiny heart. You can sew these details with a few straight stitches or attach them with small dots of fabric glue.
For a classic kite look, cut two thin felt strips: one from top to bottom and one from side to side. Place them in a cross shape on the front. Trim the ends so they follow the kite edges. Let glued pieces dry before sewing, or they may shift while you handle the felt.
Sew the Kite Together
Place the decorated front kite piece on top of the plain back piece, with the decorated side facing out. Line up the edges and hold them with clips or a couple of pins. Thread your needle and tie a knot at the end.
Begin near the bottom point, leaving a small gap if you plan to add stuffing. Sew around the edge using a whipstitch or running stitch about 1/8 inch from the edge. A whipstitch wraps over the edge and is easy for beginners to see. A running stitch goes in and out through both felt layers and gives a neat dashed line.
When you are about 1 inch from where you started, pause. Add a small pinch of stuffing if you want the kite to look slightly raised. Do not overfill it; a bulky kite will lean forward on the headband. Continue stitching closed, then knot securely on the back. Hide the thread tail by passing the needle between the felt layers before trimming.
Add the Kite Tail and Bows
Cut an 8- to 12-inch piece of narrow ribbon, yarn, or a thin felt strip for the tail. Shorter tails are better for toddlers or active play because they are less likely to tangle. Place one end of the tail at the bottom point of the kite, between the felt layers if you left a gap, or against the back if the kite is already sewn shut.
Secure it with several small stitches. If using glue, add stitches too for durability. To make bows, cut two or three small rectangles of felt, pinch each in the center, and wrap with thread. Stitch or glue the bows along the tail, spacing them so the tail still hangs naturally.
Attach the Felt Kite to the Headband
Decide where the kite should sit before attaching it. Centered on top looks bold and costume-like, while a side placement feels lighter and often stays balanced better. Have the child try on the plain headband and mark the spot with a small piece of tape.
For the strongest sewn attachment, cut a felt strip about 1 inch wide and 2 inches long. Place the kite against the outside of the headband. On the inside of the headband, position the felt strip like a bridge, with its ends touching the back of the kite. Stitch the strip ends to the kite back, trapping the headband between the strip and kite. Do not sew through a hard plastic headband.
For a fabric-covered or elastic headband, you can stitch directly through the headband and the kite back. Make several tight stitches in a small square or X shape. If you use glue, apply it between the kite and headband, then add a felt backing strip for extra hold. Let it dry completely before wearing.
Fit, Comfort, and Finishing Checks
Before calling the project finished, check the inside of the headband. Trim loose threads and cover scratchy knots with a small felt patch if needed. Make sure the kite does not wobble too much or slide along the band. If it leans forward, add a second backing strip or move the kite slightly lower on the side. Check that the tail is not long enough to catch on clothing, chair backs, or playground equipment.
Easy Variations for Different Kids and Occasions
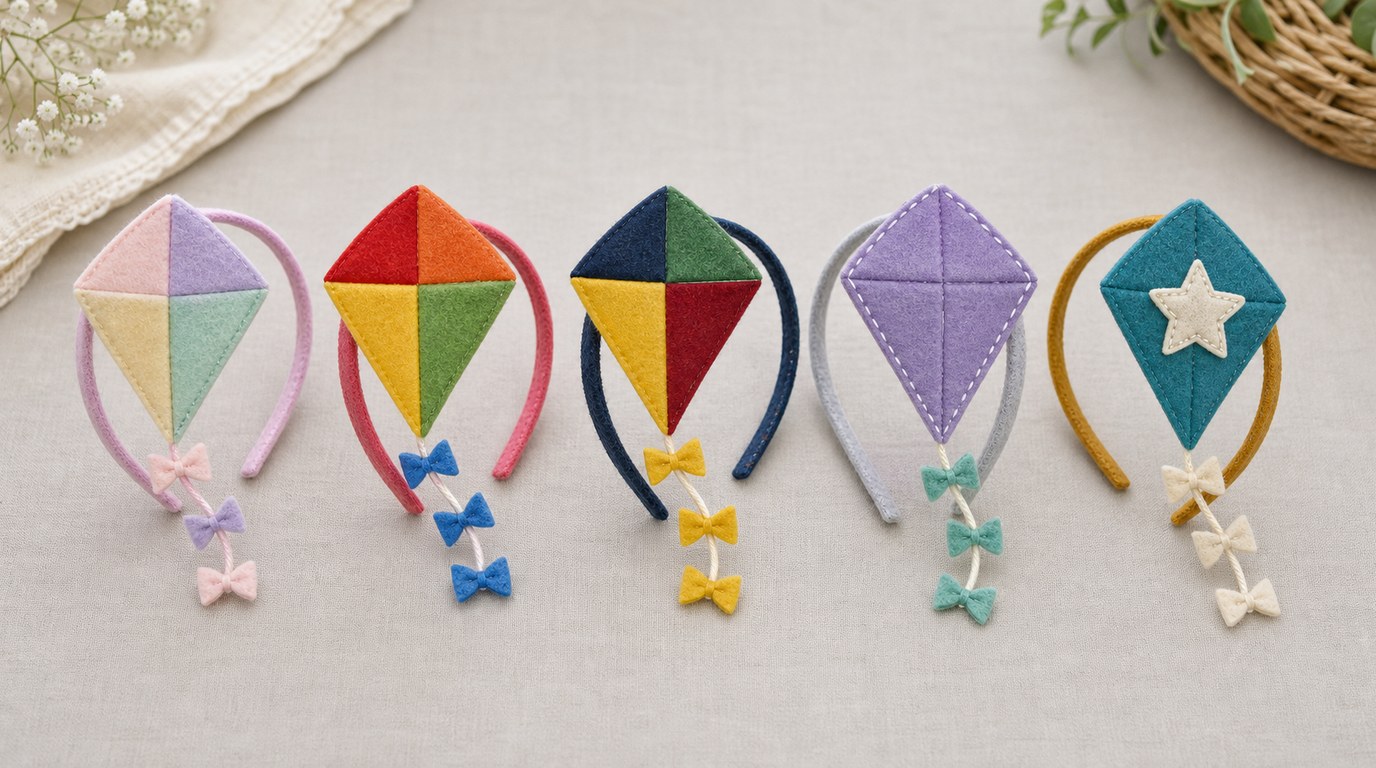
Use pastel felt for spring, rainbow colors for a birthday, or school colors for a classroom spirit craft. Add a child’s initial to the kite, or let each child choose a different tail color. For a no-stuff version, sew the kite flat and add bold decorative stitching around the edge. For a quicker group project, adults can pre-sew the kites and let kids decorate and choose the tail bows.
FAQ
What Should a Beginner Know First About Felt Kite Headband for Kids Sewing Project?
Start with felt because it does not fray and is easy to cut into simple shapes. Keep the kite small and lightweight so it stays comfortable on the headband. Practice a few stitches on scrap felt before sewing the real kite pieces together.
What Matters Most When Evaluating Felt Kite Headband for Kids Sewing Project?
The most important points are comfort, secure attachment, and safe construction. The kite should not feel heavy, scratch the child’s head, or wobble loosely. Check the backing strip, knots, tail length, and any glued decorations before the headband is worn.
What Mistakes Should Readers Avoid with Felt Kite Headband for Kids Sewing Project?
Avoid making the kite too large or overstuffed, because it may flop forward. Do not leave sharp thread ends, exposed pins, or scratchy knots inside the headband. Also avoid relying only on glue for parts that will be pulled, such as the tail or attachment point.
What Is the Next Logical Step After Learning About Felt Kite Headband for Kids Sewing Project?
After making one headband, try repeating the same basic method with other felt shapes, such as clouds, stars, flowers, or balloons. Keep the construction similar: cut two felt layers, decorate the front, sew the edges, then attach the shape securely to a comfortable headband.