You can make a simple sewing clip wrist holder with two small fabric pieces, a bit of padding, and an adjustable wrist strap. The easiest beginner version is a soft fabric band with a stuffed or padded top “clip pad” where clips can grip securely. Measure your wrist, cut a strap that fits with overlap for a closure, sew the pad, attach it to the strap, and test it with a few clips before finishing. If you keep the top slightly firm and the fit snug but comfortable, you’ll end up with a handy wearable clip station that keeps clips close while you sew, bind, or quilt.
Quick Answer
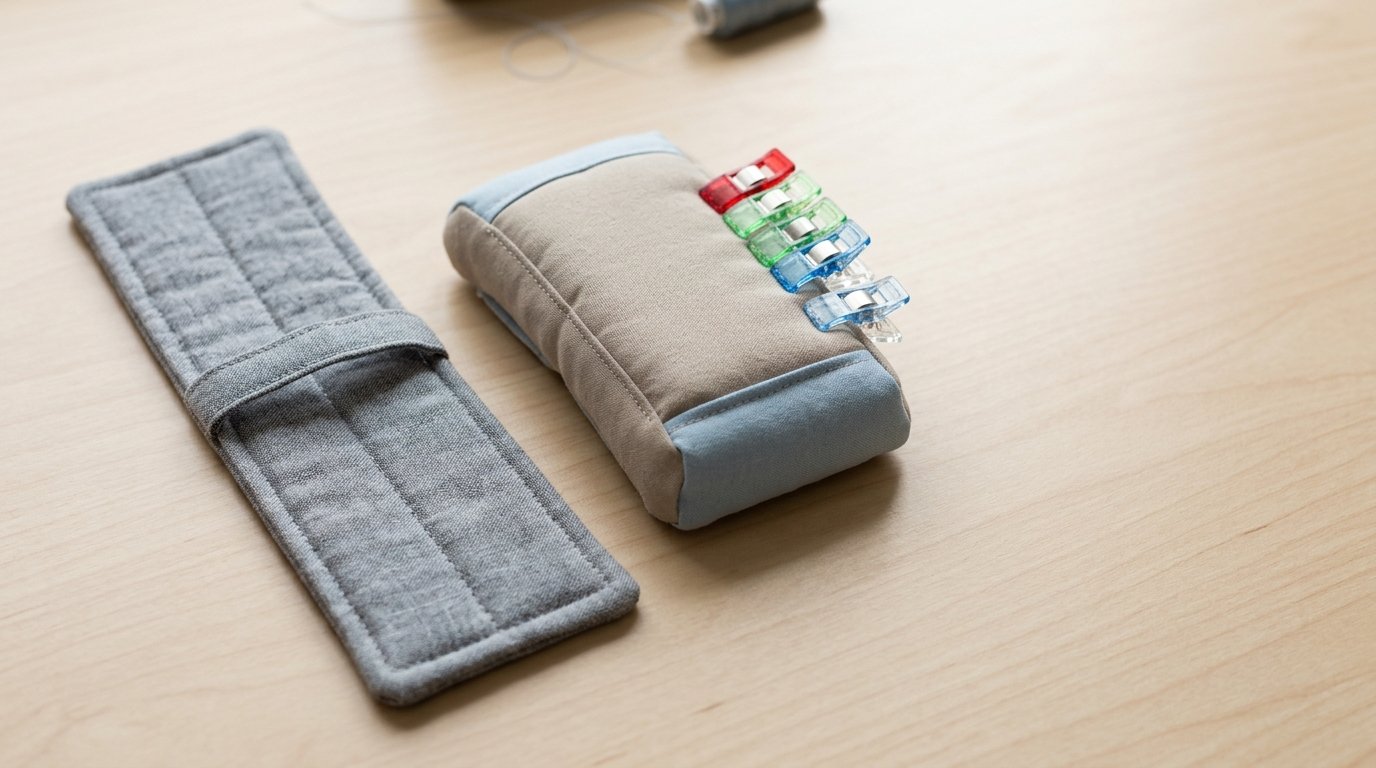
The simplest way to make a nifty wrist holder for your sewing clips is to sew a wrist band plus a small padded fabric rectangle on top. The band wraps around your wrist, and the padded top gives sewing clips enough thickness to hold on without sliding off.
For a beginner-friendly build, use quilting cotton with light interfacing or felt inside the clip area. Add hook-and-loop tape for the easiest adjustable closure.
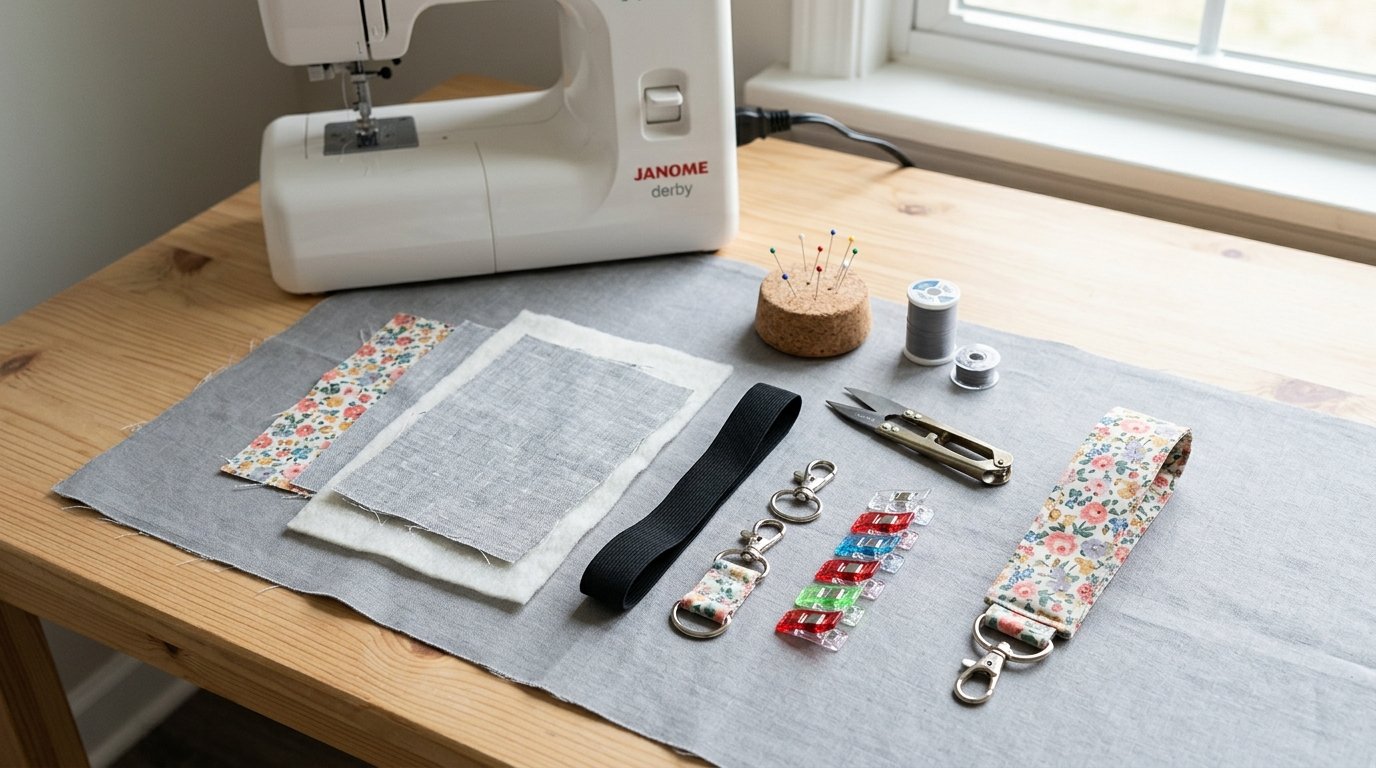
| Item | Recommendation | Beginner note |
|---|---|---|
| Main fabric | Quilting cotton or canvas | Cotton is easiest to sew |
| Inner support | Felt, fleece, or fusible interfacing | Helps clips grip better |
| Closure | Hook-and-loop tape | Simplest adjustable option |
| Strap cut size | Wrist measurement + 2 to 3 inches by 3 inches | Extra length allows overlap |
| Clip pad cut size | 3 x 4 inches, cut 2 | Easy size for most hands |
Basic process: cut the band and pad, add stabilizer, sew and turn the pieces, attach the pad to the band, add the closure, then test the fit with clips on your wrist. If the holder twists, widen the band. If clips slip, add more firmness to the top pad.
How to Think About This Topic
A sewing clip wrist holder works best when you think of it as two jobs in one project: a comfortable wrist band and a reliable clip-gripping surface. If one part is wrong, the whole tool feels awkward. A pretty band that spins around your wrist is annoying. A secure band with a floppy top will not hold clips well. Keeping both functions in mind makes the project much easier.
For most beginners, the clip surface matters more than decoration. Sewing clips need a layer they can pinch against. Very thin fabric collapses, and very bulky stuffing can make clips tilt. A lightly padded, slightly firm top is the sweet spot. Felt, fusible fleece, or two layers of cotton plus interfacing usually work well.
The wrist fit is the next priority. You do not want this holder hanging loose like a bracelet. It should sit more like a soft watch band: close enough to stay in place, loose enough to bend your hand, pin, clip, and guide fabric comfortably. That is why adjustable closure is smart, especially if you wear it over sleeves sometimes and on bare skin other times.
This project also helps to think through before cutting. Ask yourself three practical questions:
- How many clips do you want to hold?
A small pad is enough for everyday garment sewing. A wider pad is useful for quilting or binding.
- Will you wear it for short tasks or longer sessions?
For long sewing sessions, softer edges and a wider strap feel better.
- Do you want quick construction or a polished finish?
A turned cotton band looks neat. A felt-backed version is even faster and still works.
To tie this back to why you searched for this project: you want a wearable clip holder that is useful at the machine or ironing board, not just cute. So every choice should support that goal. Choose stable fabric over slippery fabric. Choose comfort over excess bulk. Choose a closure you can fasten one-handed if possible. When you build around function first, the project stays beginner-friendly and the finished holder actually earns a place in your sewing routine.
Practical Guidance
Use this one main tutorial path for the easiest successful build.
1. Measure and cut.
Measure your wrist where you want the holder to sit. Add 2 to 3 inches for overlap. Cut one strap rectangle that length by 3 inches wide. Cut two clip pad rectangles at 3 x 4 inches. Cut one matching piece of felt, fleece, or interfacing slightly smaller than the clip pad.
2. Prepare the strap.
Fold the strap lengthwise, right sides together, and sew around it, leaving a small turning gap if needed. Trim corners, turn right side out, and press. If you want an even faster finish, you can fold raw edges inward, topstitch around the whole strap, and skip a more complicated turning method.
3. Make the clip pad.
Layer the two pad pieces right sides together, with the support layer added to one wrong side. Sew around the edges, leave a gap, turn, and press. Topstitch around the edge. This topstitching helps flatten the pad and gives clips a firmer bite.
4. Attach the pad to the strap.
Center the pad on the top side of the strap. Sew around the pad close to the edge. For extra stability, stitch one line down the middle or make a simple X. This prevents the pad from puffing up too much and helps clips sit flatter.
5. Add the closure.
Sew hook-and-loop tape to the strap ends so the band can overlap and adjust. For example, put the scratchy side on the underside of one end and the soft side on the top of the opposite end. Test before sewing permanently so the overlap wraps the correct direction for your dominant hand.
6. Load and test.
Clip on 4 to 8 sewing clips and wear the holder while moving fabric around. If it rotates, tighten the band or widen the strap next time. If clips feel loose, add another layer of interfacing or use a denser top fabric.
A few practical examples help:
- If you sew garments: keep the pad moderate in size so it does not bump your machine table.
- If you quilt or bind: make the pad wider, about 3 1/2 x 5 inches, so you can hold more clips.
- If you dislike wrist bulk: use a narrower strap but keep the pad firm.
- If you want a quick gift: use pretty cotton scraps and matching hook-and-loop tape.
Simple variations are easy without changing the whole build. Use canvas or denim for a sturdier holder. Round the pad corners for a softer look. Add a little quilting to the top pad for extra structure. Sew a second small pad on the side if you like sorting clip sizes.
Troubleshooting is simple too. If the holder feels scratchy, trim seam bulk and press well. If the edges curl, topstitch again closer to the edge. If the closure peels up, sew a larger piece of hook-and-loop tape. If the holder feels heavy with many clips, reduce pad size or use lighter materials.
The goal is not perfection. It is making a comfortable wrist tool that keeps your clips within easy reach while you sew.
FAQ
What Fabric Works Best for a Sewing Clip Wrist Holder?
Quilting cotton is the easiest choice for beginners because it is stable, easy to press, and simple to sew. If you want a sturdier holder, use canvas or denim. Pair thin fabric with felt, fleece, or interfacing so clips have enough firmness to grip.
How Tight Should the Wrist Holder Be?
It should feel secure, like a soft watch band, not loose like a bracelet. You should be able to bend your wrist comfortably and slide one finger under the strap. If it spins while you move, it is too loose for practical sewing use.
Can I Make This Without a Sewing Machine?
Yes. You can hand sew the whole project with small backstitches and a whipstitch or ladder stitch to close turning gaps. Felt is especially beginner-friendly for hand sewing because it does not fray much and can simplify the edge finishing.
Will Sewing Clips Fall Off While I Work?
Not usually if the top pad is firm enough and the holder stays snug on your wrist. Clips tend to fall off when the surface is too thin, too slippery, or too floppy. Adding interfacing, felt, or an extra fabric layer fixes that problem.
What Is the Easiest Closure for Beginners?
Hook-and-loop tape is the easiest because it is adjustable, fast to sew on, and simple to open and close with one hand. Snaps and buttons can work, but they require more precise placement and give you less flexibility in fit.