Self-binding is a fast way to finish a quilt using the backing fabric as the binding. Instead of sewing on separate binding strips, you cut the backing larger than the quilt top, quilt the layers first, then fold that extra backing over the raw edge and stitch it down.
The method is beginner-friendly, but it depends on accuracy more than speed. If the backing overhang is uneven, the finished border will look uneven too. The basic order is simple: choose your binding width, cut the backing larger, quilt the sandwich, trim the quilt square, fold the backing twice, miter the corners, and sew it in place. It works especially well for baby quilts, lap quilts, and casual utility quilts.
What Self-binding Means and When to Use It
A self-bound quilt uses the backing fabric to wrap and finish the edges. Instead of making separate binding strips, you leave extra backing all the way around the quilt, fold that fabric over the trimmed edge, and stitch it to the front.
This technique is best when you want a clean finish with fewer steps. It is especially useful for baby quilts, stroller quilts, picnic quilts, and lightweight throws. It also works well when you want the backing fabric to show as a simple border on the front.
Self-binding is less ideal for heirloom quilts, very thick quilts, or projects that will get hard wear for years. Traditional double-fold binding is usually sturdier. A good mental model is this: self-binding is simpler and faster, but it gives you less structure and slightly less durability than separate binding.
Supplies and Setup for a Self-bound Quilt
You only need a few tools:
- Finished quilt top
- Backing fabric cut larger than the top
- Batting
- Rotary cutter, ruler, and cutting mat
- Pins or clips
- Iron
- Sewing machine and thread
- Walking foot, if available
Before you begin, press the quilt top and backing so they lie flat. Make sure the backing is square and large enough on all sides. If the backing is pieced, keep those seams pressed flat so the folded edge is not bulky.
How Much Bigger the Backing Should Be
The backing must extend past the trimmed quilt top and batting far enough to fold under once and then wrap to the front. For most beginners, a finished self-binding about 1/2 inch wide is easiest to handle and sew.
Use this quick guide:
| Desired finished binding on front | Backing overhang past trimmed quilt edge |
|---|---|
| — | —: |
| 3/8 inch | 1 1/4 inches |
| 1/2 inch | 1 1/2 inches |
| 5/8 inch | 1 3/4 inches |
That extra fabric accounts for two folds: one to hide the raw edge, and one to bring the backing onto the front. If you leave too little, the fold will not cover evenly. If you leave too much, the border can look bulky. For a first self-bound quilt, 1 1/2 inches of overhang per side is a safe choice.
Prepare and Quilt the Sandwich Before Binding
Self-binding happens after quilting, not before. Layer the quilt sandwich with backing right side down, batting in the middle, and quilt top right side up. Baste the layers using your preferred method.
Quilt the project completely before working on the edge. Quilting shifts fabric and batting slightly, so trimming and folding must come afterward. If you try to form the binding first, the edge may pucker or end up uneven.
When quilting is done, spread the quilt flat and check the edges. Smooth out any distortion now, because ripples near the edge will show in the finished binding.
Trim the Quilt Evenly for a Clean Self-binding Edge
This is the step that determines whether the finished border looks even. Trim the quilt top and batting first, leaving the extra backing untouched. Use a ruler to make sure each side is straight and the corners are square.
Next, measure the backing overhang from the trimmed quilt edge outward. Mark the same distance all around the quilt, such as 1 1/2 inches if you want a finished 1/2-inch self-binding. Then trim the backing to that measurement.
Do not assume the extra backing stayed even during quilting. Measure in several places on every side. Small differences at this stage become obvious once the fabric is folded to the front.
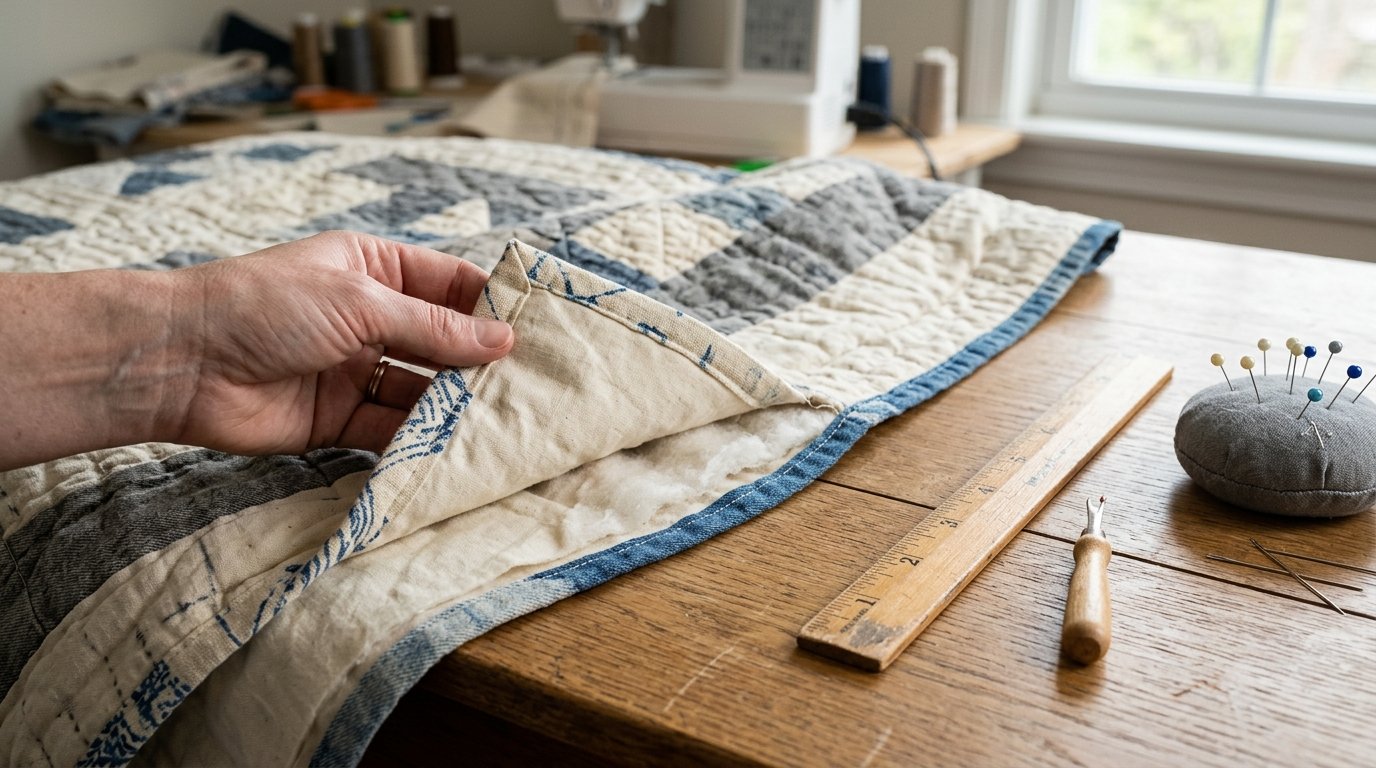
Fold the Backing to Create the Self-binding
Work one side at a time.
- Place the quilt front down.
- Fold the raw edge of the backing inward by roughly half the overhang amount and press. This hides the raw edge.
- Fold the backing again over the trimmed quilt edge and onto the front.
- Adjust until the finished border is the width you want, usually about 1/2 inch.
- Clip or pin every few inches.
As you fold, keep checking the width from the inner folded edge to the quilt top. A seam gauge or small ruler helps. If one section is wider than another, refold it before sewing.
Press lightly as needed, but do not stretch the backing. The fold should wrap the edge smoothly, cover the batting completely, and lie flat on the front.
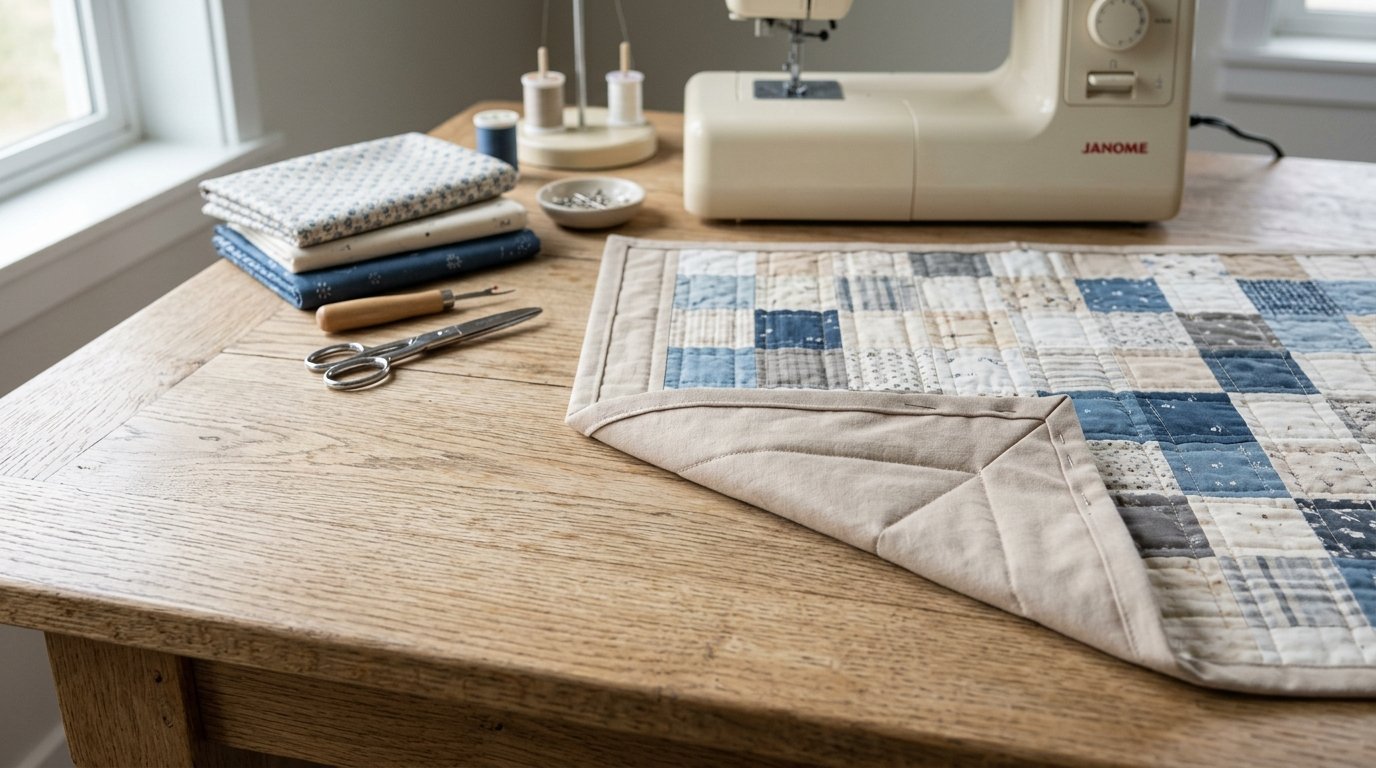
How to Miter the Corners Neatly
Corners are the trickiest part of self-binding, but they become easier if you think of them like wrapping a package. Fold one side, then fold the next side so both edges meet at the corner.
Open the corner slightly and shape the extra fabric into a diagonal 45-degree fold on the front. The two side folds should tuck underneath that diagonal line. Adjust until both adjoining edges are the same width and the corner lies flat without twisting.
Clip the miter securely before moving on. Then form all four corners before you stitch anything down. Seeing all of them at once makes it easier to spot one that looks bulky or uneven.
Sew the Self-binding in Place
Machine stitching is the easiest option for most beginners, though hand sewing also works. Sew from the front so you can watch the visible edge and keep the stitching straight.
Use a straight stitch about 1/8 inch from the inner folded edge of the binding. A walking foot can help the layers feed evenly. Sew slowly, removing clips as you go and smoothing the quilt without pulling it.
At each corner, stop with the needle down, pivot, and continue along the next side. If the miter shifts, lift the presser foot and fix it before sewing over the corner. Topstitching is usually easier than stitching in the ditch for a first self-bound quilt.
Common Self-binding Mistakes and How to Fix Them
If the binding width looks uneven, the backing was probably trimmed or folded inconsistently. Stop, measure again, and refold before sewing farther.
If the backing does not reach the front edge, the overhang was too small. You may be able to trim the quilt slightly smaller, but otherwise separate binding is the better fix.
Bulky corners usually mean excess fabric is trapped inside the miter. Open the corner, flatten the layers, and refold the diagonal crease. Ripples along the edge often come from stretching the backing while folding; repress and stitch again without tugging. If batting peeks out, trim the edge flush and refold before sewing.
When Self-binding Is Better Than Separate Binding
Self-binding is a smart choice when you want speed, simplicity, and a soft utility finish. It is especially good for baby quilts, casual throws, and beginner projects where using the backing as the border makes sense.
Separate binding is usually better for high-wear bed quilts, show quilts, thick quilts, and projects where you want a very durable edge or strong design contrast. In short, self-binding is great for quick practical finishes, while separate binding gives you more control and toughness.
FAQ
How Wide Should Self-binding Be on a Quilt?
About 1/2 inch finished on the front is a good starting point. It is easy to fold and sew, and it looks balanced on most quilts. To get that width, leave about 1 1/2 inches of backing beyond the trimmed quilt edge.
Can You Self-bind a Quilt with Thick Batting?
Yes, but it is harder to fold neatly and the corners can become bulky fast. Self-binding works best with low- or medium-loft batting. For thick batting, separate binding is often easier and cleaner.
Is Self-binding Durable Enough for Everyday Use?
Usually yes for baby quilts, lap quilts, and throws, especially if the stitching is secure. Traditional double-fold binding is still the better choice for heavy long-term wear and frequent washing.
Do You Quilt Before or After Making Self-binding?
Quilt first. After quilting, trim the layers square, then fold the backing to make the self-binding. That order helps prevent puckers and keeps the finished edge even.
Can I Self-bind a Quilt by Hand Instead of Machine?
Yes. Fold and press the backing the same way, then hand stitch it down with small even stitches. It takes longer, but it gives you more control around corners and bulky spots.