Sewing a vinyl zippered bag is beginner-friendly if you handle vinyl differently from cotton. The project itself is simple: cut two rectangles, sew a zipper to the top edges, then stitch the sides and bottom to form a flat pouch. The extra challenge is material behavior. Vinyl can stick under the presser foot, show every needle hole, and feel bulky at zipper ends. A clear setup solves most of that. Use soft vinyl, clips instead of pins, a slightly longer stitch, and a zipper-first assembly order. The tutorial below walks through one easy pouch size so you can sew it cleanly without unnecessary seam ripping or guesswork.
Quick Answer
The easiest way to succeed with sewing a vinyl zippered bag is to keep the project plain and control three things from the start: vinyl thickness, machine feeding, and zipper orientation.
For a simple beginner pouch, use:
- 2 vinyl rectangles, 10 x 8 inches
- 1 zipper, 9 to 10 inches
- 1/4-inch seam allowance
- zipper opened partway before sewing the bag closed
Basic order:
- Cut the vinyl accurately
- Sew one bag piece to one side of the zipper
- Sew the second bag piece to the other zipper side
- Fold so right sides face
- Open the zipper halfway
- Sew sides and bottom
- Turn right side out and shape corners
The main difference from cotton is that vinyl is less forgiving. Pins leave permanent holes, heavy ironing can damage the surface, and unpicking often shows. That means good prep matters more than speed.
| Item | Best beginner choice | Why it helps |
|---|---|---|
| Vinyl | Soft garment-weight or soft marine vinyl | Easier to fold, turn, and sew |
| Needle | 90/14 or 100/16 denim or microtex | Pierces cleanly |
| Presser foot | Teflon, roller, or walking foot | Reduces sticking |
| Clips | Wonder clips or binder clips | No pin holes |
| Zipper | Nylon coil zipper | Flexible at bulky spots |
| Thread | Polyester all-purpose | Strong and smooth |
| Marking tool | Removable marker on wrong side or tape guides | Avoids visible marks |
Main takeaway: use soft vinyl, sew slowly, and install the zipper first. If the material feeds smoothly and the zipper is placed correctly, the rest of the bag is straightforward.
How to Think About This Topic
A helpful mental model is this: the bag shape is easy, but vinyl punishes careless handling. If you prevent sticking, avoid extra holes, and keep the assembly order simple, sewing a vinyl zippered bag becomes very manageable.
Beginners usually run into trouble for one of three reasons:
- the vinyl is too stiff or thick
- the machine is dragging the surface
- one zipper side gets sewn in the wrong direction
Solve those first and the project gets much easier.
How Vinyl Behaves
Vinyl does not feed like woven fabric. It can stick to the presser foot or machine bed, which causes uneven stitches, shifting layers, or wavy seams. The solution is usually not pulling harder. Instead, reduce friction with a Teflon, roller, or walking foot, and use a slightly longer stitch length, around 3.0 to 3.5 mm.
Vinyl also keeps every hole. That affects how you work:
- clip instead of pin
- test stitches on scraps first
- avoid resewing visible seams several times
- mark only on the wrong side or protective film
Bulk matters too. Near the zipper ends, you are sewing through vinyl, zipper tape, and seam allowances all at once. That is why a flat unlined pouch is the best starting project. It teaches zipper insertion and vinyl control without adding boxed corners, binding, or lining.
Why Zipper-first Construction Works
For this project, think of the zipper as the top edge of the bag. Once each vinyl piece is attached to one zipper side, the bag body is almost done. You simply fold the pieces together and sew the remaining edges.
That order fits the user’s goal: make a clean vinyl pouch with the least confusion.
Use these orientation cues:
- first seam: zipper right side down on the right side of the first vinyl piece
- second seam: free zipper edge right side down on the right side of the second vinyl piece
- after sewing, fold both vinyl pieces away from the zipper so the zipper sits at the top and the pouch opens like a book
If you picture that clearly before sewing, you avoid the most common beginner mistake: twisting one side so the bag will not open properly.
What “Controlled Handling” Means
With vinyl, guide the layers but do not force them. Pulling can distort the zipper, stretch the seam, or cause skipped stitches. A better goal is steady feeding, even seam allowance, and minimal unpicking.
That is really what matters most in sewing a vinyl zippered bag: not fancy shaping, but clean basics. A soft material, simple rectangle, and careful zipper placement will give you a much better result than trying to add too many features on the first attempt.
Practical Guidance
Use this step-by-step method for one standard flat pouch.
1. Cut and Prepare
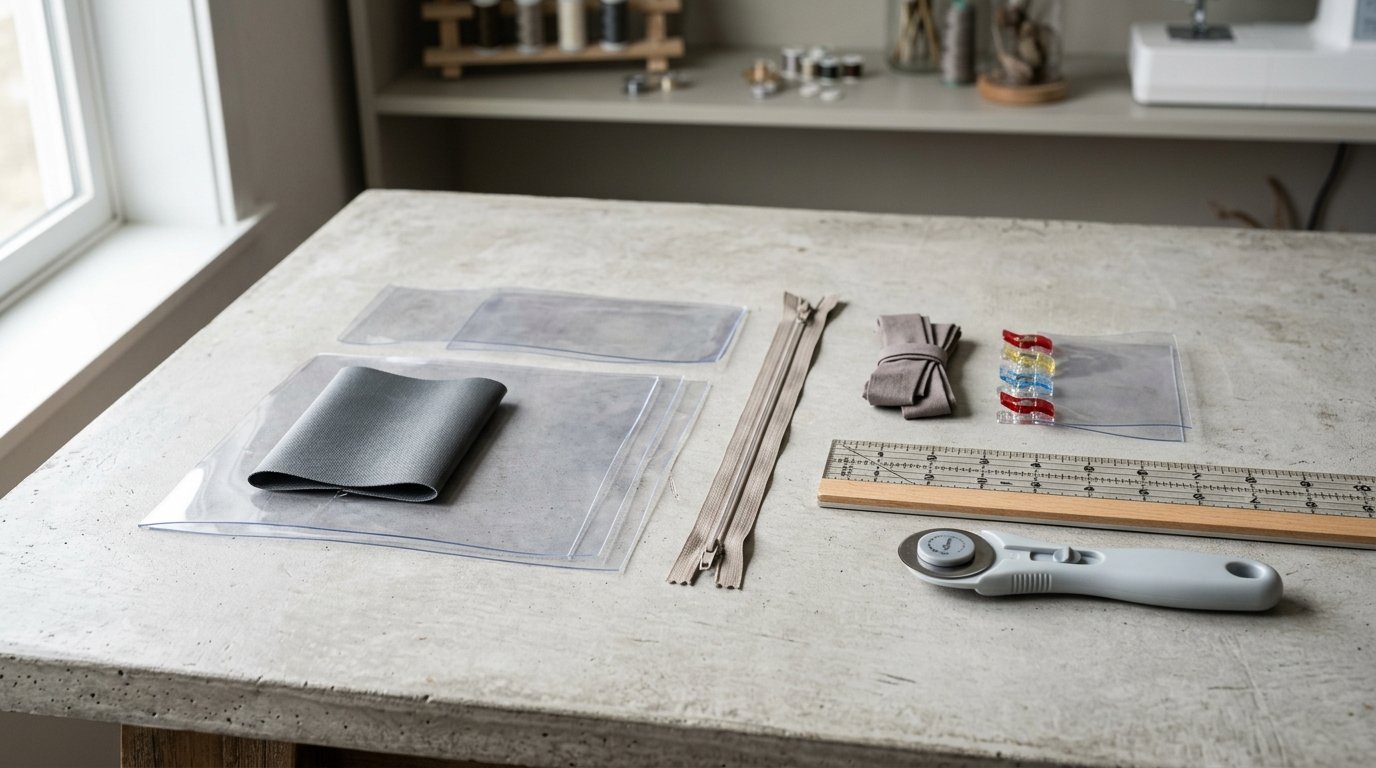
Cut:
- 2 vinyl rectangles, 10 x 8 inches
- 1 zipper, 9 to 10 inches
A zipper a little longer than the bag width is often easier to sew because the pull stays away from the thickest area.
Flatten folded vinyl gently under books if needed. Avoid direct ironing unless the manufacturer specifically says it is safe. If you must use heat, use a pressing cloth and very low heat on a test scrap first.
A rotary cutter usually gives the cleanest edges, but sharp scissors work too. Accuracy matters because vinyl is harder to ease into alignment later.
2. Set up Your Machine
Start with:
- fresh 90/14 or 100/16 needle
- polyester thread
- stitch length 3.0 to 3.5 mm
- Teflon, roller, or walking foot if available
Test on scraps of vinyl plus zipper tape. You want balanced stitches and smooth feeding.
If something goes wrong, use this logic:
- skipped stitches: change the needle first
- dragging or sticking: change the foot or add tissue paper
- waviness: sew slower and stop pulling the layers
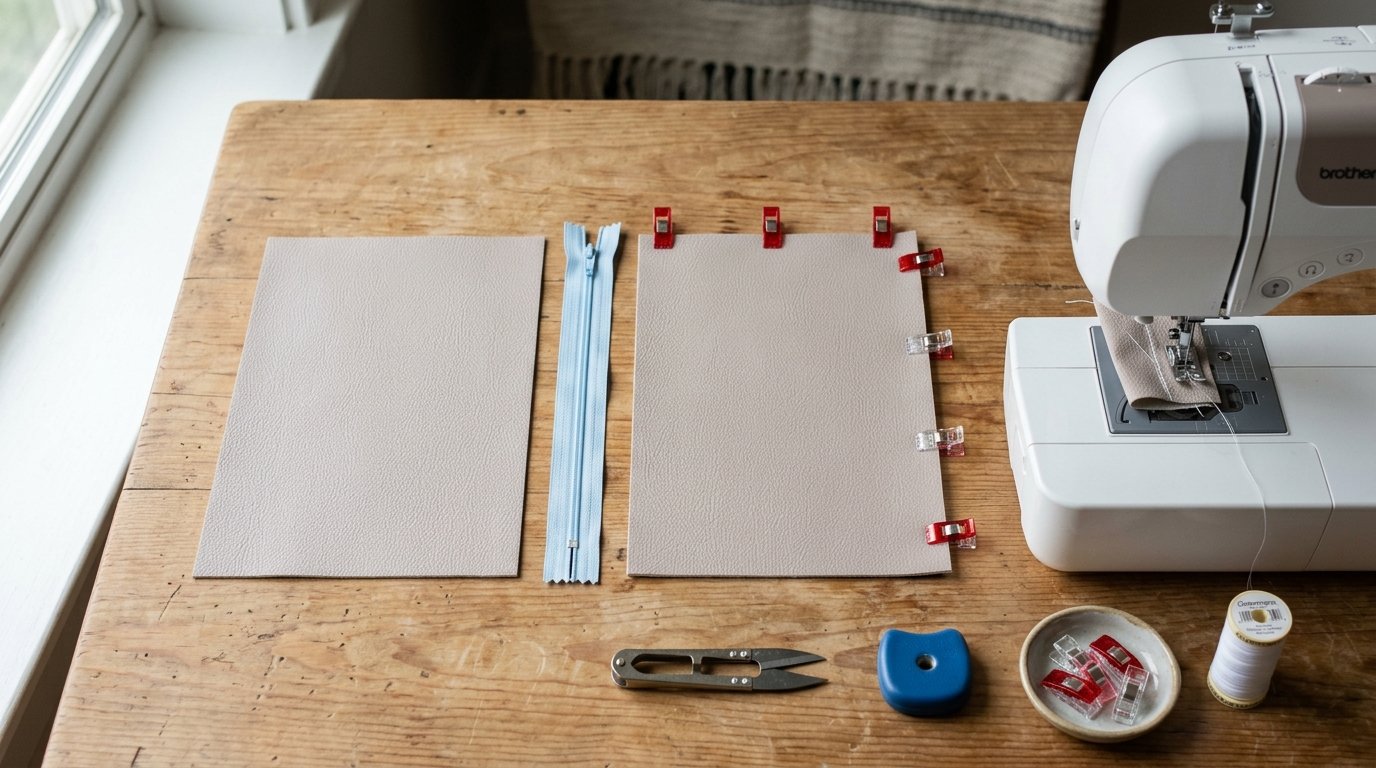
3. Sew the First Zipper Side
Place the first vinyl piece right side up.
Lay the zipper on top with the zipper right side down, aligning one long edge of the vinyl with one zipper tape edge. The zipper teeth should point toward the center of the bag.
Clip in place and sew close to the teeth with a zipper foot.
Then fold the zipper away so the zipper right side shows and the vinyl lies flat below it. If your machine handles it well, topstitch about 1/8 inch from the fold. This helps keep the edge neat and stops the lining-free pouch from rolling inward.
4. Sew the Second Zipper Side
Place the second vinyl piece right side up on the table.
Lay the free zipper tape edge on top of it, again with the zipper right side down against the vinyl right side. Now the two vinyl right sides should face each other, with the zipper between them at the top.
Clip and sew this seam.
Open the pieces away from the zipper. You should now see the zipper across the top with one vinyl panel hanging from each side. If you want, topstitch this side too.
Quick check: when the zipper closes, both vinyl right sides should be on the outside. If one is hidden inside, the second side was flipped wrong.
5. Sew the Bag Body
Open the zipper halfway before sewing the sides and bottom. Do not skip this step, or you will not be able to turn the bag right side out easily.
Fold the pouch so the vinyl right sides face each other. Match the sides and clip.
Sew:
- one side seam
- the bottom seam
- the other side seam
Use a 1/4-inch seam allowance. Backstitch lightly; too much stitching can create bulky perforations in vinyl.
If the zipper ends extend into the seam, sew slowly across them. A nylon coil zipper is easiest here. Over the thickest spots, the hand wheel may give you better control than the pedal.
6. Turn and Finish
Trim seam allowances slightly if the vinyl is bulky, but do not trim too close.
Turn the pouch right side out through the open zipper. Use a blunt tool to push out corners gently. Avoid anything sharp enough to puncture the vinyl.
Finger-press the seams into shape. If the bag needs help settling flat, place it under a light stack of books for a short time.
At this point, the pouch is finished.
7. Troubleshoot and Upgrade
Common problems and fixes:
- Vinyl sticks under the foot: use a Teflon foot, matte tape on the foot, or tissue paper as a temporary layer
- Skipped stitches: install a fresh needle
- Zipper ripples: do not stretch the zipper tape while sewing
- Top edge looks uneven: check that both zipper seams used the same seam allowance
- Corners feel bulky: trim a little more carefully or use softer vinyl next time
Once the basic pouch works, keep upgrades small:
- add a wrist strap in one side seam
- use a contrasting zipper
- make one side clear and one side opaque
- add a lining after you are comfortable with the unlined version
These changes build on the same process instead of turning the project into a different tutorial.
FAQ
What Should a Beginner Know First About Sewing a Vinyl Zippered Bag?
Know that vinyl is not hard, but it is unforgiving. Pins leave holes, seam ripping can show, and sticky surfaces need help feeding. Start with soft vinyl, a flat pouch, and clips instead of pins.
What Matters Most When Evaluating Sewing a Vinyl Zippered Bag?
The biggest factors are vinyl thickness, smooth machine feeding, and correct zipper orientation. If those three are right, the project is usually straightforward.
What Mistakes Should Readers Avoid with Sewing a Vinyl Zippered Bag?
Avoid thick stiff vinyl, dull needles, careless ironing, and pulling the material through the machine. Also avoid sewing the bag closed before opening the zipper partway.
What Is the Next Logical Step After Learning About Sewing a Vinyl Zippered Bag?
After you can sew a basic flat pouch cleanly, try adding a wrist strap, lining, or boxed corners. Those are natural next steps because they build on the same zipper and vinyl-handling skills.