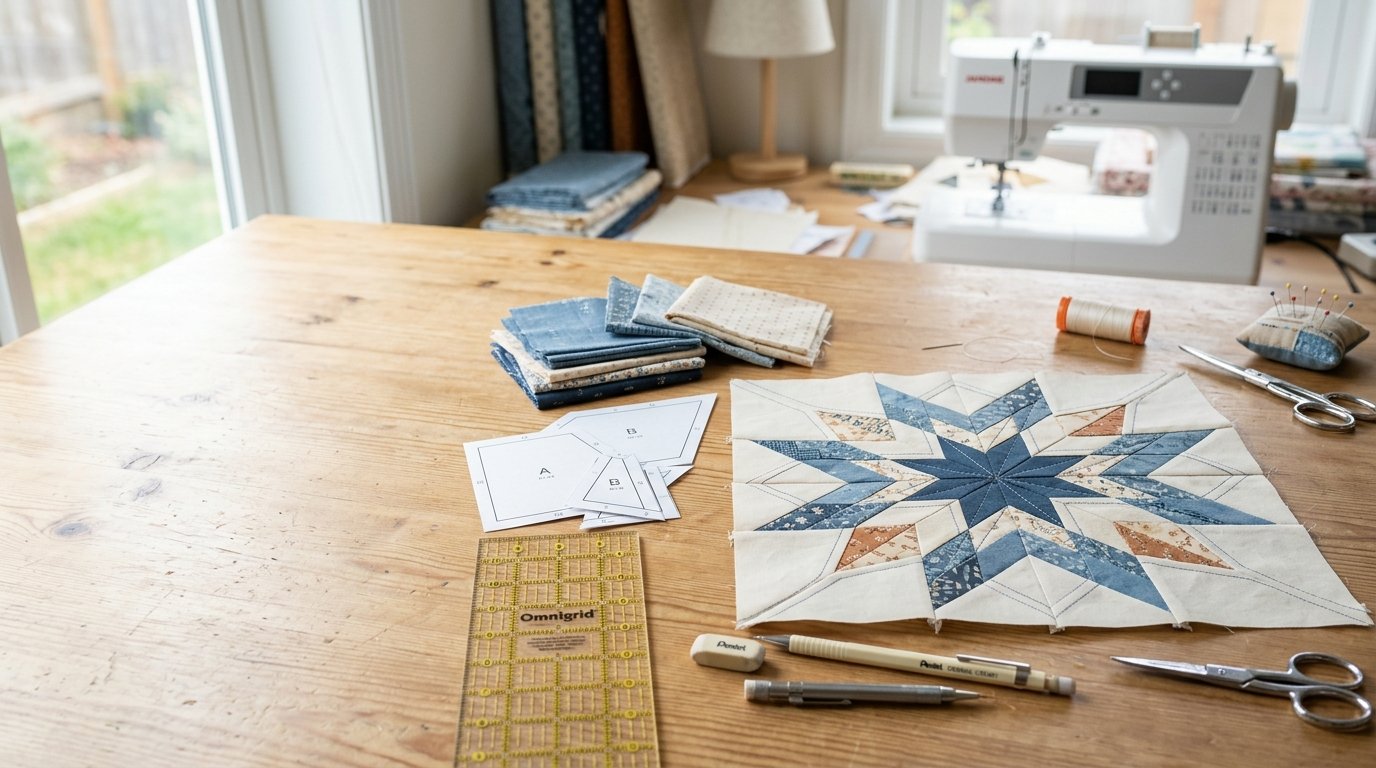
Paper piecing is a quilting technique that uses a printed paper pattern as a sewing guide. Instead of cutting every fabric piece perfectly before you sew, you stitch fabric to the paper in a numbered order, then trim each section to the exact shape. This makes sharp points, tiny angles, and unusual shapes much easier to sew accurately.
For beginners, the main thing to understand is that foundation paper piecing feels backward at first. You sew on the printed side of the paper, but the fabric sits on the unprinted side. Each new fabric piece is placed, sewn, flipped open, pressed, and trimmed before the next one is added.
Once you understand that rhythm, the process becomes much less confusing. Start with a simple block, use fabric pieces larger than you think you need, shorten your stitch length, and follow the numbers on the pattern.
What Is Paper Piecing?
Paper piecing, often called foundation paper piecing, is a method of sewing fabric onto a paper foundation. The paper has printed lines that show where to sew and numbers that show the order of construction. After the block is complete, the paper is removed.
This technique is especially useful for quilt blocks with precise points, narrow strips, odd angles, or small pieces. Traditional piecing asks you to cut fabric shapes accurately first, then sew them together with a consistent seam allowance. Paper piecing shifts much of that accuracy to the printed foundation. You still need care, but the paper gives you a stable guide.
Paper piecing is different from English paper piecing. English paper piecing usually involves wrapping fabric around paper templates and hand sewing the shapes together. Foundation paper piecing is usually done by machine, sewing directly through the paper and fabric.
The Paper Piecing Mental Model
The easiest way to understand paper piecing is to think of the paper as a map and the fabric as the hidden layer behind it. You look at the map while sewing, but the finished block appears on the other side.
Each numbered section on the pattern is a fabric area. You begin with piece 1, place it behind the paper, then add piece 2 so it will cover the next area after it is sewn and flipped open. The printed line between sections 1 and 2 is your sewing line.
This is why paper piecing can feel strange: you are not looking directly at the pretty side of the block while you sew. You are sewing from the paper side and trusting that the fabric underneath will land correctly.
The basic cycle is always the same: place fabric, sew on the line, fold the paper back, trim the seam allowance, flip the fabric open, press, and repeat.
Supplies You Need for Paper Piecing
You do not need many specialty tools to try paper piecing. A sewing machine, fabric, thread, a printed pattern, and basic cutting tools are enough. However, a few small choices make the process easier.
Use regular quilting cotton for your first project. Avoid slippery, stretchy, or very thick fabric until you understand the technique. Print your pattern at the correct scale, and check any test square before sewing.
A shorter stitch length is important because it perforates the paper, making removal easier later. Many quilters use a stitch length around 1.5 to 1.8 mm for foundation paper piecing.
| Supply | Essential? | Beginner tip |
|---|---|---|
| — | —: | — |
| Printed paper piecing pattern | Yes | Print at 100% or “actual size,” not “fit to page.” |
| Quilting cotton fabric | Yes | Cut pieces generously larger than each printed section. |
| Sewing machine and thread | Yes | Use a shorter stitch length than usual. |
| Rotary cutter, ruler, and mat | Yes | Best for trimming neat seam allowances. |
| Add-a-quarter ruler | Optional | Helpful, but a regular ruler works. |
| Iron or pressing tool | Yes | Press after each seam for accuracy. |
| Glue stick or pin | Optional | Useful for holding the first fabric piece in place. |
How to Prepare Your Pattern and Fabric
Before sewing, print the paper piecing pattern and confirm the scale. If the pattern includes a 1-inch test square, measure it. Even a small printing error can affect the finished block size.
Study the pattern before cutting fabric. Look at the numbers and notice the order of construction. If the pattern uses colors, mark each section with the fabric you plan to use. Beginners often find it helpful to write “background,” “red,” or “blue” directly on the paper.
Cut your fabric pieces larger than the section they need to cover. This is one of the most important paper piecing basics. Because pieces are flipped after sewing, exact-size fabric often ends up too small. A generous margin gives you room for seams and mistakes.
Place piece 1 so it fully covers section 1 on the unprinted side of the paper, with at least 1/4 inch extra beyond all lines.
Paper Piecing Step by Step
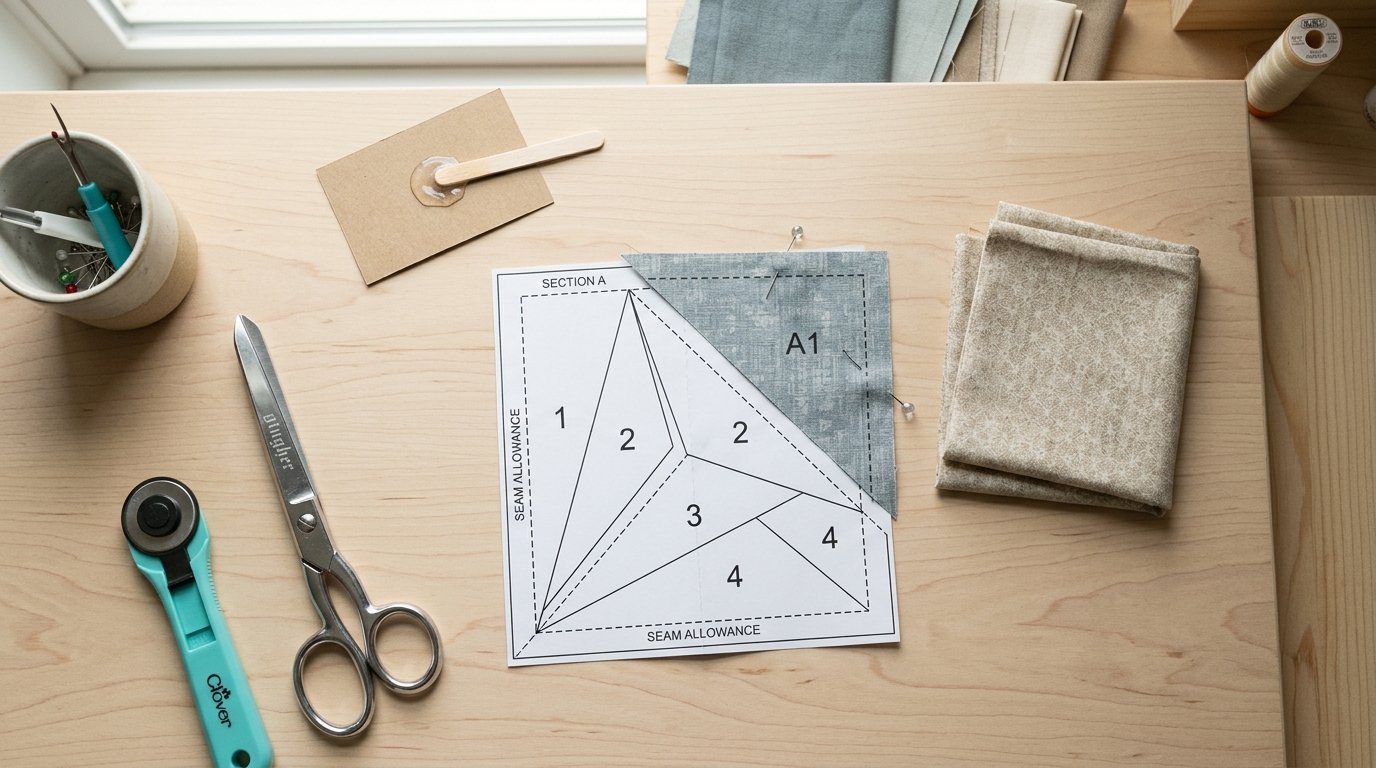
Start with the printed side of the paper facing up and fabric piece 1 on the back. Hold the paper up to a light or fold along the first sewing line if you need help positioning it. Secure the first fabric piece with a small dab of washable glue or a pin placed away from the sewing line.
Next, prepare fabric piece 2. Place it right sides together with piece 1 on the fabric side of the paper. The edge of piece 2 should extend beyond the line between sections 1 and 2 by at least 1/4 inch. Remember: after sewing, piece 2 must flip open and cover its numbered area completely.
Turn the unit so the printed side of the paper faces up. Sew directly on the line between sections 1 and 2. Start a few stitches before the line begins and continue a few stitches past the end if the pattern allows. This anchors the seam.
Now fold the paper back along the sewn line. Trim the fabric seam allowance to 1/4 inch using a ruler and rotary cutter. If you have an add-a-quarter ruler, this is where it is useful.
Flip fabric piece 2 open so the right side is visible. Press it flat with an iron or finger presser. Check that it covers section 2 completely, including seam allowance around the outside edge.
Repeat the same process for each numbered section. Place the next fabric piece right sides together, sew on the printed line, fold, trim, flip, and press.
When all sections are covered, trim the entire unit along the outer cutting line. Many patterns include a seam allowance around the block; do not trim on the inner finished line unless the pattern tells you to. Finally, remove the paper carefully. The short stitch length should make it tear away cleanly.
Beginner Example: a Simple Flying Geese Unit
A flying geese unit is a good first paper piecing example because it has one center triangle and two side triangles. In traditional piecing, the point of the goose can easily become blunt or crooked. Paper piecing helps keep that point sharp.
On a simple pattern, section 1 might be the center triangle, section 2 the left background triangle, and section 3 the right background triangle. You would place the center fabric first, add the left background piece, sew, trim, flip, and press. Then you would add the right background piece the same way.
When trimmed, the unit should have a crisp triangle point and straight outer edges, even if your original fabric pieces were rough rectangles.
Common Paper Piecing Mistakes and Easy Fixes
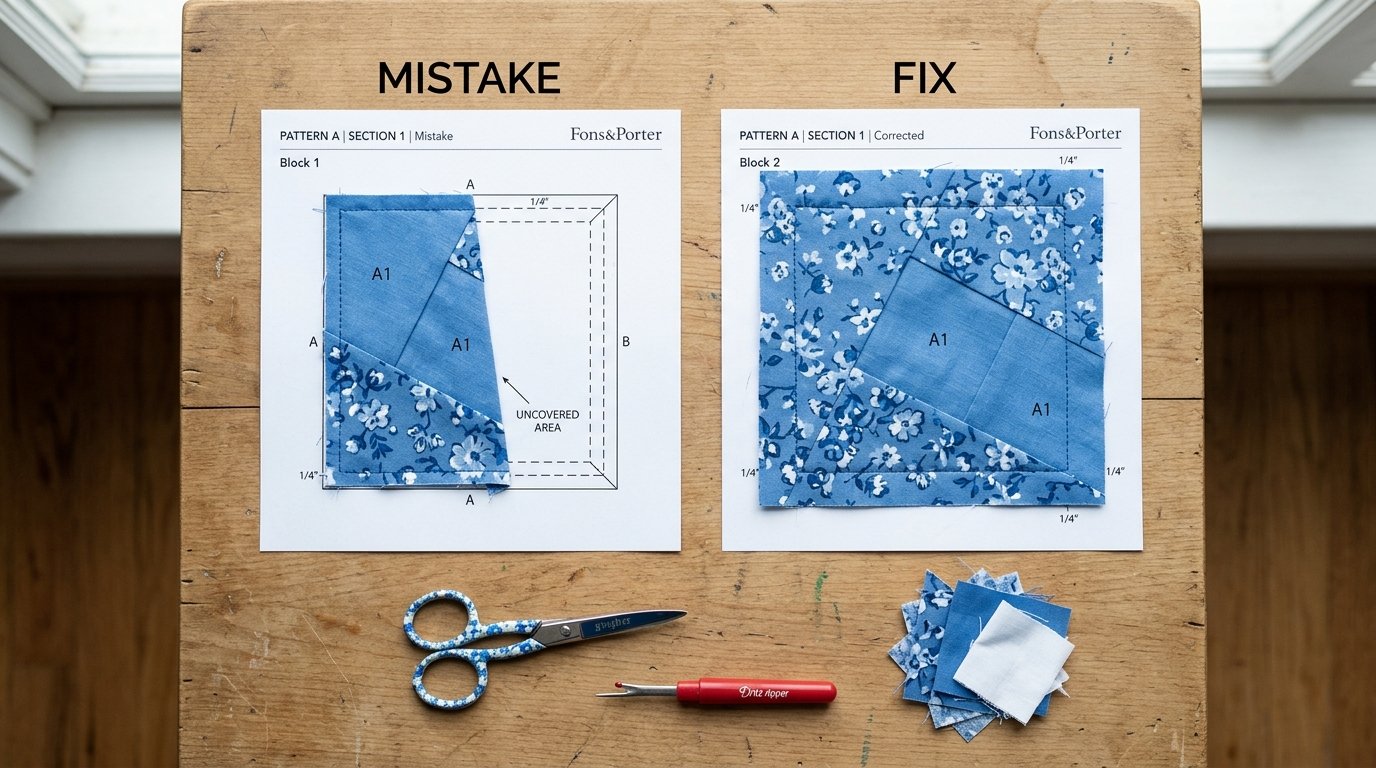
The most common beginner mistake is cutting fabric too small. Because each piece flips after sewing, it needs to cover the printed area after rotation, not just before stitching. Fix this by cutting oversized pieces until you can predict the flip more confidently.
Another common issue is placing fabric on the wrong side of the paper. You sew on the printed side, but the fabric belongs on the unprinted side. If you get turned around, pause and check before stitching.
Beginners also sometimes sew the wrong line. Follow the numbers, not just the nearest line. Highlighting the next seam before sewing can help.
If your paper is hard to remove, your stitch length may be too long. Shorten it slightly next time. If the paper tears while sewing, your stitch may be too short or the paper too fragile.
If a fabric piece does not cover its section after flipping, remove the seam gently and replace it with a larger piece. This is normal while learning. Paper piecing rewards checking early, before several more pieces are sewn over the mistake.
Tips for Choosing Your First Paper Piecing Pattern
Choose a pattern with few pieces, large sections, and clear numbering. Simple stars, flying geese, trees, hearts, and basic geometric blocks are good beginner choices. Avoid tiny sections, curves, complicated mirror-image layouts, and patterns with many separate units for your first attempt.
Look for a pattern that includes a seam allowance, printing scale check, and beginner notes. A block between 6 and 10 inches is usually easier than a very small block.
Most importantly, choose fabrics with enough contrast. If the shapes are easy to see, it is easier to understand how the block is coming together.
FAQ
What Should a Beginner Know First About Paper Piecing Basics?
A beginner should know that foundation paper piecing is sewn through paper and fabric at the same time. The paper shows the sewing lines, while the fabric sits behind it. The process feels backward at first, but the repeatable rhythm makes it manageable.
What Matters Most When Evaluating Paper Piecing Basics?
The most important basics are accurate printing, correct fabric placement, generous fabric pieces, and sewing in the numbered order. A short stitch length and careful trimming also matter. These small habits prevent most beginner frustration and help the finished block come out accurately.
What Mistakes Should Readers Avoid with Paper Piecing Basics?
Avoid cutting fabric too small, printing patterns at the wrong scale, sewing from the fabric side instead of the paper side, and skipping the press-and-trim steps. Also avoid starting with an overly complex pattern. A simple block teaches the method more clearly.
What Is the Next Logical Step After Learning About Paper Piecing Basics?
After learning the basics, make one simple practice block, such as a flying geese unit or small star point. Then try a slightly more detailed pattern with more sections. Build confidence through repetition before moving into tiny pieces or complex pictorial designs.