Sewing with a decorative flag garland is a beginner-friendly way to turn fabric scraps into reusable décor for parties, nurseries, craft rooms, holidays, or outdoor gatherings. You’ll make a row of fabric flags, often called bunting or pennants, and sew them into bias tape, ribbon, or fabric binding so they can be hung neatly.
Quick verdict: A decorative flag garland is made by cutting fabric triangles or pennants, sewing each flag right sides together, turning and pressing them, then attaching them to bias tape, ribbon, or binding. It is ideal for using scraps and can be customized by size, fabric, spacing, and trim.
Below, you’ll plan the measurements, cut your flags, sew and press them, then attach everything into one finished garland.
What You’ll Make and How the Project Works
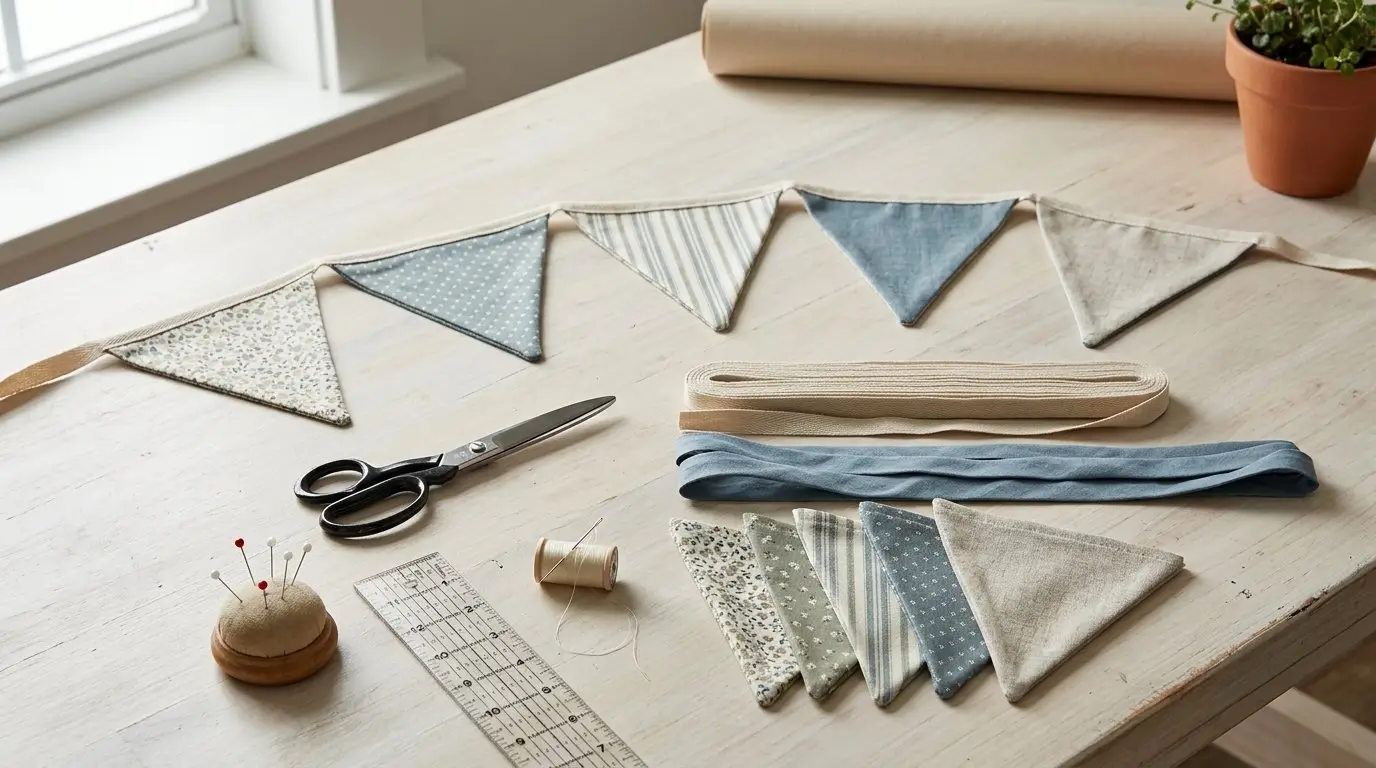
A decorative flag garland is a sewn strand of fabric flags attached along a long top strip. You may also hear it called fabric bunting, pennant bunting, or a fabric flag banner. The structure is simple: several fabric flags hang from a continuous piece of bias tape, ribbon, twill tape, or handmade binding.
This project is friendly for confident beginners because it uses useful sewing basics without complicated fitting. You’ll measure, cut, sew straight seams, pivot at corners, trim seam allowances, turn points, press flat, and topstitch the finished strip. If you can sew a steady line and use an iron, you can make a neat garland.
The most common shape is a triangle pennant, but rectangles, rounded-bottom flags, swallowtail flags, and mixed shapes also work. Triangle flags feel classic and festive, while rectangles are easy to personalize with appliqué letters or seasonal motifs.
A short garland can be finished in an afternoon. A long party banner with many double-sided flags takes more time, so plan your measurements before cutting.
Materials, Tools, and Planning Measurements
Before sewing, decide where the garland will hang. A small shelf decoration needs fewer flags than a banner across a wall, window, party table, or garden fence.
Materials
You’ll need:
- Cotton fabric or fabric scraps
- Double-fold bias tape, ribbon, twill tape, or handmade fabric binding
- Coordinating or contrasting thread
- Optional lightweight interfacing for soft fabrics
- Optional trims such as lace, pom-poms, ric-rac, tassels, or appliqué pieces
Quilting cotton is a reliable choice because it cuts cleanly, presses crisply, and is easy to sew. Linen blends, chambray, canvas, or denim can also work, but heavier fabrics may need a stronger needle and slower stitching. If the garland will be handled often, washable fabrics are practical.
Tools
Gather:
- Sewing machine
- Fabric scissors or rotary cutter
- Ruler or quilting ruler
- Cutting mat, if using a rotary cutter
- Iron and ironing board
- Pins or sewing clips
- Fabric marker or chalk
- Paper or cardboard for a template
- Blunt turning tool, chopstick, or point turner
Planning Table
Use this table as a starting point and adjust for your space.
| Use case | Suggested finished flag size | Suggested spacing | Notes |
|---|---|---|---|
| Small shelf or nursery bunting | 4–5 in wide x 5–6 in long | 1–2 in apart | Good for scraps and small prints |
| Party table or mantel | 5–6 in wide x 6–7 in long | 1.5–3 in apart | Balanced indoor size |
| Wall, doorway, or window | 6–7 in wide x 7–8 in long | 2–3 in apart | Easy to see from across the room |
| Outdoor celebration banner | 7–9 in wide x 8–10 in long | 3–4 in apart | Use sturdier fabric |
| Lettered name banner | 6–8 in wide x 7–9 in long | 1–2 in apart | Leave room for letters |
To estimate total garland length, measure the display area and add extra length at both ends for ties. For example, if your display space is 60 inches wide, cut 80 to 90 inches of tape so you have 10 to 15 inches at each end.
To estimate the number of flags, add the finished flag width plus the spacing. If each flag is 6 inches wide and you want 2 inches between flags, each flag uses about 8 inches of garland length. For a 60-inch display area, you would need about 7 or 8 flags.
Step 1: Choose, Cut, and Pair Your Flag Pieces
Start by choosing your flag shape. For triangle bunting, draw a triangle on paper or cardboard. A common beginner size is about 6 inches wide at the top and 7 inches long from top edge to point. Add seam allowance if your template does not already include it.
A template keeps every flag consistent. Cardboard is especially useful when tracing several flags onto different fabrics. Mark the top edge clearly so you do not rotate directional prints by mistake.
For a neat garland, cut two fabric pieces for each flag. These pieces will be sewn right sides together, turned, and pressed so both sides look finished. This method is best if the garland may be seen from both sides, such as in a doorway, window, or outdoor setting.
You can also make single-layer flags for a faster project. If you do, finish the raw edges with a narrow hem, pinking shears, a serger, zigzag stitch, or decorative stitch to reduce fraying. Single-layer flags are quicker but look more casual.
Cutting tips:
- Align the fabric grain when possible so flags hang smoothly.
- Stack only as many layers as you can cut accurately.
- Use sharp scissors or a rotary cutter for clean edges.
- Avoid stretching triangle sides, especially if they fall on the bias.
- Check directional prints before cutting.
After cutting, lay the flags out in order. Balance bright prints with calmer fabrics, alternate colors, or create a repeating pattern. A quick photo can help you remember the layout at the sewing machine.
Step 2: Sew, Trim, Turn, and Press the Flags
Pair each flag with right sides together. The wrong side of the fabric should face outward. Pin or clip the layers if they shift.
Sew around the side edges of each flag, leaving the top edge open. The open top will later be enclosed in bias tape, ribbon, or binding. Use a consistent seam allowance, such as 1/4 inch, or follow the allowance built into your template.
For triangle flags, sew down one side toward the point, stop with the needle down, lift the presser foot, pivot, and sew up the other side. Shortening the stitch length slightly near the point can give you more control and help the point turn cleanly.
For rectangle or swallowtail flags, pivot carefully at each corner. If sewing a swallowtail shape, take your time around the inner “V,” because clipping and turning that area neatly affects the final look.
After sewing, trim seam allowances to reduce bulk. At triangle points, trim close to the point without cutting through the stitches. At square corners, clip diagonally across the corner. For curved or shaped flags, clip small notches into the seam allowance so the fabric can turn smoothly.
Turn each flag right side out through the open top edge. Use a blunt turning tool, chopstick, or point turner to gently shape corners and points. Avoid anything too sharp, which can poke through fabric or split stitches.
Press each flag flat. Pressing helps the seams settle and makes the flags easier to insert into the top tape. Roll the seams slightly between your fingers before pressing if the edges look tucked in.
Optional topstitching gives the flags a crisp finish. Sew close to the side edges, usually about 1/8 inch from the edge. Topstitching also adds durability if the garland will be packed away and reused. Use matching thread for a subtle look or contrast thread for decoration.
Repeat until all flags are sewn, turned, pressed, and arranged in order.
Step 3: Attach the Flags to Bias Tape, Ribbon, or Binding
Now turn the individual flags into one continuous garland. Lay your bias tape, ribbon, or binding flat on a table or floor. Mark the center of the tape and the center of your flag layout. Working from the center outward helps keep the garland balanced, especially over a mantel, headboard, or party table.
Leave extra tape at both ends for hanging ties. Depending on where it will hang, 8 to 15 inches on each end is often useful. Longer ties are easier to knot around railings, hooks, or curtain rods.
If Using Double-Fold Bias Tape
Open the bias tape slightly and tuck the raw top edge of each flag inside the fold. The top of the flag should sit fully inside the tape so the raw edge is enclosed. Clip or pin through all layers, making sure the back fold is caught as well as the front.
If Using Ribbon or Flat Tape
Place the top edge of each flag behind or under the ribbon, then stitch across the ribbon and flag together. Since ribbon does not wrap around the raw edge like bias tape, make sure the flag top is finished or hidden neatly. For a cleaner back, sandwich the flags between two layers of ribbon.
If Using Handmade Binding
Cut fabric strips, press the long edges inward, and fold the strip around the flag tops. Handmade binding is useful when you want the top strip to match the flags or use fabric from the same collection.
Before sewing, clip or pin every flag in place and check the full layout. Confirm the spacing is consistent, the prints face the correct direction, and the end ties are long enough.
Sew slowly along the full length of the tape or binding. Start at one end, backstitch, and stitch close to the open edge of the bias tape or along the lower edge of the ribbon. Make sure every flag top is caught securely. Remove pins or clips before they reach the presser foot.
Backstitch at the end. If the garland will be handled often, reinforce each flag top by backstitching a few stitches at the beginning and end of each flag or sewing a second line along the tape.
Finishing Touches, Troubleshooting, and Result Check
Once the garland is assembled, give it a final press. Avoid pressing directly over trims that may flatten or melt; use a pressing cloth if needed.
Finishing ideas include:
- Decorative machine stitching along the tape
- Pom-pom trim or lace sewn under the binding
- Tassels between flags
- Appliqué letters for names or celebrations
- Seasonal fabric combinations
- Mixed flag shapes
- Buttons, bows, or small fabric yo-yos added by hand
Keep embellishments practical. A nursery wall banner can handle delicate details, while an outdoor party garland may need sturdy stitching and fewer loose trims.
Troubleshooting Common Problems
The flags look uneven.
Check your template first. If it is accurate, the issue may be seam allowance or pressing. Use the same seam allowance on every flag, trim points consistently, and press each flag before attaching it.
The points look bulky.
Trim the seam allowance near the point without cutting the stitches. Turn with a blunt tool, not a sharp one. A slightly shorter stitch length near the point can also help.
The stitching puckers.
Check machine tension, needle size, and thread quality. Use a needle suited to your fabric weight. Do not pull the fabric while sewing; guide it gently.
The flags slip out of the tape.
Use more clips, baste the flags first, or apply a tiny amount of washable glue stick inside the tape. Use glue sparingly and let it dry before sewing if it feels tacky.
The garland twists when hung.
Press the tape flat, check that the flags are not pulled unevenly into the binding, and make sure both ends are tied at the same height.
Cautions for Outdoor Use
Fabric garlands can be used outdoors for parties and photos, but weather affects fabric. Sun, wind, and moisture can fade, wrinkle, or soil the garland. Choose sturdier fabric when needed, stitch securely, and bring the garland inside after use when possible.
Result Check
Your decorative flag garland is finished correctly when:
- The flags hang evenly along the tape
- Raw edges are enclosed or finished
- Each flag is securely caught in the stitching
- The spacing looks balanced
- The end ties are long enough for hanging
- The garland lies flat or drapes smoothly
- Loose threads are trimmed
If it passes those checks, it is ready to display, gift, or fold away for reuse.
FAQ
What fabric is best for sewing a decorative flag garland?
Quilting cotton is the easiest choice because it cuts cleanly, presses well, and comes in many prints. Linen blends, chambray, canvas, and denim can also work, but heavier fabrics may need a stronger needle.
Can I make a flag garland without bias tape?
Yes. You can use ribbon, twill tape, handmade fabric binding, or cord with folded-over flag tops. Bias tape is popular because it encloses raw edges neatly, but it is not the only option.
How far apart should fabric flags be spaced?
Most fabric flags look good spaced 1 to 3 inches apart. Use closer spacing for a fuller indoor garland and wider spacing for a longer, airier banner. Keep the spacing consistent for a tidy finish.
Do I need to sew two layers for each flag?
No, but two layers create a cleaner, double-sided flag with enclosed side seams. Single-layer flags are faster, but the edges should be hemmed, zigzagged, pinked, or otherwise finished to help reduce fraying.
How do I stop the flag points from looking bulky?
Trim the seam allowance near the point before turning, but do not cut through the stitches. Use a blunt turning tool, press carefully, and consider shortening the stitch length slightly as you sew around the point.