
A twisted headband is one of the most useful beginner sewing projects because it is small, forgiving, and wearable. To sew your own twisted head band, you need stretchy knit fabric, a basic sewing machine, and a simple construction method: sew two fabric tubes, cross them to create the twist, then join the ends into one back seam. The key is using fabric with enough stretch and cutting the pieces long enough to fit comfortably around your head. This tutorial focuses on a soft knit headband with a neat front twist and a finished back seam, suitable for everyday wear, gifts, or using up knit fabric scraps.
Quick Answer
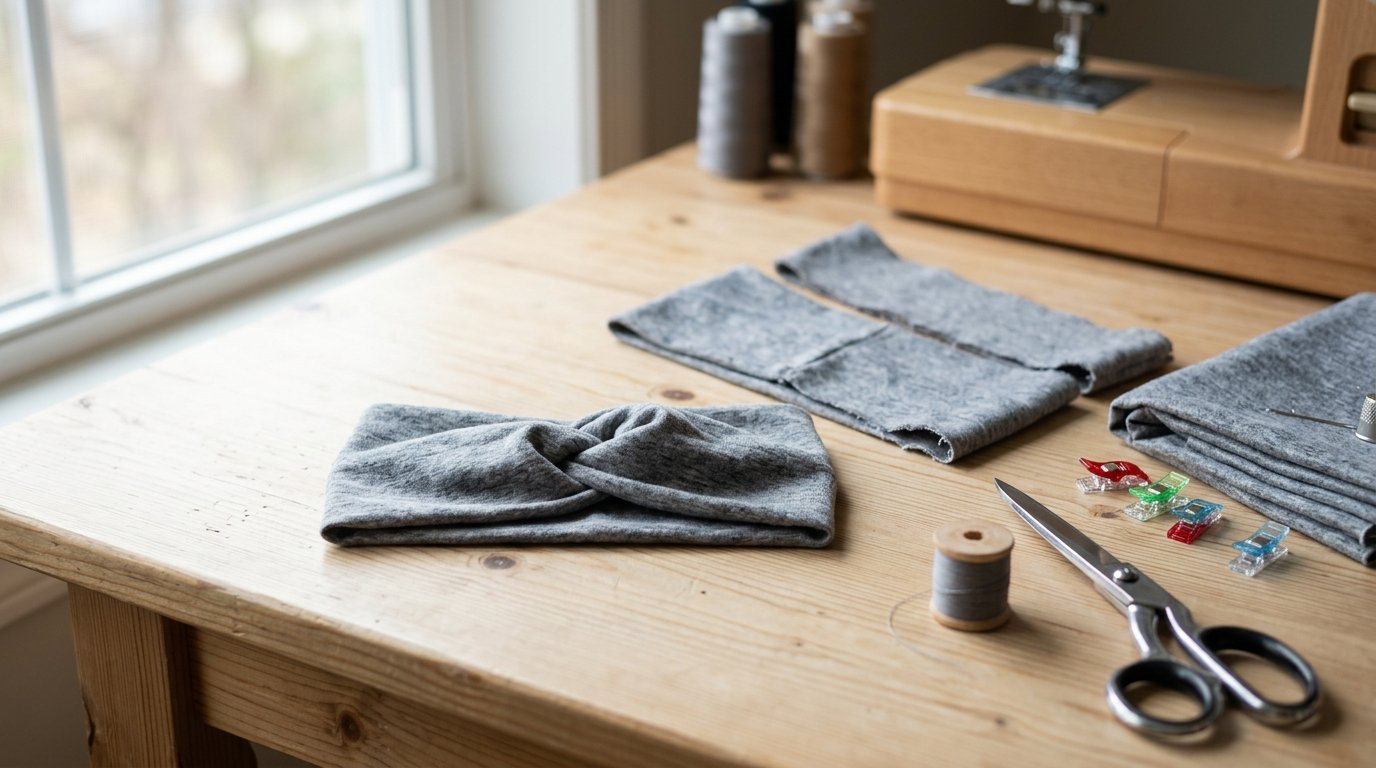
To sew your own twisted head band, cut two long rectangles of stretchy knit fabric, sew each rectangle into a tube, turn the tubes right side out, cross them into a twist, and sew the short ends together at the back. The finished headband looks like one continuous band with a decorative knot-like twist at the front.
For an average adult size, cut two rectangles about 20 inches long by 5 inches wide. This gives a comfortable, medium-width headband once the fabric is folded and sewn. If your fabric is very stretchy, you can shorten the length slightly. If it has less stretch or you prefer a looser fit, add an inch.
You will need:
- Stretch knit fabric, such as jersey, rib knit, cotton spandex, or brushed poly
- Matching thread
- Sewing machine
- Ballpoint or stretch needle
- Scissors or rotary cutter
- Pins or clips
- Measuring tape
- Safety pin or tube turner
Use a stretch stitch, narrow zigzag, or lightning stitch so the seams can stretch with the fabric. The most important part is forming the twist correctly: place the two fabric tubes in a cross shape, fold each one around the other, and bring all four raw ends together at the back. Once sewn, the front naturally forms a twist.
This is a quick project, but take your time with sizing and the twist step. Those two details make the difference between a headband that looks handmade in a good way and one that feels bulky or uneven.
How to Think About This Topic
The easiest way to understand this project is to think of the headband as two soft fabric loops that overlap at the front and are joined at the back. You are not sewing a complicated knot. You are arranging two sewn tubes so they wrap around each other before the ends are secured together.
That mental model helps with the most confusing part: the twist. Before sewing the final back seam, the headband will look like two separate strips crossing over each other. Once you join the ends, the crossing point becomes the twist at the front, and the back seam becomes the hidden closure.
Fabric choice matters because this headband needs to stretch over the head and then recover so it stays in place. Woven cotton is not ideal for this version because it does not stretch enough unless you add elastic or redesign the pattern. For a simple beginner-friendly headband, choose knit fabric with at least moderate stretch.
Good fabric options include:
- Cotton spandex jersey: soft, breathable, and easy to sew
- Rib knit: very stretchy with good texture
- Bamboo or rayon jersey: drapey and comfortable, but can be slippery
- Brushed poly: warm, soft, and good for cooler weather
- Interlock knit: stable and beginner-friendly, though sometimes less stretchy
Width affects the look. A 5-inch-wide cut piece usually finishes around 2 inches wide after folding and sewing, depending on seam allowance and fabric thickness. A wider piece makes a bold, turban-style headband. A narrower piece creates a slim, sporty band.
Length affects comfort. The headband should be slightly smaller than the head measurement because knit fabric stretches. If your head measures 22 inches, a cut length of 20 inches often works well. Very stretchy fabric may need more negative ease, meaning the headband is cut shorter than the head measurement. Less stretchy fabric needs less reduction.
Here is a quick cutting guide:
| Size | Cut 2 Rectangles | Notes |
|---|---|---|
| — | —: | — |
| Child | 17 x 4 inches | Best for soft, stretchy knits |
| Teen / Small Adult | 19 x 5 inches | Good starting size |
| Average Adult | 20 x 5 inches | Fits many adults |
| Large Adult / Looser Fit | 21 x 5 inches | Use for less stretchy fabric |
If in doubt, wrap the fabric gently around your head before sewing the final seam. It should feel snug but not tight.
Practical Guidance
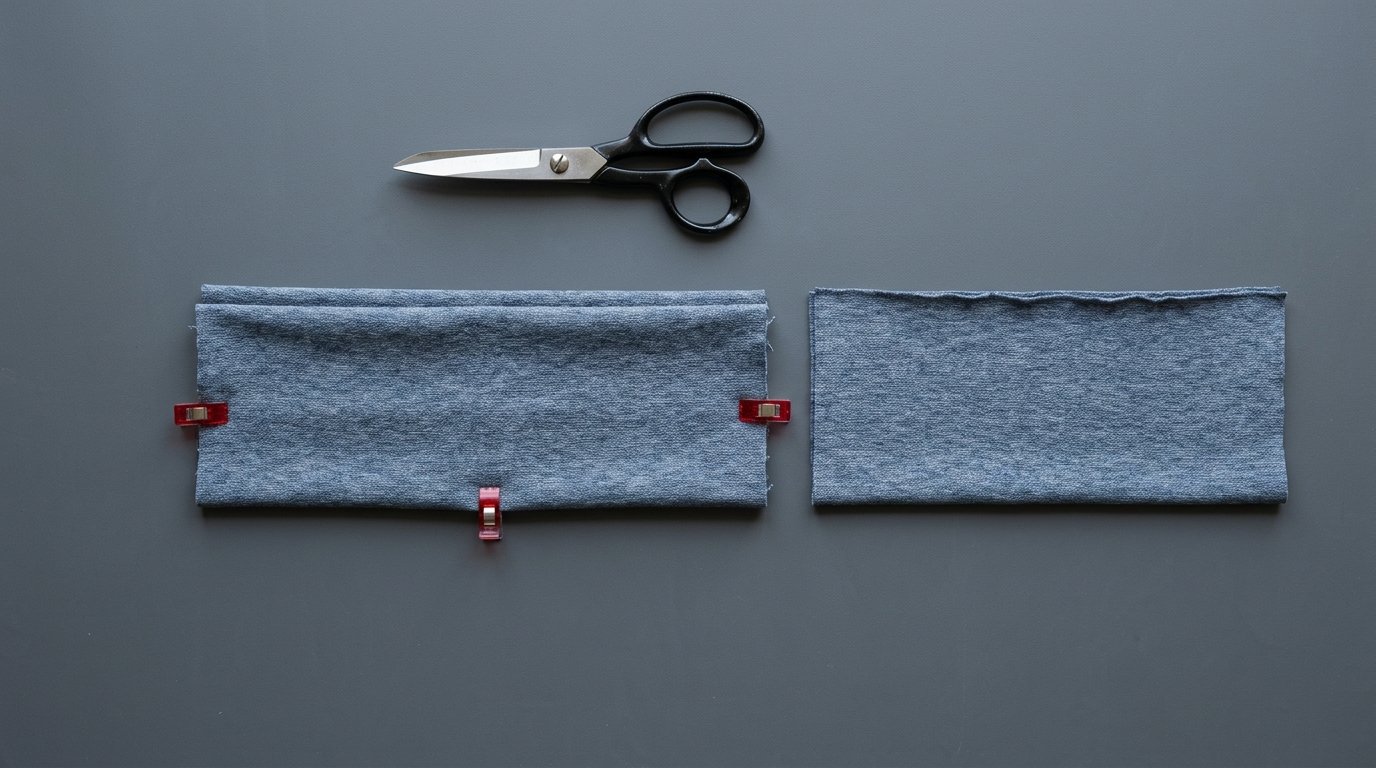
Start by cutting two matching rectangles from your knit fabric. Place the greatest stretch along the length of each rectangle, so the headband stretches around your head. If your fabric curls at the edges, use clips instead of fighting it with too many pins.
Fold each rectangle in half lengthwise with right sides together. Sew along the long raw edge using a 3/8-inch seam allowance. Use a stretch stitch, narrow zigzag, or lightning stitch. Do not use a long straight stitch on knit fabric because the seam may pop when stretched.
After sewing both long seams, turn each tube right side out. A safety pin attached to one end can help you feed the fabric through the tube. Roll the seam between your fingers so it sits along one side or the center back of each strip. You do not need to press heavily; if you do press, use low heat and test the fabric first.
Now form the twist:
- Lay one fabric tube horizontally on the table, seam side down if possible.
- Lay the second tube vertically across the center, making a plus sign.
- Fold the left and right ends of the horizontal tube toward each other, wrapping around the vertical tube.
- Fold the top and bottom ends of the vertical tube toward each other, wrapping around the horizontal tube.
- Gather all four short raw ends together at the back.
At this point, the center should look like an interlocked twist. Before sewing, hold the gathered ends and gently stretch the headband into a circle. Check that the twist is at the front and the tubes are not accidentally flipped or tangled.
To finish the back seam, stack the four short ends evenly. Match the two ends from one tube together and the two ends from the other tube together, keeping the twist smooth. Sew across the short ends with a stretch stitch or zigzag, reinforcing the seam with a second row if desired. Trim excess bulk, but do not cut too close to the stitching.
For a cleaner finish, you can cover the back seam with a small fabric wrap. Cut a small rectangle, wrap it around the seam, fold the raw edge under, and hand stitch or machine stitch it in place. This is optional, but it makes the headband look more polished and can reduce scratchiness at the back.
Try on the headband. If it feels too loose, remove the back seam and shorten the ends slightly. If it feels too tight, you may need to recut longer pieces; there is not much extra length to add after sewing. For future headbands, note your preferred length and fabric type.
Common fixes are simple. If the twist looks bulky, use a lighter knit or reduce the width. If the headband slips, choose fabric with better recovery, such as cotton spandex or rib knit. If the seams look wavy, reduce presser foot pressure if your machine allows it, avoid stretching while sewing, and use a ballpoint or stretch needle.
Once you have made one, this project is easy to repeat. Cut several sets at once, sew them assembly-line style, and adjust width or length depending on whether you want a slim workout band, a cozy winter band, or a wider everyday accessory.
FAQ
What Should a Beginner Know First About Sew Your Own Twisted Head Band?
Start with stretchy knit fabric, not woven cotton. The headband needs to stretch over your head and recover afterward. Cut two long rectangles, sew them into tubes, form the twist, then sew the ends together. The twist is created by arrangement, not by tying a knot.
What Matters Most When Evaluating Sew Your Own Twisted Head Band?
Fit and fabric recovery matter most. The headband should feel snug without squeezing, and the fabric should bounce back after stretching. A neat twist also depends on even cutting, smooth tubes, and careful alignment before sewing the final back seam.
What Mistakes Should Readers Avoid with Sew Your Own Twisted Head Band?
Avoid using fabric with too little stretch, sewing knit seams with a non-stretch straight stitch, or cutting the band too long. Also, check the twist before sewing the back seam. If the pieces are crossed incorrectly, the front can look uneven or bulky.
What Is the Next Logical Step After Learning About Sew Your Own Twisted Head Band?
Make a test headband from scrap knit fabric, then adjust the length and width to your preference. Once you know your best size, sew a few more in different knits. You can also add a small back seam cover for a more finished look.