
An open toe walking foot helps your sewing machine feed the top and bottom fabric layers more evenly while giving you a clearer view of the needle area. For garment sewing, that matters most when fabric shifts, layers creep, or accurate visible stitching is important. The “walking” action reduces dragging from the top, and the open front lets you see seam lines, edge stitching, and topstitching more easily than with a standard walking foot. It is especially helpful for knits, slippery fabrics, layered seams, and places where matching stripes, plaids, or seam intersections matters. Used correctly, it can improve control, accuracy, and stitch quality without requiring advanced sewing skills.
What an Open Toe Walking Foot Does and Why Garment Sewists Use It
A regular presser foot presses down while the machine’s feed dogs pull fabric from underneath. That works fine for many seams, but some garment fabrics do not feed evenly. The bottom layer may move faster than the top, causing shifting, stretching, or misaligned edges.
An open toe walking foot adds a second feeding action on top. Its mechanism moves in step with the machine so the upper layer is guided forward along with the lower layer. Think of it as helping both layers travel together instead of letting the top one lag or slide.
The “open toe” part simply means the front center of the foot is cut away. That gives you better visibility of the needle, seam line, and stitching path. For garment sewists, that extra view is useful when topstitching collars, sewing hems, or following marked lines precisely.
When It Helps Most in Garment Sewing
You do not need this foot for every garment seam. It helps most when feeding is the problem or when visibility matters.
Use it when sewing fabrics that like to shift, stretch, or stick, such as jersey knits, rayon challis, lightweight viscose, satin, or layered denim details. It is also useful when sewing over bulky seam crossings, attaching patch pockets, or topstitching where you want a clean, even line.
| Garment situation | How the foot helps |
|---|---|
| Knit shoulder or side seams | Reduces stretching and waviness |
| Slippery woven fabrics | Keeps layers from sliding apart |
| Plaids, stripes, seam matches | Improves alignment through the seam |
| Topstitching collars, cuffs, pockets | Better visibility for straighter stitching |
| Thick seam intersections | Feeds bulky areas more evenly |
If your regular foot already handles a seam cleanly, you can keep using it. Switch when you expect feeding trouble or want a clearer view.
How to Set up the Foot Correctly
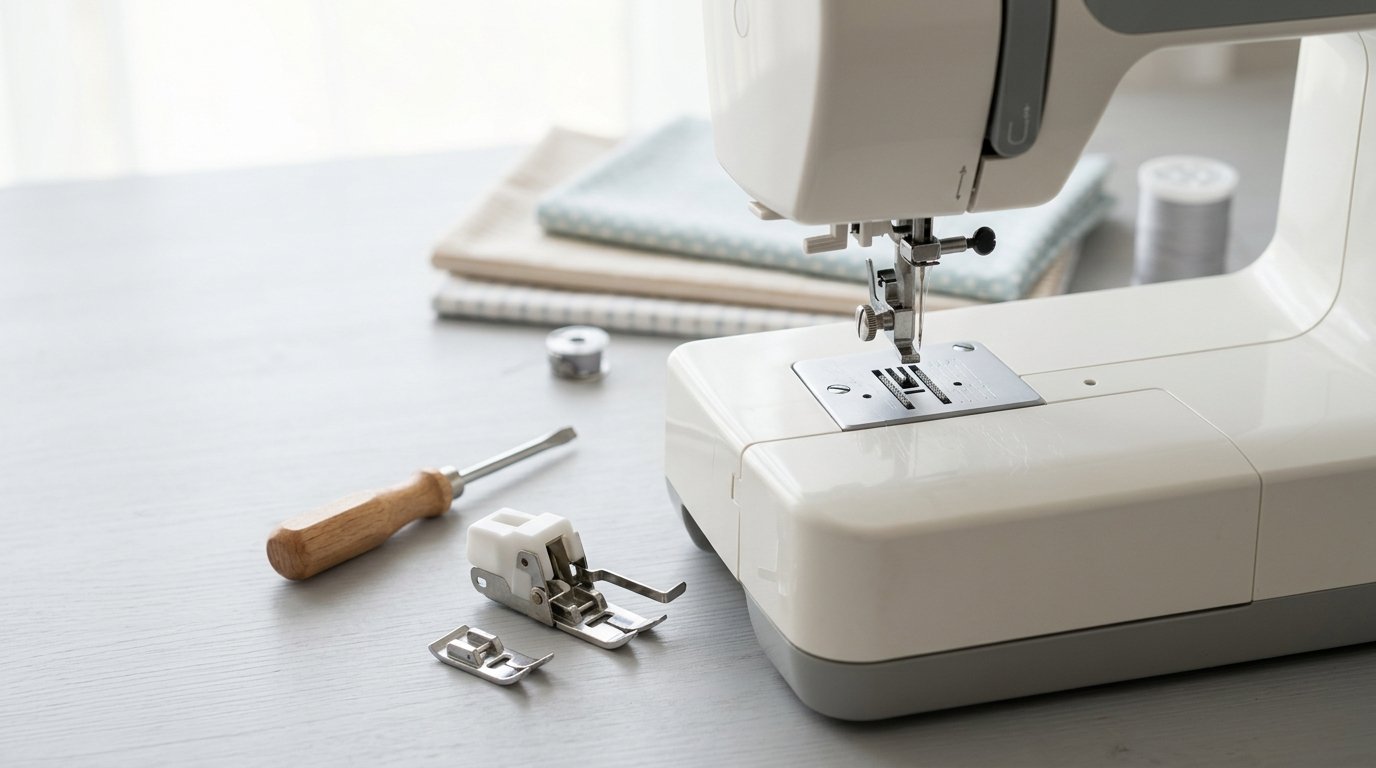
Start by turning off the machine and raising the needle to its highest position. Remove your regular presser foot and, if needed, the ankle or shank attachment, depending on your machine and foot style. Most walking feet attach differently from snap-on feet.
Position the open toe walking foot so its forked lever sits above or around the needle clamp screw, according to the foot design. That lever is what transfers motion from the needle bar to the foot. If it is not placed correctly, the foot will not “walk.”
Screw the foot on firmly, but do not overtighten. Lower the presser foot by hand and slowly turn the handwheel toward you for one full cycle before sewing. Watch that the needle clears the foot opening and that the walking mechanism moves smoothly.
Then test on scrap from your garment project. Use the same fabric layers, interfacing, or seam bulk if possible. Check stitch length, pressure, and fabric feeding before sewing the real piece. A slightly longer stitch often works well with a walking foot, especially for topstitching and thicker seams.
Sewing Technique: How to Use an Open Toe Walking Foot Well
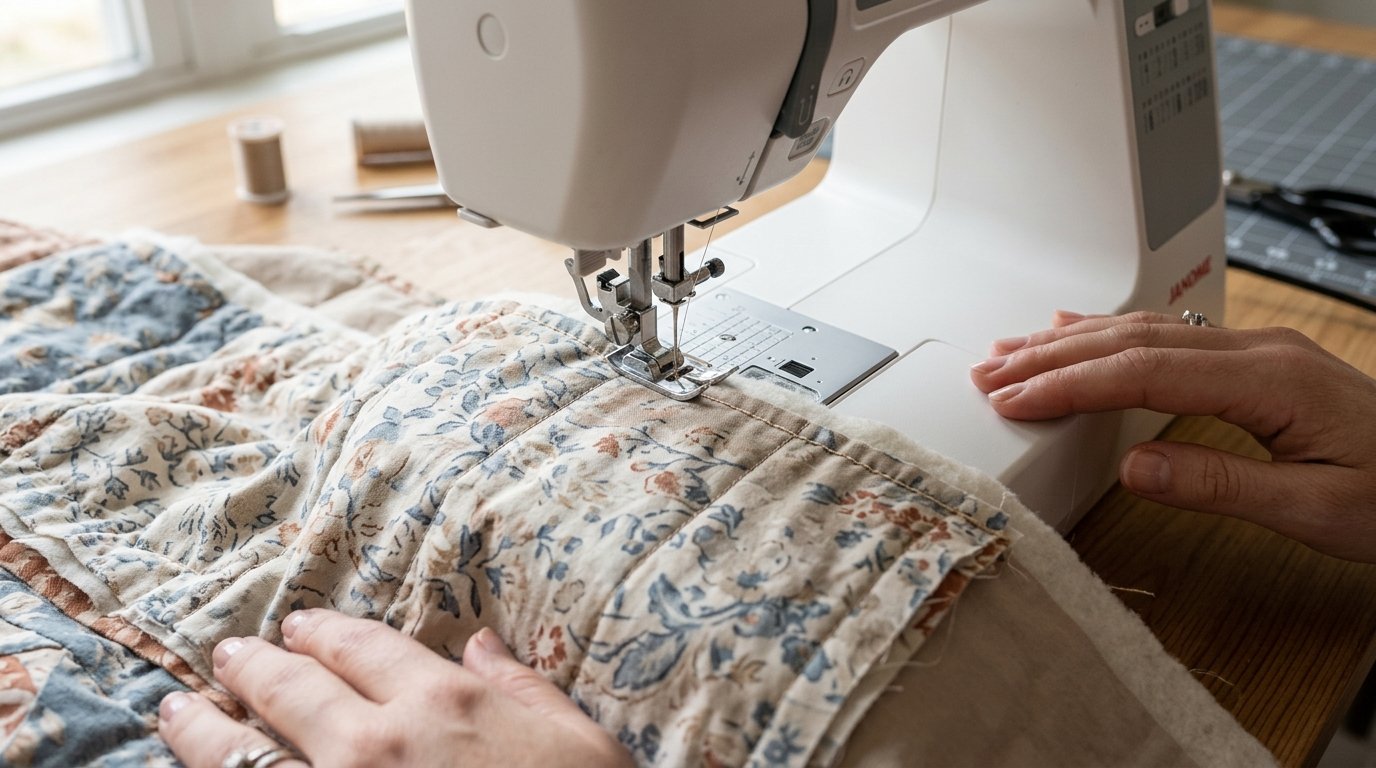
Let the foot and feed dogs do the work. Your main job is guiding, not pulling. If you tug the fabric from the front or back, you can still distort the seam, even with a walking foot attached.
Place the fabric fully under the foot before you begin, lower the needle, then lower the presser foot. Start with a few controlled stitches. Sew at a steady, moderate speed rather than racing. Walking feet usually perform better when the machine is not pushed too fast.
Keep your hands light and level on both sides of the seam. Guide the fabric so the edge or marking stays where you want it, but do not stretch it. This matters especially on knits, bias edges, and curved areas like armholes or necklines.
Use the open front as a visual guide. Watch the needle path and reference line, not just the raw edge. That helps when edge stitching a collar, topstitching a waistband, or sewing close to a seam.
When approaching bulky spots, slow down. If needed, stop with the needle down, lift the presser foot, and level the fabric before continuing. On very uneven areas, a hump jumper or folded scrap behind the foot can help keep it balanced.
Best Garment Tasks to Practice First
The easiest way to get comfortable with this foot is to try it on simple, visible garment jobs.
Start with a patch pocket. You can clearly see the edge, the turning point at each corner, and the topstitching line. The open toe makes it easier to stay evenly spaced from the pocket edge.
Next, try hemming a knit T-shirt. The walking action helps prevent stretched, rippled hems, especially if you use a stretch needle and test your stitch first.
Another good practice task is topstitching along a waistband seam, yoke seam, or collar edge on stable woven fabric. These seams are easier than very curved or delicate areas, but they still show you how the foot improves visibility and feeding.
Finally, practice sewing across a seam intersection, such as a side seam hem. This teaches you how the foot behaves over bulk and how much to slow down.
Common Problems and Easy Fixes
If the stitches look uneven or the foot seems noisy, first recheck installation. The lever must sit in the correct position at the needle clamp. An incorrectly installed foot may not feed properly at all.
If fabric still shifts, do not assume the foot failed. Check whether you are pulling the fabric, sewing too fast, or using too much presser foot pressure. A gentler touch and slower speed often fix the issue.
If knits are still stretching, try a ballpoint or stretch needle, adjust stitch choice, and test on scrap. The foot helps feeding, but it cannot fully compensate for the wrong needle or stitch.
If topstitching wanders, use the open toe view better: focus on a seam guide, needle position, or marked line instead of eyeballing the edge alone.
If the foot struggles at thick intersections, handwheel the first few stitches, use a leveling tool, and lengthen the stitch slightly. For skipped stitches, replace the needle before changing multiple settings.
When Not to Use It
An open toe walking foot is not the best choice for every task. Skip it when you need a specialty foot that does a more specific job, such as an invisible zipper foot, narrow rolled hem foot, buttonhole foot, or piping foot.
It can also feel bulky for tiny precision work on very small garment pieces. And if your fabric feeds perfectly under a regular foot, changing to a walking foot may add setup time without giving much benefit.
A Simple Decision Rule for Choosing This Foot
Use an open toe walking foot when you have two goals at once: more even feeding and better visibility. If a garment seam is shifting, stretching, or getting bulky, and you also need to see your stitching clearly, it is a strong choice.
If only visibility matters, another open toe foot may be enough. If only feeding matters, a regular walking foot may do the job.
FAQ
Is an Open Toe Walking Foot the Same as a Regular Walking Foot?
Not exactly. Both help feed fabric layers evenly, but the open toe version has a cutaway front for better visibility around the needle. That makes it more useful for garment topstitching and precise visible stitching than a more closed-front walking foot.
Can I Use an Open Toe Walking Foot on Knit Garments?
Yes. It is often very helpful on knits because it reduces stretching and uneven feeding. Pair it with the right needle and stitch, and always test on scrap first, since the foot improves feeding but does not replace proper knit sewing setup.
Do I Need This Foot for All Topstitching?
No. Use it when visibility or layer control is a challenge. On stable fabric with simple topstitching, a regular presser foot or edge-stitch foot may work perfectly well. It is a problem-solving tool, not a requirement for every line of topstitching.
Why Is My Walking Foot Not Moving Properly?
The most common cause is incorrect installation, especially the lever placement near the needle clamp. Also check that the foot is screwed on securely and that nothing is obstructing its movement. Turn the handwheel manually once before sewing to confirm proper motion.
Can Beginners Use an Open Toe Walking Foot Successfully?
Yes. Beginners often benefit from it because it helps control tricky fabrics and makes the stitching area easier to see. The key is to install it carefully, sew at a moderate speed, and practice first on scraps or simple garment details.